How to Remove Rust From a Car: Methods and Remover Products
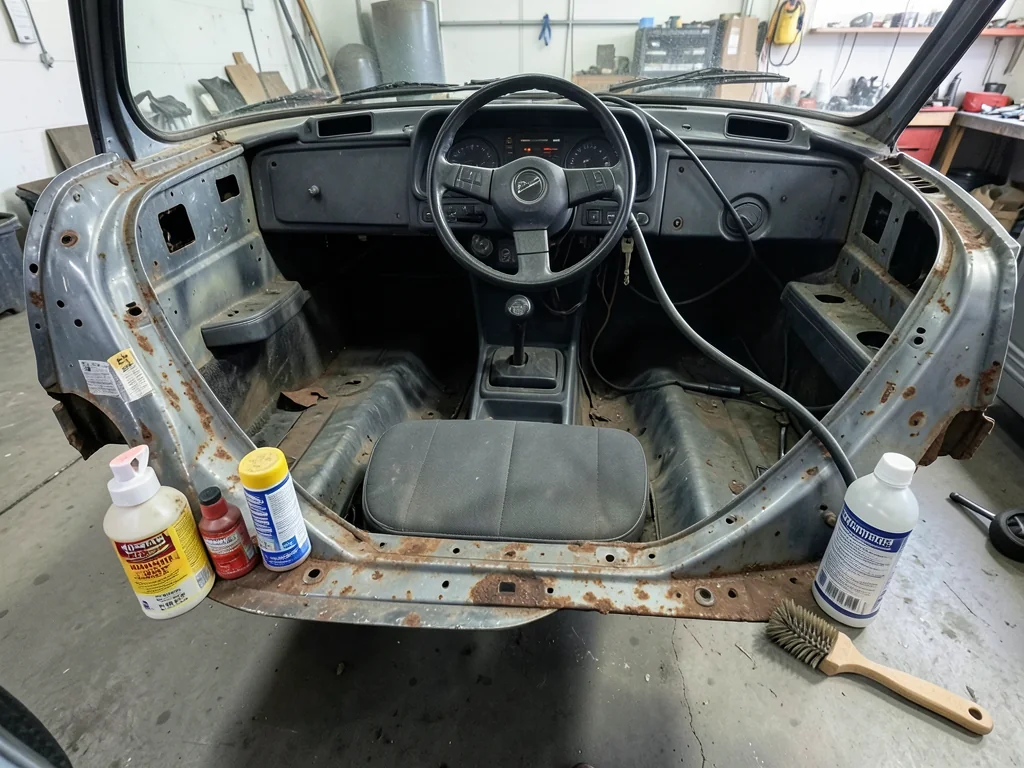
Choosing a rust remover for car panels and parts starts with understanding what the corrosion has already done. Knowing how to remove car rust means accepting that stripping it exposes clean metal but cannot replace steel that oxidation consumed. This guide explains how to assess damage, compare mechanical and chemical rust removal, read product labels, and judge whether rusty car parts are still worth saving.
Assess the Rust Before Choosing a Removal Method
Rust is oxidized steel, and the iron that became rust scale is gone from the panel or part. That is the key limit of any car rust removal effort. Scraping, sanding, or dissolving corrosion shows you what remains, but it cannot restore metal loss. A panel that looked solid under a crust of scale may turn out thinner than expected, pitted, or already perforated. Before buying a remover, treat the job as uncovering the true condition of the metal, not reversing damage that built up over months or years.
Visible clues help sort the problem. Thin, even surface corrosion is different from flaking scale, deep metal pitting, paint bubbling where rust is lifting a coating from below, and outright holes. Appearance still cannot confirm remaining strength. Orange streaks on intact paint are often deposits from another source, which is a separate cleaning issue and not corrosion of the panel itself. Rust on frame rails, mounting points, subframes, brake lines, or suspension components needs professional inspection before anyone tries removing rust there, because disturbing weakened metal can hide or worsen a safety problem.
Understand What Mechanical and Chemical Removal Do
Mechanical removal physically abrades rust away. Hand methods such as sandpaper for car rust removal, abrasive pads, and wire brushes cut through oxidized material, but they do not stop at the rust boundary. The same abrasion can thin sound metal, scratch surrounding paint, and widen the damaged area. Chemical rust removal works differently. The product reacts with rust according to its formulation, and the label defines which metals, finishes, and nearby materials it tolerates and how long it may stay in contact. Neither approach is better in every case.
Location and access shape the choice. A small exposed spot on a flat, reachable surface is very different from rust inside a seam, behind trim, or next to rubber and wiring. Rust depth and the underlying material matter too, since aluminum, plated hardware, and coated steel may react differently than bare steel. A sensible sequence is to inspect the area, confirm that the material and product are suited to each other, follow the labeled handling requirements, and reassess the exposed surface. Power-tool grinding, abrasive blasting, and aggressive chemical baths are best left to professionals with proper equipment.
Check Small Rust Spots and Surface Corrosion
When you set out to remove rust spots on a car, remember that the size of a spot says little about the real repair scope. A pinhead blister can be the visible edge of corrosion spreading under the coating or starting inside a seam, a door edge, or a wheel-arch lip. Surface rust removal on accessible bare metal, such as a stone chip where steel is exposed, is often the most manageable case. Even so, an orange or brown mark is not confirmed surface-only rust until you have checked the area around it for lifting paint or soft metal.
Removing rust spots on a car often reveals more than you expected. Once the loose oxide is gone, pits may remain, stubborn scale may cling in the low points, or a small hole may appear where the metal had already rusted through. Each of these is a reason to stop and reassess, not to push harder. Set a clear stopping point: coating damage keeps spreading as you work, the metal flexes or feels weak, or the corrosion runs into a seam or enclosed section you cannot reach. At that stage, car rust spot removal has become a body repair question.
Read Rust Remover Labels for Material and Use Limits
A car rust remover label carries the information that matters most. Check the stated substrate, whether the product is meant for automotive use, which nearby materials it may harm, and what removal or rinse procedure it requires afterward. Rust removers, rust converters, and penetrating lubricants also do different jobs. A remover is meant to take corrosion off, a converter chemically changes rust into a different compound that stays on the surface, and a penetrant loosens seized fasteners. A rust-related name on the can does not prove the product removes rust.
Gels are a product format designed to cling, and the label sets the application thickness and gel dwell time. Clinging can help on some angled surfaces, but it does not guarantee the product will stay in place on every vertical panel or work on every type of corrosion. The same caution applies to a rust remover pen for car touch-ups. A pen may contain a remover, a converter, or a coating, so check its actual contents and intended use before it goes near a chip or scratch.
Use Rust Remover Sprays Within Their Stated Limits
Car rust remover spray is a delivery method, not a description of chemistry. Two products can share the same aerosol format while acting very differently, supporting different materials, and handling different levels of corrosion. When choosing a rust removal spray for car use, read past the front label to the stated materials and limits. Overspray is a real concern, because mist can drift onto paint, rubber seals, plastic trim, electrical connectors, and brake friction surfaces. Masking and careful aim should follow the label's restrictions on anything the product must not touch.
Follow the labeled ventilation, protective equipment, contact time, and cleanup directions every time. Never mix rust removal products with each other or with other chemicals. Do not leave a product on longer than directed in the hope of stronger results, since extra exposure can damage surrounding finishes or the metal itself. Sprays also have practical limits. Runoff carries product away from vertical areas, corrosion inside seams stays out of reach, and heavy scale may resist treatment. Spraying again and again until the surface looks clean does not prove the part underneath is sound.
Evaluate Rusty Car Parts and the Result of Removal
Rusty car parts vary too much for blanket advice. Part function, base material, plating, seals, bearings, and whether the item is an assembly all affect whether a rust remover for car parts is appropriate. A bare steel bracket and a caliper with rubber seals are very different candidates. Use immersion products only on parts the label explicitly identifies as suitable for soaking. When rust removal on car parts requires disassembly, or when the component affects braking, steering, or suspension, get professional guidance first.
After removal, judge the part honestly. Remaining pits, damaged threads, altered mating or sealing surfaces, and uncertain metal thickness can all mean the part needs professional inspection or replacement. A cleaner appearance does not prove a part is serviceable, especially a load-bearing or safety-critical component. The same logic applies to body panels. Getting the rust off a panel exposes bare metal, but it does not finish the repair. Rust removal is one stage of restoring a vehicle, and the steps that follow it need their own careful attention.