How to Remove an Inner Tie Rod Without a Specialty Tool
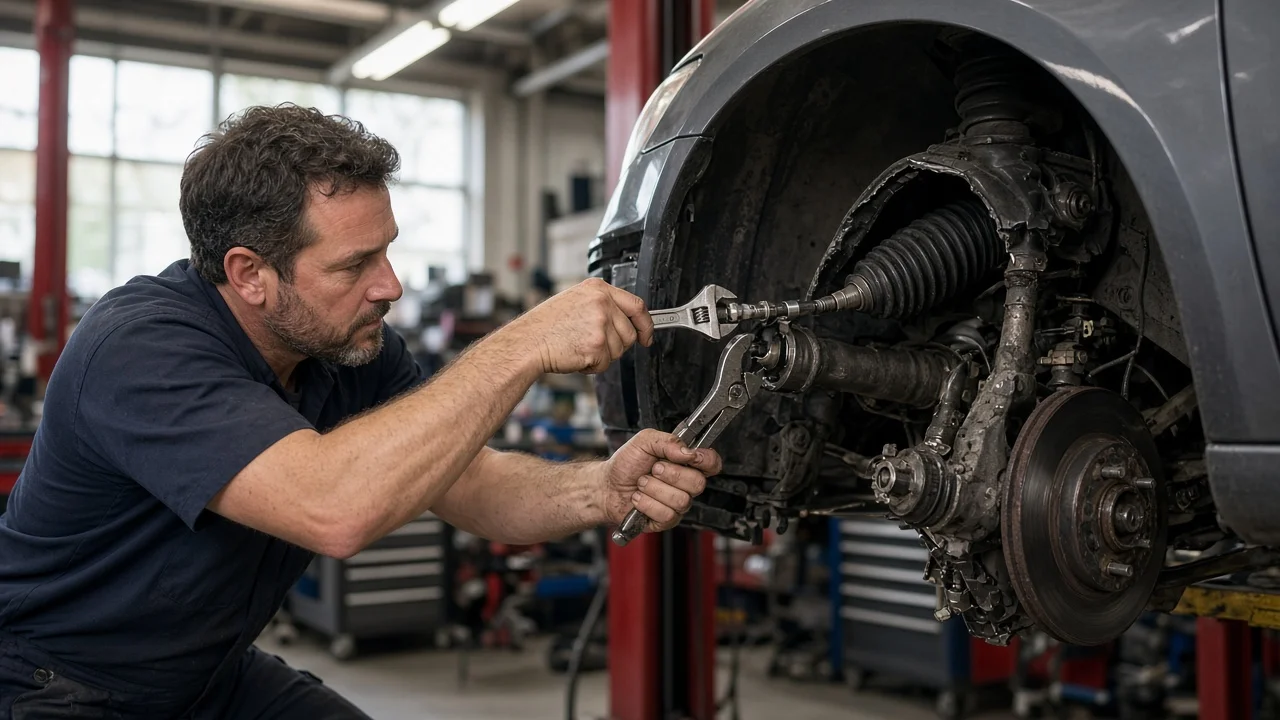
Inner tie rods thread onto the ends of the steering rack and sit under a rubber boot, so many guides assume you own a dedicated inner tie rod socket. You can often do the job without one, using common wrenches and careful technique, if your rack design allows it and the vehicle is properly supported. This guide explains how to judge your setup, which ordinary tools can substitute for the specialty tool, and what the repair still requires afterward.
Define the job before you pick up a wrench
Start by confirming that the inner joint is actually the problem. Typical reasons for replacement are joint play you can feel through the boot, a torn boot that has let in dirt and water, or steering that feels loose or wanders. With the front of the vehicle raised and supported, grip the inner joint through the boot while a helper rocks the wheel side to side. Movement at the inner joint, rather than at the outer tie rod end or wheel bearing, points to the inner tie rod. Also check the boot for fluid on hydraulic racks, because a wet boot usually means a leaking rack seal that a new tie rod will not cure.
Safe vehicle support comes before any loosening. Park on level, solid ground, set the parking brake and chock the wheels that stay on the ground. Lift only at the jacking points listed in the owner's manual or service information, and lower the vehicle onto jack stands placed at the designated support or mounting points. Never work under a vehicle held only by a jack. Once the wheel is off, loosen the jam nut on the outer tie rod, separate the outer end from the steering knuckle, and count the turns as you unscrew it or measure its position so the new assembly can be set close to the original length.
Check how your rack and tie rod are built
The wrench method applies to end-take-off racks, where each inner tie rod screws directly onto the end of the rack shaft. Some vehicles use a center-take-off rack, with the tie rods bolted to the middle of the rack; that design needs its own model-specific procedure. Next, identify how the inner joint is locked. Depending on the manufacturer, it may be staked into a groove, secured by a lock washer with tabs bent over flats, held by a roll pin, or retained with a set screw. Every lock must be released before you try to turn the joint, or you risk damaging the rack threads.
Look at the joint housing itself. Many inner tie rods have machined flats that accept an open-end or adjustable wrench, while others have a round housing with no flats at all. Check the clearance around the boot area as well, because subframes, exhaust parts and steering components can limit wrench swing. Finally, compare the replacement part with the old one before installation: thread size and pitch, overall length, boot fit and any included lock hardware should match. Take the fastener specification for the inner joint and jam nut from the service information for your exact vehicle rather than from a generic chart.
Tool features that matter for this job
An open-end or combination wrench that fits the flats is the most controlled option because it grips flat surfaces without slipping. A large adjustable wrench can work too, but set the jaws snug and keep the fixed jaw on the side that takes the load, since an adjustable wrench that slips can round the flats or skin your knuckles. A pipe wrench is the usual fallback when the housing is round or the flats are worn. It bites into the metal, which is acceptable on the old joint you are discarding, but it should never be clamped on the rack shaft, whose polished surface passes through the rack seals.
A crowfoot wrench on a breaker bar or long ratchet helps in tight spaces and also lets you use a torque wrench during installation. Keep in mind that a crowfoot changes the effective length of the torque wrench unless it is positioned at a right angle to the handle, so follow the torque wrench and service guidance on how to use it correctly. Whatever tool you choose, apply steady force instead of hammering or using an impact tool. Shock loads travel into the rack teeth and pinion, and twisting the joint can rotate the rack itself; counter-hold at a holding point on the rack if your design provides one, and keep the steering centered.
Before turning anything, cut or release the boot clamps and slide the boot toward the outer end so you can see the joint and its lock. Inspect the rack shaft for corrosion or damage and wipe the area clean, which also makes it easier to judge whether the new joint has seated fully against the rack shoulder during installation.
Limitations and the costs you still pay
Skipping the specialty tool saves money, but the repair still has fixed costs. Any tie rod replacement changes toe, so a professional wheel alignment is required afterward. Counting turns or measuring the outer end only gets you close enough to drive carefully to the alignment shop; it is not a substitute for an alignment. Alignment should be done with the vehicle at its normal ride height and with the suspension under load, not with the wheels hanging, so do not attempt to set toe on jack stands. Do not guess any alignment setting; the shop works from the specifications for your vehicle.
Plan for consumables as well. A new boot and clamps are commonly needed, and many lock washers or staked collars are designed for single use. Some manufacturers specify thread locker on the inner joint threads, so check the service information. Ear-type clamps need crimping pliers or a similar tool to close properly. Ordinary wrenches also have limits: a pipe wrench or adjustable wrench cannot tighten the joint to a measured value, so final tightening needs a torque wrench and a suitable adapter. Avoid using heat to free a stuck joint, because the rack seals, boot and nearby fluids can be damaged or ignite.
Build a practical tool and parts shortlist
Use this checklist before you start. Confirm the rack type and inner joint lock style for your vehicle. Have a jack and jack stands rated for the vehicle, plus wheel chocks. Choose a wrench that fits the flats, or a large adjustable wrench, with a pipe wrench as a backup for a round housing. Have a way to separate the outer tie rod from the knuckle, a tape measure or paint marker for recording its position, and something to release and crimp boot clamps. Order the correct inner tie rod, boot, clamps and any lock hardware, and have a torque wrench with a crowfoot that fits. Book the wheel alignment before the car is back on the road.
Know when to stop. If the flats are inaccessible, the joint will not break loose with steady force, the rack turns instead of the joint, or the boot is full of fluid, the ordinary-wrench approach is no longer the right method. At that point, borrowing or renting the dedicated inner tie rod tool, or handing the job to a shop, protects the rack from damage that would cost far more than the tool.