How to Remove Crayon Marks From Car Interior Trim
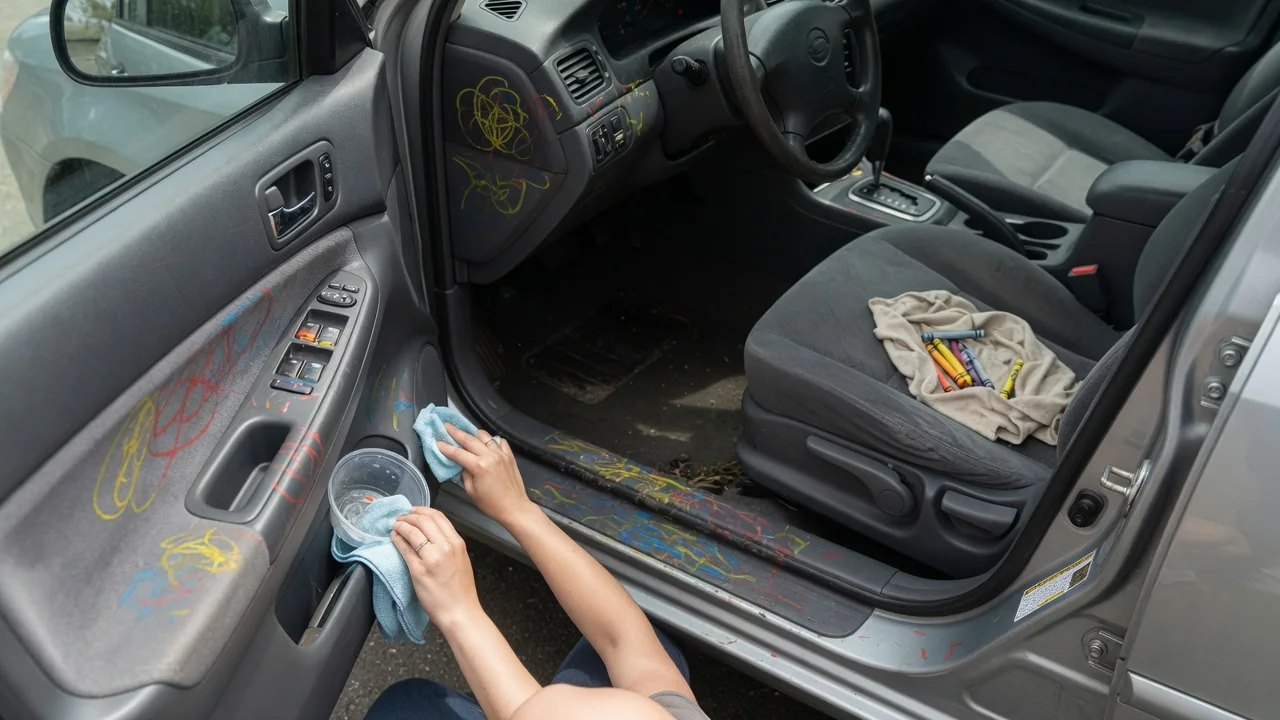
Crayon left on a door panel or seat back looks alarming, but it is mostly pigment suspended in wax, and wax responds to patience more than force. Learning how to remove crayon marks from car interior trim comes down to identifying the surface, loosening the wax gently, and cleaning away the residue without dulling, bleaching, or scratching the material underneath.
Test hidden spot
Interior trim is rarely one material. A single door card can combine hard molded plastic, a soft-touch coated armrest, vinyl, fabric inserts, and a glossy or painted accent strip, and each reacts differently to cleaners. Before touching the visible mark, apply your chosen cleaner to a spot nobody sees, such as the lower edge of a door panel near the sill, the underside of an armrest, or the side of the center console that sits against the seat. Let it sit briefly, wipe it away, and allow the area to dry.
Look at the test patch in good daylight and from an angle. Warning signs include a shiny spot on matte plastic, a dull haze on gloss trim, color on the cloth, a tacky feel, or a lighter patch once dry. Soft-touch coatings and older vinyl are the most likely to react, and worn or sun-aged surfaces can behave differently from the same material elsewhere in the cabin. Because finishes vary by manufacturer and model year, the owner's manual care section is worth checking for products the maker advises against.
Lift wax
Start by taking off as much solid wax as possible while it is still sitting on the surface. A plastic card edge, a nylon trim tool, or a fingernail wrapped in a microfiber cloth can shave away thick deposits without cutting into the panel. Work with light pressure and follow the direction of the grain on textured plastic, since pushing across it tends to pack wax deeper into the pattern. Metal blades and abrasive pads should stay out of the cabin, because they leave permanent scratches that are far more visible than the crayon.
Temperature changes how the wax behaves. In a cool cabin, crayon is brittle and flakes off cleanly, which suits hard plastics. Wax that has softened and smeared in a hot car is better blotted than scraped. On fabric inserts, gentle warmth from a hair dryer on a low setting, held well back, can soften wax so a clean white cloth pressed against it absorbs the residue. Keep heat modest and moving, since vinyl, adhesives behind trim panels, and thin plastics can distort or lift when overheated, and avoid heating near airbag covers.
Finish cleaning
Once the bulk is gone, a faint colored shadow usually remains. A dedicated interior cleaner or a small amount of mild soap in warm water, applied to a microfiber cloth rather than sprayed directly on the panel, handles most of it. Wipe in short passes and turn the cloth often so lifted pigment is not rubbed back in. A soft detailing brush or soft toothbrush helps on grained plastic where color sits in the low points of the texture, using small circular strokes and very little liquid.
Follow with a cloth dampened with plain water to remove cleaner residue, then dry the area completely. Residue left behind attracts dust and can leave the cleaned patch looking different from the surrounding trim. Leather and vinyl may benefit from a suitable conditioner or protectant afterward, applied sparingly so the sheen matches the rest of the panel. Keep liquid away from window switches, speaker grilles, seat controls, and seams, where moisture can wick into electronics or foam and cause problems unrelated to the original mark.
Everyday Use and Observations
Where the marks appear says a lot about how to handle them. Rear door panels, front seat backs, and the plastic around cup holders and child seat positions take most of the damage, and these are typically durable hard plastics that tolerate careful cleaning well. Marks near the rear window or on a parcel shelf often look worse because sun exposure melts the wax into the surface. A crayon left in a seat pocket or cup holder on a hot day can pool into a waxy puddle that needs repeated blotting rather than a single pass.
After cleaning, check the result once the surface is fully dry and again in different light, since damp trim hides leftover color. Darker crayon shades, especially reds and blues, tend to leave more persistent tinting on light gray or beige interiors than on black trim. Fabric and perforated surfaces may show a faint outline that fades with a second gentle round rather than harder scrubbing. Keeping crayons in a closed container and out of direct sun reduces repeat incidents more effectively than any cleaning method.
Limits and Next Steps
Some marks will not come out completely, and recognizing that point protects the trim. Pigment can migrate into porous or uncoated materials, perforated leather, headliner fabric, and light-colored soft-touch coatings, leaving a stain rather than a surface deposit. Stronger solvents, melamine sponges, and aggressive scrubbing may take the color out but can also strip coatings, flatten texture, or leave a permanent shiny patch. If the finish starts changing under your cloth, stop, because a faint tint is usually less noticeable than a damaged panel.
For stubborn stains, a professional detailer has material-specific cleaners, steam equipment, and the experience to judge what a given surface will tolerate. That is the sensible route for headliners, which can sag if the backing adhesive gets wet or warm, and for leather with color transfer in the grain. Where a panel is permanently stained or its coating is damaged, refinishing or replacing the individual trim piece may be an option, though availability and effort depend on the vehicle. Describing the material and what has already been tried helps the detailer choose a safe approach.