How to Remove Control Arm Bushings Without Damaging the Arm
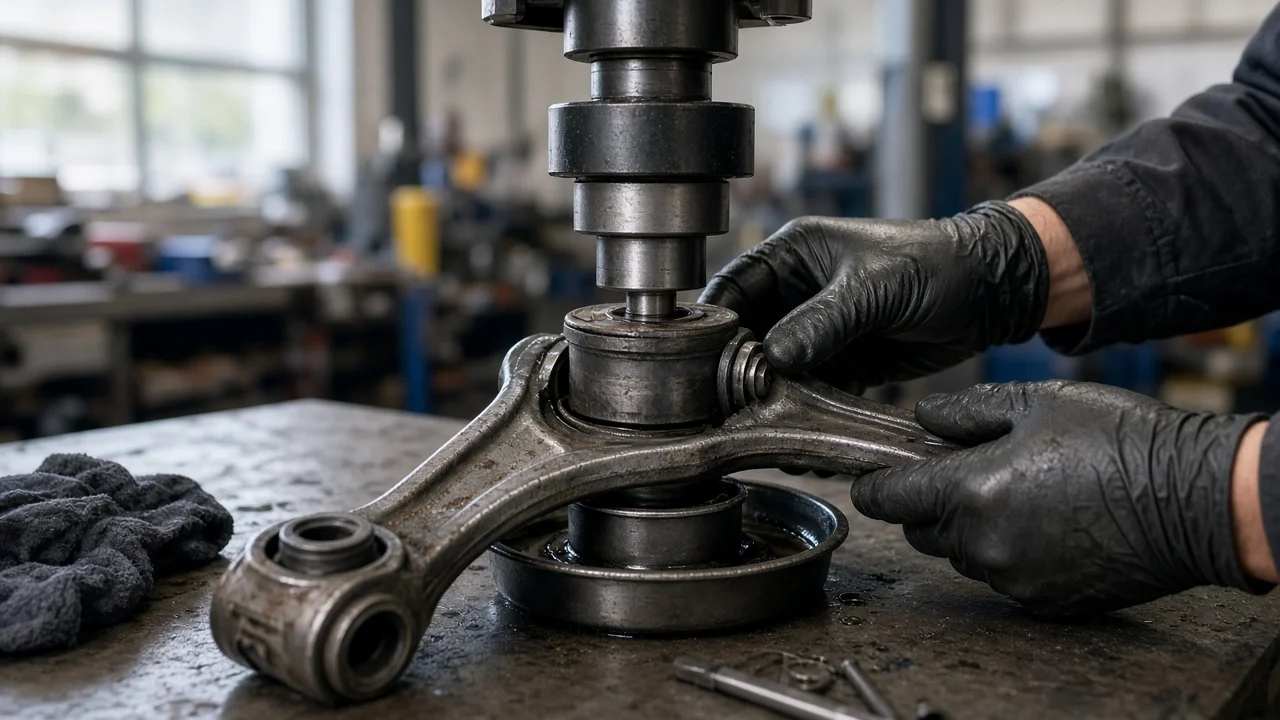
Worn control arm bushings let the suspension shift under braking and cornering. That shows up as clunks, vague steering and uneven tire wear. Removing them is mostly a pressing job, but the details depend on how your vehicle's arms are built. This guide covers confirming the diagnosis, setting up safe access, getting the old bushings out without damaging the arm, installing the new ones correctly and checking the finished work.
Confirm the part and repair scope
Before removing anything, make sure the bushings are actually the problem. Clunks, wander and uneven tire wear can also come from ball joints, tie rod ends, sway bar links or strut mounts. With the vehicle safely supported, inspect each bushing for cracked or torn rubber, an inner sleeve sitting off center, rubber separating from the shell or fluid weeping from a hydraulic bushing. Gently lever between the arm and its mounting bracket with a pry bar while a helper watches. Movement at the bushing points to a bushing problem. Joint play at the outer end of the arm points to the ball joint instead.
Next, identify exactly which arm and which bushings you are replacing. Upper and lower arms, front and rear pivots, and left and right sides often use different bushings. Parts can also change with model year, drivetrain or trim, so match part numbers to your vehicle identification number rather than relying on make and model alone. Some arms have serviceable pressed-in bushings. Others are sold only as complete assemblies. When the ball joint is also worn or the arm is corroded, a complete arm with new bushings already installed often saves time and removes the pressing step entirely. If you choose polyurethane bushings, expect firmer ride quality and confirm they are made for your exact arm.
Prepare tools and safe access
Get the factory service procedure for your specific vehicle before starting. It tells you the removal sequence and the fastener specification for every bolt. It also tells you which fasteners are single-use and whether final tightening must be done at normal ride height. Do not guess torque values. Typical tools include a floor jack, jack stands, wheel chocks, a breaker bar, sockets and wrenches, penetrating oil and a ball joint separator. You will also need a bushing press kit or C-frame press with receiver cups that match the bushing's outer shell, or access to a shop hydraulic press. Use only the installation lubricant the bushing maker specifies, because petroleum-based products can degrade rubber.
Proper vehicle support is non-negotiable. Work on firm, level ground, chock the wheels that stay on the ground, lift only at the manufacturer's lift points and lower the vehicle onto rated jack stands. Never work under a vehicle held only by a jack. Some designs are not suitable for inexperienced owners. These include lower arms that carry a loaded coil spring, torsion bar suspensions and badly rusted subframes, because stored spring energy and seized hardware can cause serious injury. If you lack a press or proper spring tools, a practical option is to remove the arm yourself and have a machine shop press the bushings. Otherwise, leave the job to a suspension shop.
Remove without avoidable damage
Most pressed-in bushings are replaced with the arm off the vehicle. Remove the wheel, then unclip any ABS sensor wiring or brake line brackets attached to the arm. Disconnect the sway bar link if it mounts there. Separate the ball joint with a proper separator, and support the steering knuckle so the brake hose and axle are not hanging under strain. Then remove the pivot bolts at the arm's mounting points. If a pivot uses an eccentric cam bolt, mark its position first so you can reinstall it close to where it was. Bolts seized inside the bushing sleeve sometimes have to be cut. Check the service information first so you do not damage the bracket or subframe.
Before pressing, photograph the bushing and mark its orientation relative to the arm. Many bushings have voids, arrows or offset sleeves that must face a specific direction. Set up the press so the receiver cup sits squarely on the arm around the bore and the driver pushes only on the bushing's outer shell, not the rubber or inner sleeve. Press slowly and straight. Flanged bushings generally must be pressed out away from the flange side, and some designs come out in only one direction. Some rear and subframe bushings can be removed with dedicated on-car drawbolt tools; use the tool designed for your application.
Avoid burning out the rubber. It produces toxic smoke, creates a fire risk near fuel and brake lines, and the heat can weaken the arm, especially an aluminum one. If a shell is seized, a careful method is to cut slots in the shell with a hacksaw blade. Stop before reaching the arm, then collapse the shell inward. Once the bushing is out, clean the bore and inspect it for scoring, corrosion or an out-of-round shape. A damaged bore will not hold a new bushing securely, so replace the arm instead.
Install and restore the system
Compare the new bushing with your photos and marks, and align its voids, arrows or offset sleeve exactly as the original sat or as the instructions direct. A bushing installed in the wrong orientation can change handling and wear out quickly. Apply the specified lubricant, then press the new bushing in using cups that bear only on the outer shell. Polyurethane bushings usually come with their own grease. Press until it reaches the depth or flush position given in the instructions, keeping it square so the shell does not cock in the bore.
Reinstall the arm and start all bolts, but leave the pivot bolts snug rather than fully tightened. Rubber bushings should be torqued with the suspension at normal ride height. Otherwise the rubber is twisted at rest and tears early. Raise the arm with a jack until the suspension sits at its loaded position, or tighten with the vehicle on ramps or the ground if your service information allows. Then tighten to the specified values. Replace single-use bolts, nuts and cotter pins. Reconnect the ball joint, sway bar link, brake line brackets and ABS wiring, and torque the wheel fasteners to specification.
Get a wheel alignment after the job. Removing control arms and bushings changes suspension geometry, especially where eccentric bolts set camber or caster, and your marks only get you close. Some vehicles also need a steering angle sensor reset or driver-assistance camera and radar calibration after an alignment. Follow the manufacturer's requirements for your model.
Check the completed work
Before driving, confirm every fastener has been tightened to specification and every cotter pin and clip is in place. Turn the steering lock to lock and check that the brake hoses and ABS wiring have slack and do not rub. With the vehicle on the ground, bounce each corner and listen for knocks. Take a slow test drive over speed bumps and rough pavement. Brake firmly in a safe area, and check that the steering wheel is centered and the vehicle tracks straight.
Some signs call for further diagnosis. A clunk that remains often means another worn part such as a sway bar link, ball joint or strut mount. A pull or off-center steering wheel usually means the alignment still needs correcting. Squeaks from polyurethane bushings typically point to missing lubrication. A bushing that walks out of its bore suggests the wrong part or a damaged bore. Check tire wear over the following weeks too. Uneven wear despite a fresh alignment means something in the suspension is still out of place. If your service information calls for rechecking fasteners after initial driving, do that as well.