How to Load a Roof Cargo Box
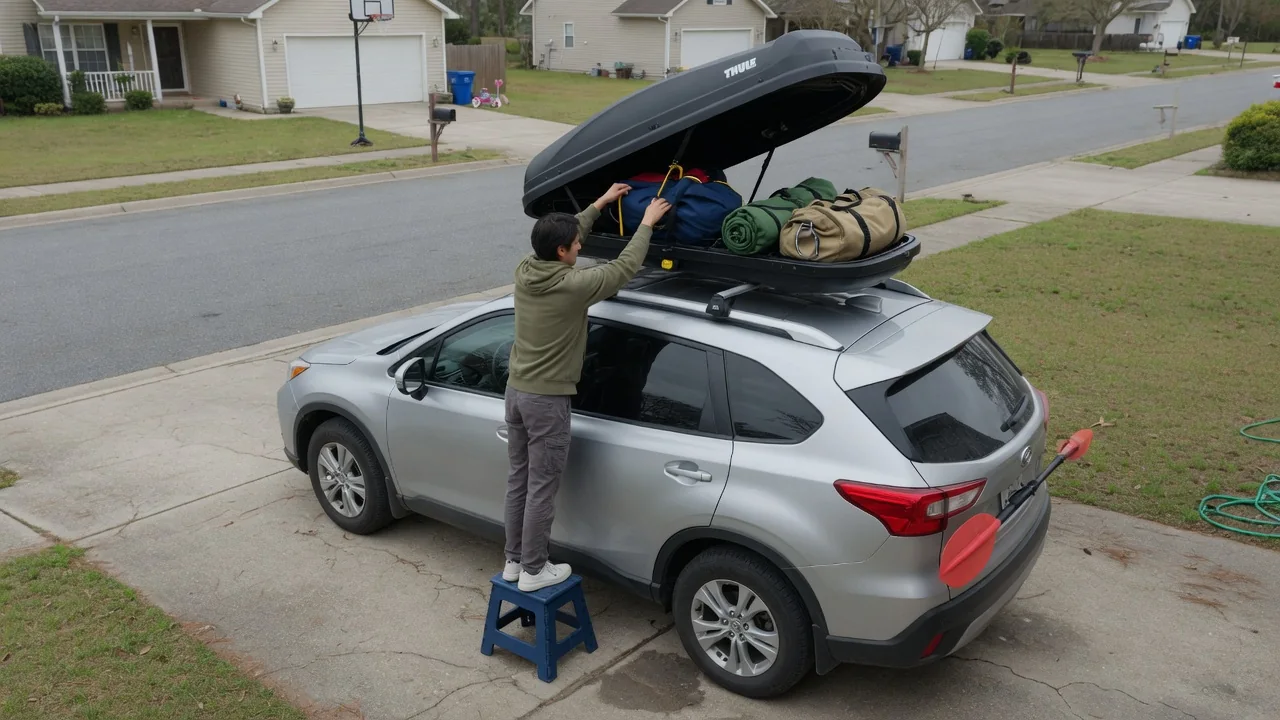
Knowing how to load a roof cargo box properly matters as much as choosing the box itself. Weight carried high on the vehicle changes how it steers, brakes and handles crosswinds, and a poorly packed box can damage both luggage and hardware. The approach below focuses on balance, protection, closure and the limits your vehicle sets.
Balance the load
Start by treating the box as a place for bulky, lightweight items rather than dense ones. Sleeping bags, tents, folding chairs, jackets and beach gear suit the roof well, while tool kits, coolers full of drinks and cases of water belong low in the trunk or cargo area. Mass placed above the roofline raises the vehicle's center of gravity, which increases body roll in corners and makes sudden lane changes feel less settled. Keeping heavy objects down near the cabin floor reduces that effect noticeably.
Within the box, place the heaviest of the items you do carry in the middle, roughly between the crossbars, so the load rests over the rack's mounting points rather than hanging off either end. Lighter, softer pieces can fill the nose and tail. Distribute weight evenly from side to side as well, because a box that is heavier on one side can make the vehicle lean slightly and tug on one set of clamps. Crossbar spacing and box mounting position differ between vehicles, so the ideal center point varies.
Protect contents
Cargo inside a roof box moves more than most drivers expect. Braking pushes everything forward, acceleration pushes it back, and each corner slides loose objects toward the side walls. Many boxes include internal straps or tie-down points, and using them keeps the load from shifting into the nose under hard braking. Filling gaps with soft items such as blankets or clothing bags also helps, since a tightly packed layer has less room to build momentum and strike the shell or the lid hardware.
Soft duffel bags generally fit the tapered shape of a box better than rigid suitcases, and they cushion whatever sits beside them. Hard or sharp objects, such as ski edges, tent stakes or trekking pole tips, deserve a sleeve or wrap so they cannot gouge the plastic floor. Although most boxes resist rain reasonably well, seals vary by design and age, so placing electronics, documents and down-filled gear in dry bags or sealed plastic bags is a sensible precaution against moisture and road dust.
Verify closure and clearance
Before closing the lid, check that nothing sits higher than the rim or drapes over the sealing edge. A strap end, sleeve or bag handle trapped in the seam can prevent latches from fully engaging and may let water in. Lower the lid without forcing it; if it needs heavy pressure to shut, the box is overfilled and the hinges or locks are carrying strain. On many designs the key can only be removed once every latch point is engaged, but that feature is not universal, so press along the lid edge to confirm.
Clearance deserves the same attention as closure. With the box loaded, open the liftgate or trunk slowly to see whether it contacts the rear of the box, and check that the nose does not interfere with a roof antenna or the windshield sightline. The vehicle is now taller than usual, which matters at parking garages, drive-through lanes, home garage doors and low branches. Measuring the new overall height and keeping a note of it on the dashboard is a simple habit that prevents an expensive mistake.
Everyday Use and Observations
A loaded box changes how the vehicle feels in ordinary driving. Expect more wind noise at highway speed, greater sensitivity to crosswinds and passing trucks, somewhat longer stopping distances and a little more lean in curves. Fuel consumption, or driving range in an electric vehicle, typically worsens because of added aerodynamic drag, and the effect grows with speed. Smooth steering inputs, earlier braking and moderate cruising speeds suit the added height; some box and rack makers also publish a recommended maximum speed worth following.
Observation during the trip tells you a lot. After the first few miles, and again at fuel or charging stops, check that the mounting clamps remain tight on the crossbars, that the box has not crept forward or backward, and that the lid is still latched all around. A new whistle, rattle or thump from above usually means something has shifted or loosened and is worth investigating before continuing. Lifting bags to roof height is easier and safer from a stable step stool than from a door sill or tire.
Limits and Next Steps
Every roof-mounted setup is governed by several separate limits: the vehicle's roof load rating, the crossbar or rack rating, and the capacity of the box itself. The lowest of those figures controls, and the weight of the rack and the empty box counts against it. These numbers differ widely between models and are found in the owner's manual and the rack and box documentation, not in general guidance. Vehicles with panoramic glass roofs, or without factory mounting points, may carry particular restrictions worth confirming.
If you are unsure how much your packed gear weighs, a bathroom scale gives a workable estimate one bag at a time. Total vehicle payload, including passengers and everything in the cargo area, also applies and is usually listed on a label in the driver's door opening. When the figures are close to the limit, move items inside or leave them at home. For questions about rack fit, mounting hardware or unusual noises that persist, a dealer or rack specialist can inspect the installation. Removing the box between trips restores normal efficiency and garage clearance.