How to Label Car Fasteners During a Small Repair
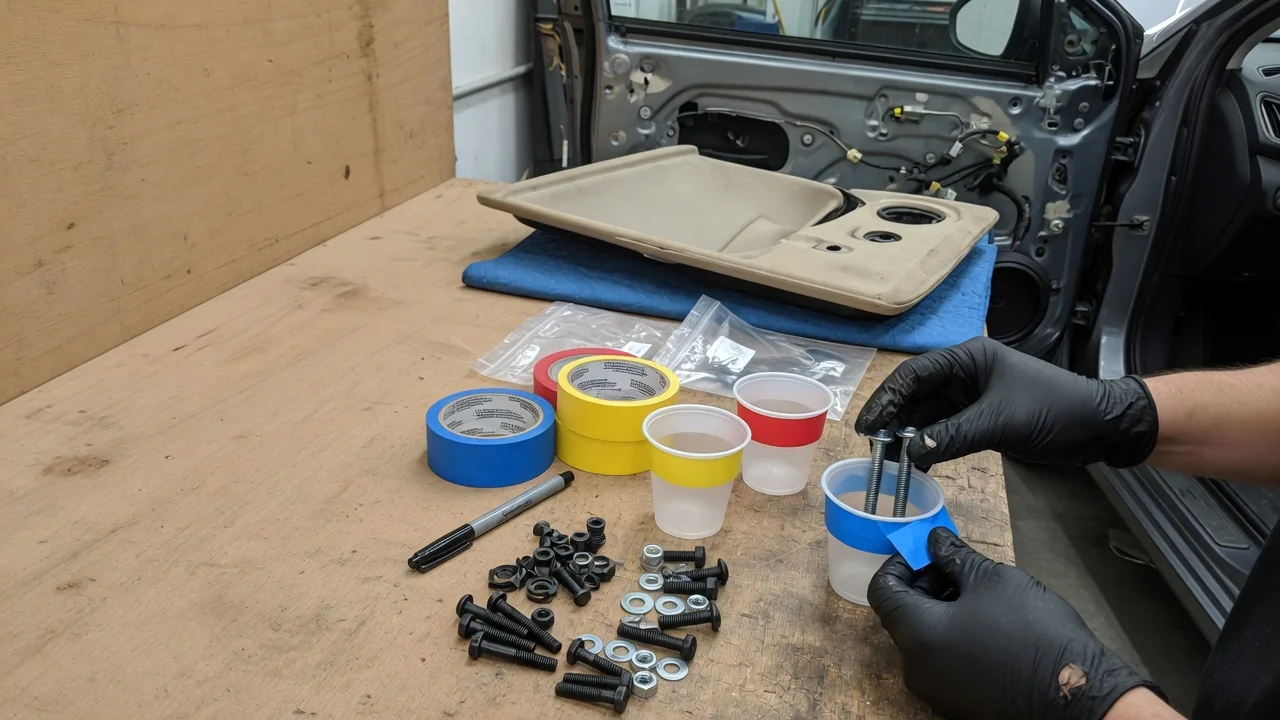
A small repair, such as replacing a sensor, removing a splash shield, or swapping a brake caliper, can still leave you with a handful of bolts, clips, and screws that look nearly identical. Labeling them as they come out is the simplest way to avoid stripped threads, missing hardware, and parts that rattle loose later. This guide explains how to label car fasteners by location, how to record removal order, and how to use those labels for a clean reassembly.
Location: Tie Each Fastener to Its Exact Spot
The most useful label answers one question: where did this fastener come from? Bolts that look identical at a glance often differ in length, thread pitch, head size, or whether they carry a shoulder or captive washer. Put a bolt that is too long into the wrong hole and it can bottom out before the part is clamped, or reach through and contact wiring, a fluid line, or a component behind the panel. A bolt that is too short may engage too few threads to hold reliably. Labeling by location, rather than by appearance, removes the guesswork.
Several simple methods work well in a home garage. One is a cardboard template: trace or sketch the part on a piece of cardboard, poke a hole at each fastener position, and push every bolt through its matching spot as it comes out. Another is small resealable bags marked with a permanent marker or masking tape, with a plain description such as 'driver side caliper bracket, upper bolt.' A phone photo taken before anything is loosened shows where each fastener sits, but a photo cannot show a bolt's length once it is out, so pair pictures with physical bagging rather than relying on them alone.
Record the small parts that travel with each fastener. Washers, spacers, grommets, ground straps, and small brackets held under a bolt head are easy to lose or misplace, and leaving one out can change how a part seats or whether an electrical ground makes contact. Describe sides using the vehicle's own orientation, such as driver side and passenger side or front and rear, because 'left' changes depending on whether you are standing in front of the car or sitting in it.
Order: Record the Sequence of Removal
Location tells you where a fastener goes; order tells you when. On many assemblies, brackets overlap, one bolt also holds a wiring clip or hose bracket, or a cover has to come off before you can reach the part beneath it. Writing down the removal sequence gives you a ready-made reassembly plan, because in most small jobs you simply work through the list in reverse. A practical habit is to number each step as you go and write the same number on the bag or tape that holds that step's hardware.
Keep one group of fasteners per step or per component, and avoid combining hardware from different steps in one magnetic tray or cup, where it quickly becomes a mixed pile. A short written list on paper or in a phone note, with entries like '3: remove two bolts, heat shield, bag 3,' is enough. Photos taken before each step also capture sequence, since they are stored in the order you took them. This matters most when a repair pauses overnight or waits on a part, because memory of the order fades faster than people expect.
Removal order and tightening order are not always the same thing. Some parts held by several bolts, such as covers, flanges, and certain brackets, are meant to be tightened in a specific pattern or in stages so they seat evenly. If you notice a part like that, add a note to its label so you remember to check the vehicle's service information for the correct sequence before reinstalling it.
Reassembly: Use the Labels to Put It Back Correctly
Work backward through your numbered steps and open only one bag at a time, so hardware from the next step cannot drift into the current one. Before installing each fastener, match it to its labeled location and confirm that any washers or spacers recorded with it are in place. Start bolts and screws by hand for the first few turns. A fastener that threads smoothly by hand is usually aligned; one that binds early may be cross-threaded or may be the wrong bolt, and forcing it with a ratchet risks damaging the threads in the part.
When a component is held by several fasteners, it often helps to start all of them by hand before snugging any, which leaves room to align the part. Final tightening should follow the torque values and any sequence given in the service information for the specific vehicle, not guesswork. Also note any fastener the service information marks as single-use. Some designs use torque-to-yield bolts, self-locking nuts, or plastic clips that deform on removal, and these are generally meant to be replaced rather than reused.
Finish by checking that every labeled bag is empty and every template hole is clear. A leftover fastener is a sign that something was missed, and the label tells you exactly where to look. Keep your photos and notes until the vehicle has been driven and rechecked, in case a rattle, leak, or warning light points back to the area you worked on.
Practical Implications and Limits
The effort should scale with the job. Removing two identical bolts from a single part may need nothing more than one marked cup, while a job with several layers of brackets and covers justifies bags, numbers, and photos. Labeling usually takes only a few minutes, which is far less than the time spent searching for a dropped clip or repairing a stripped hole. Choose materials that survive a garage environment: masking tape can lose its grip on oily surfaces, and some markers smear when they meet fluids, so writing on clean bags or cards and keeping them away from drips makes labels last.
Labels have limits. They record what came out of the car, not what should have been there. If a previous repair used the wrong bolt or left out a washer, careful labeling will faithfully reproduce that mistake. Hardware with damaged threads, heavy corrosion, a rounded head, or visible stretching should be replaced with the correct part for the vehicle instead of being reinstalled because it is labeled. Labels also cannot tell you torque values, whether thread-locking compound is required, or whether a fastener is single-use; that information comes from vehicle-specific service documentation. When you label car repair bolts, treat the system as a memory aid that supports the manual rather than a substitute for it.