How to Inspect a Used Car Seat for Wear: Track, Upholstery and Wiring
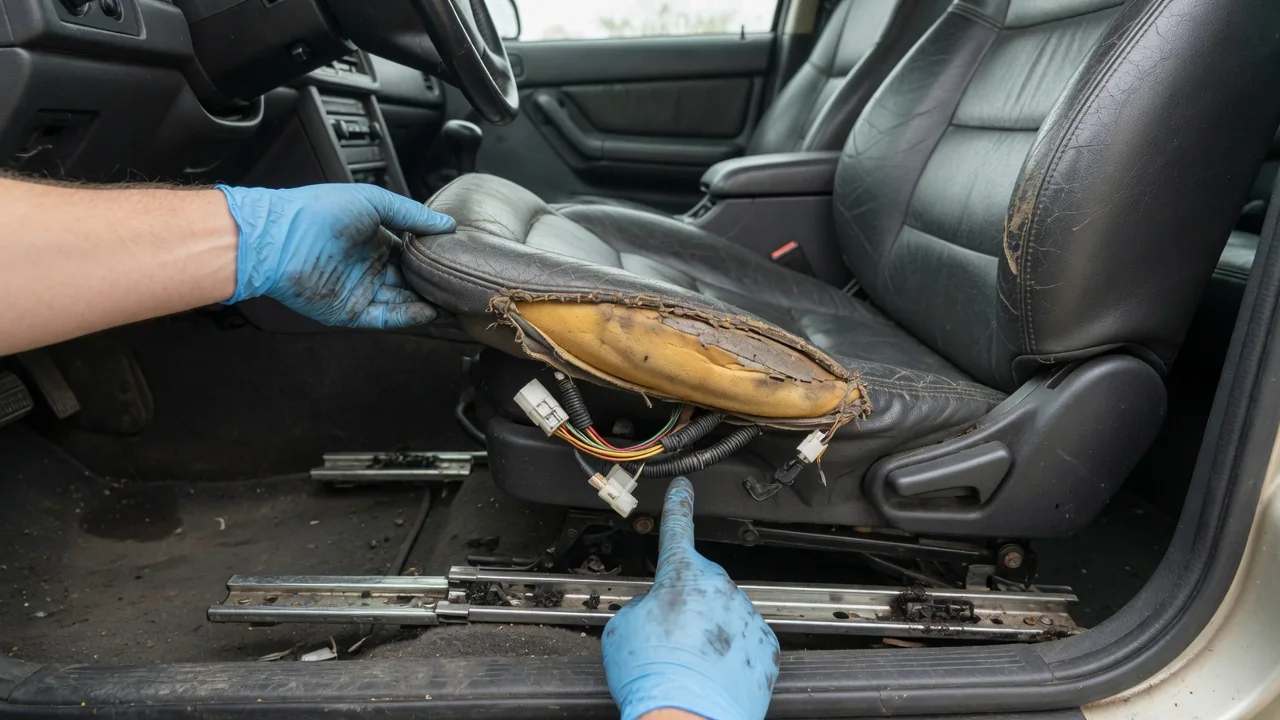
A seat takes more daily use than almost any other part of a car's interior, and its condition often reflects how the vehicle was treated. Knowing how to inspect a used car seat for wear helps you find problems that affect comfort, adjustment and safety, not just appearance. A thorough check covers three areas: the mechanical track and recline hardware, the upholstery and padding, and the wiring that supplies power, heating and safety-related components.
Track and recline
Start with the seat track, the pair of rails that lets the seat slide forward and back. On a manual seat, lift the release bar and move the seat through its full range several times. It should glide without grinding, sticking or sudden catches, and it should lock firmly when you release the bar. Once it is locked, grip the seat and push and pull it hard. Noticeable fore-and-aft movement or a clunk suggests worn latch teeth, a weak return spring or a latch that is not fully engaging. Use a flashlight to look along the rails for rust, bent sections, missing trim and debris such as coins or pens that can jam the mechanism.
Next, test the recline function. Whether the backrest uses a lever, a rotary knob or a power switch, move it through its whole range and confirm that it holds at each position. With the backrest upright, rock it firmly side to side and front to back. Looseness at the hinge points can indicate wear in the recliner mechanism or loose fasteners. On power seats, listen to the motors in every direction, including height, tilt and lumbar adjustment if fitted. A motor that runs slowly, stalls, clicks without moving or works in only one direction points to a failing motor, a stripped drive cable or gear, or an electrical issue covered later in this guide.
Finally, check how the seat is attached to the floor. The mounting bolts at the ends of the tracks should be present, tight and free of heavy corrosion. Fresh tool marks, disturbed trim or mismatched hardware may mean the seat has been removed at some point. That is not a problem in itself, since seats come out for carpet cleaning or other repairs, but it is worth asking why and making sure everything was refitted securely.
Upholstery
Upholstery wear usually concentrates where the body contacts the seat most often. On the driver's seat, the outer bolster of the cushion takes the brunt of every entry and exit, so inspect it closely. On cloth seats, look for thinning fabric, pilling, frayed edges, open seams, burns and stains that have spread into the foam. On leather, check for deep creases, surface cracks, color loss and a dry or stiff feel in high-contact areas. Vinyl and many synthetic leather materials tend to show wear as peeling or flaking of the top layer, which generally cannot be reversed by cleaning or conditioning alone.
The padding underneath matters as much as the cover. Press down across the cushion and backrest with your palm and then sit in the seat for a few minutes. Healthy foam returns to shape and supports you evenly. Collapsed foam feels soft or hollow in one spot, makes you sit lower on one side or lets you feel the frame or suspension wires beneath. A seat that tilts or sags noticeably may have broken springs, a detached suspension mat or a damaged frame, all of which affect long-drive comfort.
Be cautious with seat covers, especially aftermarket ones that are not tailored to the vehicle. If a seller agrees, lift or remove them to see the original material. Also pay attention to smell and texture. A musty odor, water staining or mildew spots can indicate water intrusion from a leaking door seal, sunroof drain or window. Panels that do not match in color or grain, or areas that look freshly dyed, suggest previous repairs or reupholstery, which is useful to know when you judge the seat's overall history.
Wiring
Many modern seats are electrical assemblies as well as mechanical ones. Depending on the vehicle, the wiring under a seat may serve power adjustment, heating, ventilation, memory settings, seat belt buckle sensors, occupant detection systems and side airbags built into the seat. With a flashlight, look beneath the seat and along the tracks. The harness should be clipped neatly, with connectors fully seated and locked. Warning signs include insulation rubbed through where wires cross the rails, pinched sections, loose connectors, electrical tape over splices and wires that hang down where the seat could crush them as it moves.
Then test every electrical function from the switches. A heated seat should begin to warm within a reasonable time, a ventilated seat should produce audible fan noise and airflow, and memory buttons should return the seat to a stored position. After starting the vehicle, watch the instrument cluster. An airbag or supplemental restraint warning light that stays on can relate to seat wiring, a buckle sensor or an occupant detection fault, although the light alone does not identify the cause. Avoid unplugging or probing connectors yourself, particularly those linked to airbag circuits, which are often marked with distinctive colored connectors or labels. Improper handling can set fault codes or create a safety risk.
Practical implications and limits
Not every finding carries the same weight. It helps to sort what you discover into three groups. Safety-related issues include a seat that does not lock securely, loose mounting hardware and a persistent airbag warning. Functional issues include a slow motor, an inoperative heater or a sagging cushion. Cosmetic issues include faded leather or a small stain. The first group deserves resolution before the car is driven regularly, while the last group mainly affects comfort, appearance and possibly resale value. This ranking also helps when you discuss condition with a seller, because it separates genuine defects from normal aging.
A hands-on inspection also has clear limits. You cannot see inside the seat frame, confirm the condition of internal recliner components or diagnose an electrical fault reliably by looking at it. Intermittent problems may not appear during a short test, and an airbag warning can come and go. Electrical diagnosis typically requires a scan tool capable of reading the relevant control modules, and the correct procedure varies by manufacturer. Features also differ widely between vehicles and trim levels, so the owner's manual or service information for the specific car is the reliable reference for what the seat should do and how its adjustments, memory functions and warnings are meant to behave.
If you are evaluating a used seat sold on its own, for example from a salvage source, compatibility becomes a separate question. Mounting points, harness connectors and integrated airbag components may differ even between closely related versions of the same model, and some components can require programming or specific installation procedures. When in doubt, have a qualified technician confirm fitment and inspect any safety-related parts before installation. A careful used car seat wear check narrows down what to look at, but a professional inspection remains the right step for anything involving restraints or electrical systems.