How to Identify Rust Beneath Old Car Paint
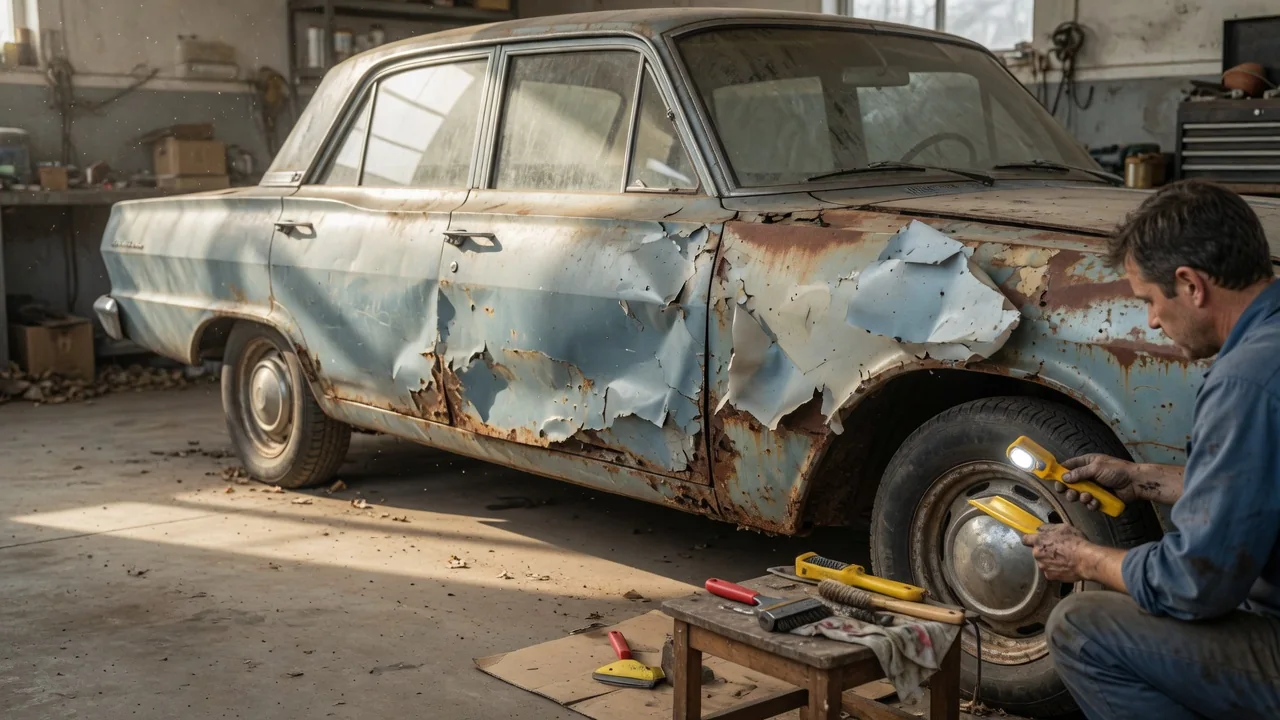
Rust rarely announces itself on a classic car until it has already spread. On an older body, corrosion often starts under the finish, where moisture reaches bare steel through chips, pinholes, or failed seam sealer and works outward unseen. Learning how to identify rust beneath old car paint means reading surface clues, checking the places where panels meet, and turning what you find into a realistic repair plan before committing money or time to new paintwork.
Bubbling: The First Visible Sign of Hidden Corrosion
Paint bubbling is usually the earliest clue that corrosion is active underneath the finish. When moisture and oxygen reach bare steel through a stone chip, scratch, or porous spot, the metal begins to oxidize. Rust takes up more volume than the steel it replaces, so it pushes the primer and paint upward from below, creating small raised blisters. Not every blister is rust, though. Trapped solvent or moisture in a poorly applied refinish can also lift paint, and from the outside the two can look similar. Treat any bubble on an older body as suspect until the metal beneath it has been seen.
Start where water lingers: lower door edges, wheel arch lips, rocker panels, the bottoms of fenders and quarter panels, the corners of the trunk lid, and the areas around windshield and rear window trim, badges, and moldings. Inspect in low, angled light, which makes raised texture easier to spot than direct overhead light, and run a flat hand slowly across the panel to feel for bumps. Watch for orange or brown staining, hairline cracking, or a rough, sandpaper-like feel. A single isolated blister and a line of bubbles along an edge mean different things; a row that follows a panel edge or trim line often indicates rust creeping in from that edge.
Pressing lightly on a blister with a fingernail or a plastic trim tool can tell you more. Rust under paint often feels crunchy or collapses into flakes and powder. Keep in mind that the visible bubble usually marks only the leading edge of the problem, because corrosion spreads beneath intact-looking paint before it lifts it. Old repairs add another complication: thick body filler can hide rusted or patched metal. A weak magnet wrapped in cloth, moved across the panel, will pull noticeably less where filler is thick, which flags areas worth a closer look, though it cannot confirm rust by itself.
Seam Inspection: Where Panels Meet
Seams are where many cases of classic car rust under paint begin, often out of sight. Overlapping panels, spot-welded flanges, and folded hems create narrow gaps where water, dirt, and road salt collect. Factory seam sealer was meant to close those gaps, but on an old car it can harden, shrink, and crack, letting moisture wick into the joint. Corrosion that starts between two layers of metal can progress for a long time before it reaches the outer surface, so a seam that looks only slightly irregular may hide significant damage.
Check drip rails and roof gutters, windshield and rear glass channels, the joints between quarter panels and rockers, door bottoms and their folded hems, inner wheel house seams, trunk gutters and floor, floor pan to rocker joints, and the cowl area below the windshield. Look for sealer that is cracked, lifting, or missing, rust stains weeping out of a joint, paint cracking in a straight line along the seam, pinholes, and swelling where two panels appear to be separating. That swelling, sometimes called rust jacking, happens when corrosion between layers forces them apart. Whenever possible, inspect each seam from both sides: from underneath, inside the trunk, under carpets and mats, and behind interior trim panels. Confirm that door and rocker drain holes are open, since blocked drains keep seams wet.
A bright flashlight, an inspection mirror, and an inspection camera help with enclosed sections such as rockers and pillars. Probe suspicious spots carefully with a plastic pick rather than a sharp screwdriver, which can punch through weakened metal. Body construction varies from vehicle to vehicle, so the factory service manual or a body repair manual for your car is the best guide to where its seams, drains, and enclosed cavities are located.
Repair Planning: From Findings to a Workable Scope
Begin by documenting everything. Photograph each suspect area, mark its location on a simple sketch of the body, and sort findings into rough categories: light surface rust, scaled or pitted metal, and perforation. The only way to confirm what lies beneath the paint is to remove it, whether by sanding, chemical stripping, or media blasting. Strip a small test area first at the worst-looking spots. Plan ahead before exposing large sections, because bare steel begins to flash rust quickly and should be cleaned and primed without long delays.
Severity determines the repair method. Light surface rust can generally be removed down to clean, bright metal and then treated and primed. Heavily pitted steel needs more aggressive cleaning and an honest judgment about whether enough sound metal remains. Perforated or badly thinned areas usually have to be cut out and replaced with patch panels or repair sections welded in place. Covering active rust with filler or fresh paint does not stop it; the corrosion continues underneath and the bubbles return. Rust on structural areas such as frame rails, rockers, floor supports, and suspension or seat belt mounting points deserves priority and, for most owners, a professional assessment.
Order the work so it lasts. Fix the source of water first, including blocked drains, failed window seals, and leaking weatherstrips, then repair the metal, reseal seams, prime, and protect enclosed cavities with a suitable corrosion inhibitor before final paint. Build flexibility into the budget and timeline, because the full extent of rust is often larger than the first inspection suggests.
Practical Implications and Limits
Any inspection done with the paint still on is an estimate, not a diagnosis. Filler, undercoating, fresh paint, and interior trim can all conceal damage, and some enclosed sections cannot be seen without disassembly. When evaluating a classic car you are considering buying, it is safer to assume that visible bubbling represents more damage than it shows and to weigh the purchase accordingly. A clean-looking body is not proof of sound metal, particularly if the car has been recently repainted without documentation of what was done underneath.
The patterns described here are general mechanisms, not predictions for a specific vehicle. Where rust appears depends on body construction, original corrosion protection, the climate the car has lived in, road salt exposure, and how it has been stored. Known weak points for a particular make and model are best learned from factory literature and experienced owner communities. If inspection reveals corrosion near load-bearing structure, steering, suspension, or brake line mounts, treat it as a safety question rather than a cosmetic one and have the car checked before driving it regularly.