How to Grease Tie Rod Ends
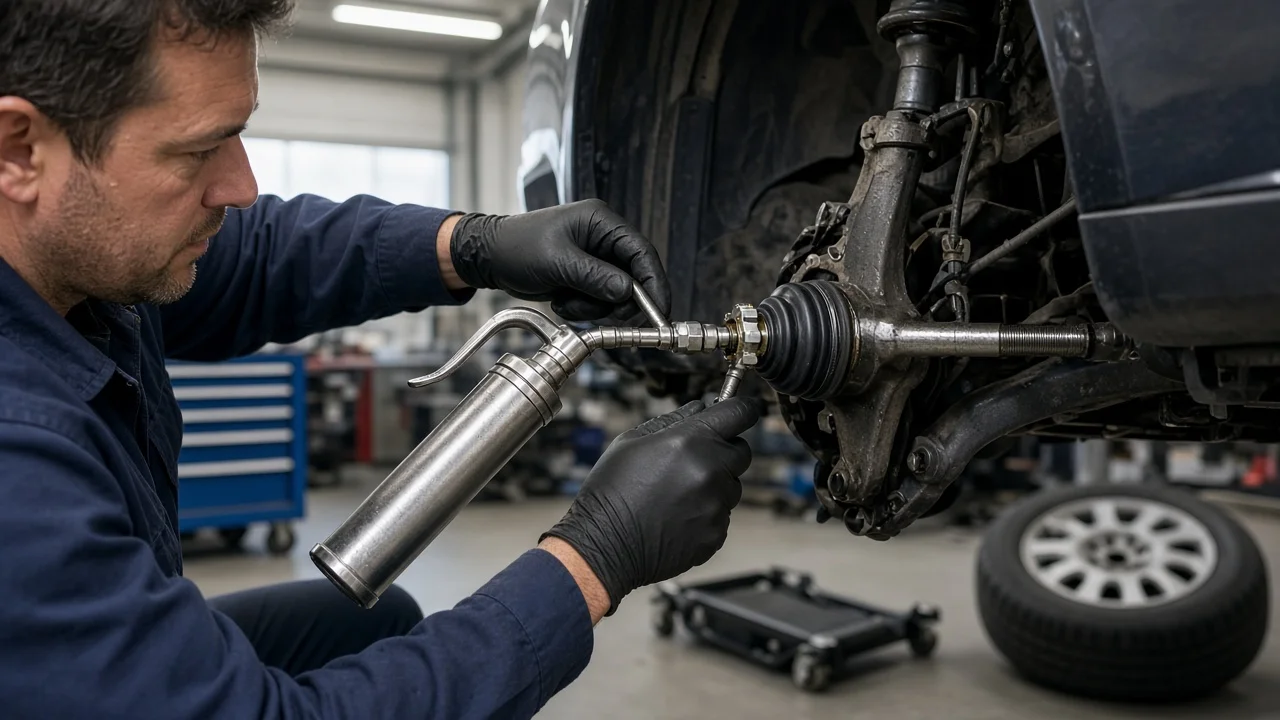
Tie rod ends connect the steering linkage to each steering knuckle. On vehicles built with grease fittings, they need periodic lubrication to resist wear and keep water out. Greasing tie rod ends is a simple job with a grease gun, but only if the joints are designed for it. This guide explains how to tell, how to support the vehicle, how much grease to add, and what the job can and cannot fix.
The short answer
To grease a tie rod end, first clean its grease fitting. Attach a grease gun loaded with the grease your owner's manual or service information calls for. Pump slowly until the rubber boot begins to swell slightly or old grease starts to purge from the boot edge. Then stop, wipe off the excess, and repeat on the other side. Most passenger vehicles have two outer tie rod ends. Some trucks and older vehicles have additional steering linkage joints that also take grease.
The important qualification is that many modern tie rod ends are sealed at the factory and have no fitting at all. These are lubricated for life and are not meant to be serviced. If a sealed joint becomes dry, worn or loose, the fix is replacement, not grease. Greasing also cannot restore a joint that already has play or a torn boot.
How a greaseable tie rod end works
A tie rod end is a small ball-and-socket joint. The ball stud is fixed to the steering knuckle, and the socket housing threads onto the tie rod. When you steer, and when the suspension moves up and down, the ball rotates and pivots inside the socket against a bearing surface. Grease reduces friction and wear between those surfaces. It also helps keep water, road salt and grit out.
On serviceable joints, a grease fitting, often called a zerk, leads into the socket. The fitting contains a small check ball that lets grease in under pressure but keeps dirt out. A rubber dust boot surrounds the stud. Fresh grease pushed into the joint displaces old, contaminated grease, which on many designs escapes past the boot lip. Because of this purging action, you add grease until you see movement at the boot rather than pumping a fixed number of strokes.
What changes the answer for your vehicle
Start by checking the design. Look at the bottom or side of each outer tie rod end for a fitting. A smooth, closed housing usually means a sealed joint. Some joints have a threaded plug that the manufacturer intends to be replaced with a fitting during service. Some aftermarket replacement parts include fittings where the original part had none. Inner tie rod ends on rack-and-pinion steering sit inside the rack boots and are not greased through a fitting.
Boot design matters too. Some boots are made to vent old grease at the lip, while others are sealed and can split if overfilled, so watch the boot closely and use gentle pressure. Driving conditions affect how often the job is needed. Mud, deep water, gravel roads, road salt and off-road use wash out or contaminate grease faster than mostly dry highway driving. Use your vehicle's maintenance schedule for the interval, and follow the severe-service schedule if your driving matches its description. Some service information also says whether the suspension should be at normal ride height or hanging during chassis lubrication. Follow that instruction where it exists.
Preparing and supporting the vehicle safely
On many trucks and SUVs with good ground clearance, you can reach the fittings with the vehicle on its wheels, which avoids lifting entirely. Turning the steering wheel toward one side can bring a fitting within easier reach. If you need to lift the vehicle, work on firm, level ground. Set the parking brake and chock the wheels that stay on the ground.
Raise the vehicle only at the lifting and mounting points shown in the owner's manual. Then lower it onto jack stands rated for the load before reaching underneath. A jack alone is not adequate vehicle support. Wear eye protection, because grease can spit from a fitting that does not seal against the gun coupler.
Greasing the joint step by step
Wipe each fitting clean with a rag so dirt is not forced into the joint. Inspect the boot before adding grease. If it is torn or cracked, grease will push out through the tear and contamination will still get in, so mark the joint for repair instead. Press the grease gun coupler squarely onto the fitting until it locks, then pump slowly while watching the boot.
Stop as soon as the boot starts to fill out slightly or old grease begins to appear at the boot edge. Dark or gritty grease purging out is normal on a joint that has not been serviced in a while. On boots designed to purge, it is reasonable to continue until cleaner grease appears, but do not balloon a sealed boot. Remove the coupler by tilting it off the fitting, and wipe away excess grease so it does not collect dirt. Move to the next fitting, and lower the vehicle carefully when you finish.
If a fitting will not accept grease, do not keep increasing pressure. The fitting may be clogged or damaged. Replacing a fitting is usually straightforward, but tighten the new one only snugly, because overtightening can strip the threads or crack the fitting. Use the fastener specification if the service information gives one. If the joint still will not take grease with a new fitting, have it inspected.
Checking for wear while you are there
With the front raised and safely supported, check for joint play. Grip the tire at the left and right sides and push one side in while pulling the other out, while a helper watches the tie rod end. Any clunk, or visible movement between the stud and the housing, indicates wear. With the vehicle on the ground, a helper can rock the steering wheel back and forth slightly while you watch each joint for lost motion.
Also look for a bent tie rod, a loose or missing cotter pin or locking nut at the stud, and damaged or leaking rack boots nearby. Signs of worn steering joints include wandering, a loose feel on center, clunking over bumps and uneven wear on the tire edges.
Limitations and the next step
Grease protects a healthy joint; it does not repair a worn one. A tie rod end with play or a damaged boot needs replacement. Replacing a tie rod end affects toe, so the vehicle needs a professional wheel alignment afterward. Do not estimate how far a loose steering joint can safely be driven. Steering components are safety critical, so have suspected wear inspected promptly.
Fitting locations, grease specification, lubrication interval and torque values all depend on the specific vehicle. Get those details from the owner's manual or factory service information. Have a suspension and steering technician confirm the condition and do any repair if any of these apply: you cannot support the vehicle safely with your equipment, the joints are sealed and showing symptoms, or you are unsure what you found during inspection.