How to Get Car Wax Off Black Plastic Trim
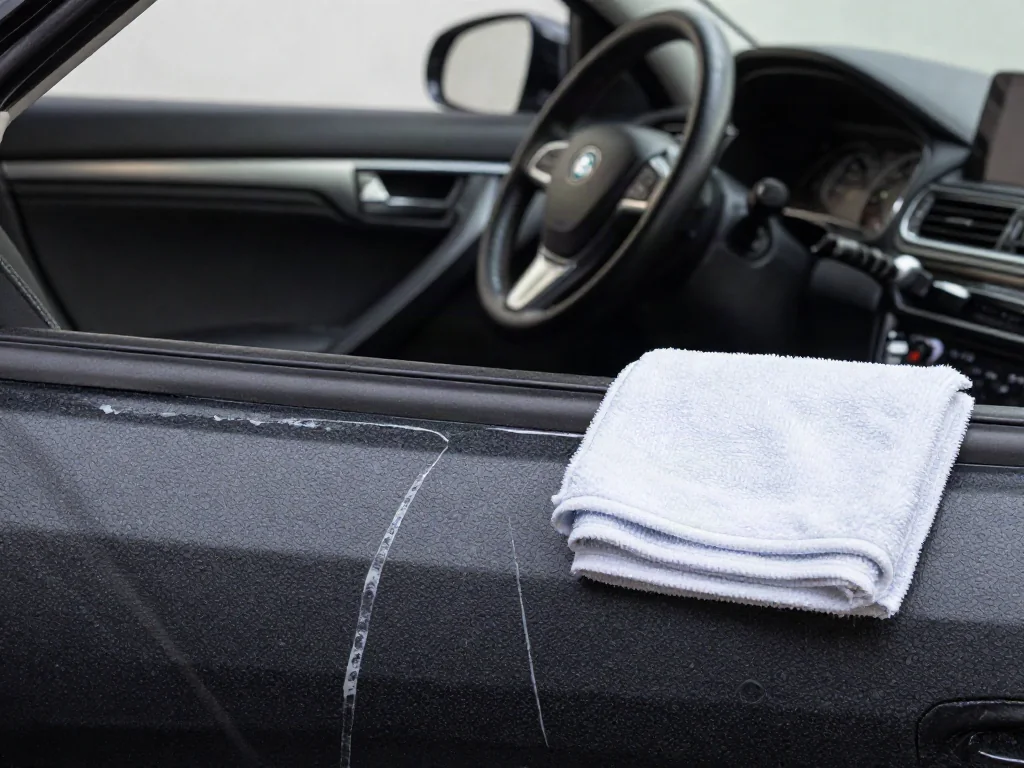
White wax residue on black plastic trim is a common frustration after detailing. It often appears as chalky haze along panel edges or inside graining, where paste or liquid wax gets trapped. Removing it requires matching the cleaning method to the trim material—bare textured plastic, painted plastic, or rubber react differently. Gentle, label-approved products and soft tools usually lift fresh residue. Dried deposits need more care. Understanding what you are working with prevents worsening the discoloration.
Check Whether the White Marks Are Wax Residue
Marks that appear on trim soon after waxing, especially right along tape-free edges or within recessed grain, often point to leftover wax. Cars are usually waxed on paint, and applicators or towels drift onto adjacent black plastic. The haze sits on the surface rather than inside the material, but timing alone does not prove wax is the cause. Run a fingernail lightly across a hidden spot; a wax deposit may scrape away slightly or smear, while faded plastic will not.
Distinguish surface deposits from fading or chemical damage by how the marks behave. Oxidation tends to look even and chalky over a broader area, while wax residue often has a defined smear pattern where contact happened. Previous harsh cleaners can bleach plastic and leave permanent white patches. Check whether the affected area is bare textured plastic, painted plastic, or rubber. Rubbers are softer and more porous, absorbing residues more readily. Cleaning may remove residue, but it cannot restore pigment already damaged.
Choose Supplies Safe for the Trim Material
Start with clean microfiber towels, a soft detailing brush, plain water, and a cleaner specifically labeled for the exterior trim material you identified. Many dedicated trim cleaners are water based and safe for unpainted plastic, but the same product might not suit rubber or painted surfaces. Read the label statements for the material you are treating. A cleaner formulated for polypropylene can leave rubber sticky or remove paint gloss. Keep separate towels for painted and unpainted parts to avoid transferring wax back.
Before using any product on visible trim, test it on a small hidden area such as the lower rear corner of a bumper insert. Apply the cleaner per directions, wipe it off, and wait for the area to dry completely. Watch for color change, tackiness, or increased dullness. Abrasive pads, stiff brushes, and household solvents like acetone or paint thinner can scratch textured surfaces, melt rubber, or bleach black trim. Even strong all-purpose cleaners can stain if left too long, so confirm compatibility first.
Lift Fresh Wax Residue With Gentle Cleaning
Work on cool trim out of direct sunlight and wash the area with a gentle automotive soap first. Loose dirt and road film can scratch the surface when agitated, and heat makes cleaners flash off before they act. After rinsing and drying, apply the approved trim cleaner to a microfiber towel or soft brush, not by spraying the whole panel. Keep runoff off adjacent paint and glass by working from the wax mark outward and blotting excess liquid with a second towel.
Use light brush pressure in a single direction across the graining to loosen residue from the tiny valleys. Then blot or gently wipe with a clean microfiber to lift the wax and cleaner together, avoiding circular motions that spread the haze. If the towel picks up white material, fold to a clean side frequently. Once the area looks clear, remove all cleaner residue with a damp towel as the label instructs. Let the trim dry fully before judging the result because damp plastic often hides faint residue.
Treat Dried Wax Caught in Textured Plastic
After the first cleaning pass, dried wax may remain packed into the recessed texture of plastic. The initial wash loosens surface deposits, but graining holds hardened wax below the peaks. A dedicated wax-residue remover can dissolve that trapped film, but only if its label explicitly permits use on the affected trim material. Some removers are designed for paint and contain solvents that dull or soften plastic. Never use them simply because ordinary trim cleaner did not work.
Follow the remover’s dwell time precisely. Apply it to a small area with a soft brush or swab, let it sit only as long as instructed, then wipe off using the specified method. Do not allow the product to dry on the surface unless the directions say to. Work in sections small enough to finish within the instructed time. If the trim becomes tacky, changes color, or begins to look shiny, stop immediately and rinse the area. Repeating more times than recommended can drive the wax deeper into pores.
Assess Remaining Haze Before Applying Dressing
Inspect the clean, dry trim in even light before applying any dressing. Water gloss and oily dressings can temporarily conceal faint white marks that reappear days later. Move the vehicle or use a bright light at a low angle to see remaining haze in the grain. A trim dressing darkens plastic and fills texture, improving appearance, but it does not remove wax trapped underneath. Dressing over residue may create a streaky, greasy film that is harder to remove later.
If label-directed cleaning has stopped producing improvement, do not automatically reach for stronger chemicals. Aggressive solvents or abrasive pastes can permanently dull or bleach black plastic. Persistent haze, uncertain material identification, or signs like flaking pigment or melting texture justify a qualified detailer. They can test plastic types and use professional trim restoration products without guessing. Damage from prior harsh cleaners may require re-dyeing rather than more cleaning, so knowing when to stop protects the surface.
Keep Wax Off Plastic and Rubber Next Time
Before your next waxing session, check the wax label for restrictions involving unpainted plastic and rubber. Many carnauba and polymer waxes stain trim, while some synthetic sealants are labeled trim-safe. If in doubt, use a small applicator and controlled product amounts near edges. Apply wax to the paint with a foam pad held at a shallow angle, and leave a thin safety margin next to textured moldings. This reduces the chance of dragging paste across the plastic.
Automotive masking tape can protect sound, compatible trim, but test it on a hidden area first. Apply tape along the edges of well-cleaned, dry trim, press it down fully, and remove it promptly after waxing. Leaving tape on in sun or heat can leave adhesive behind or pull up fragile coatings. If wax still contacts plastic or rubber, wipe it off immediately with a damp microfiber before it dries. Inspect textured edges after every panel; residue caught then is much easier to remove than hardened haze.