How to Do Body Work on a 1970 Chevelle
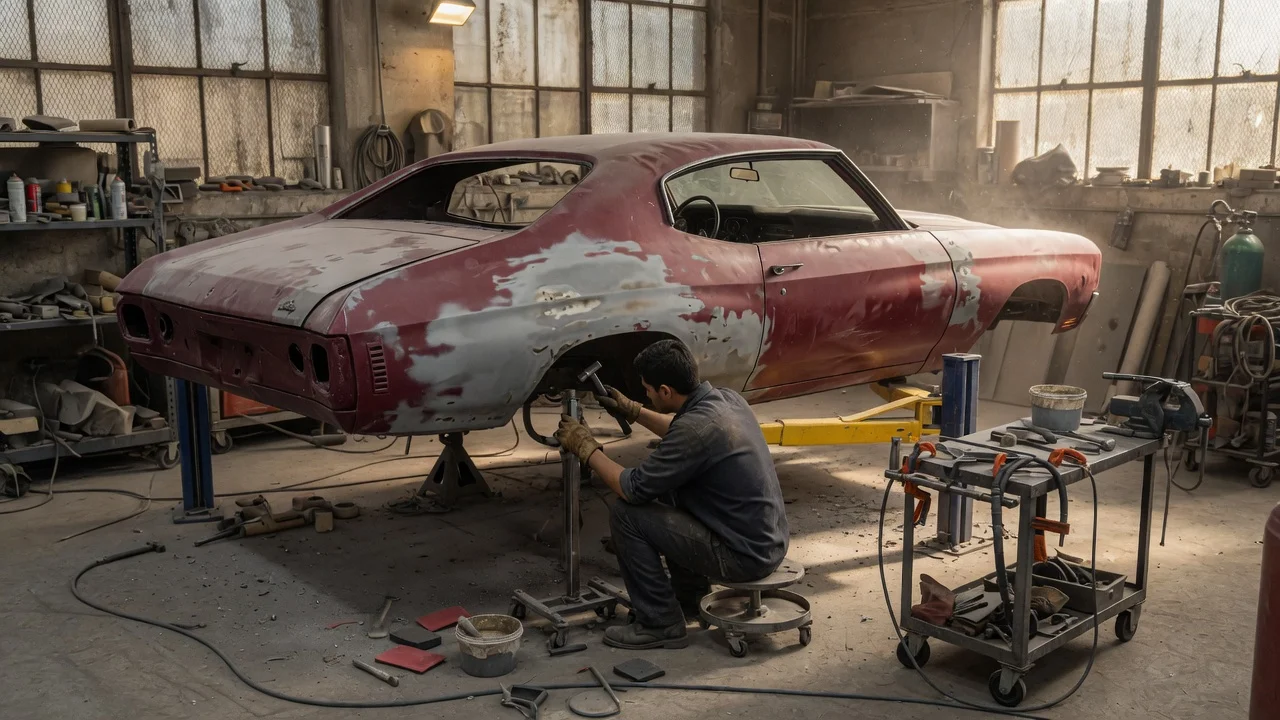
What body work on a 1970 Chevelle actually covers
Doing body work on a 1970 Chevrolet Chevelle means restoring the steel shell so panels fit, rust is stopped, seams are sound, and the surface is ready for primer and paint. The 1970 Chevelle is a GM A-body, body-on-frame car, so the frame, mounts, and glass openings matter as much as the visible sheet metal. The answer changes with body style: a two-door sport coupe, convertible, sedan, four-door hardtop, and wagon do not share the same quarters, roof, or rear structure. Super Sport, Malibu, and base trims also differ in hood, grille, bumper, and trim, even when the main stampings look similar.
This is a restoration and collision-repair task, not a single-part swap. Typical work includes rust cut-out and welding, panel replacement, gap and alignment setup, metal finishing, and corrosion protection. Exact panel gaps, weld schedules, and factory repair procedures belong in Chevrolet service and body literature for this generation; those values are not reproduced here because they were not supplied for verification.
What you need before cutting or welding
Confirm the car’s body style, trim, and options first. A 1970 SS cowl-induction hood, standard hood, chrome bumper, and Endura-style front treatment are not interchangeable as a set, and reproduction parts are sold by body style. Photograph the car, tag every trim clip and molding, and decide whether the job is a local repair, a panel replacement, or a full reshell before you buy steel.
Safe support: a level floor, jack stands or a lift rated for the vehicle, and the battery disconnected. Do not weld with the fuel tank, fuel lines, or an unknown fuel-vapor path in the work area. Identity of the car: VIN, body style, and whether it is a coupe, convertible, sedan, wagon, or related A-body, so quarters, doors, and roof parts match. Assessment tools: bright light, magnet or paint-thickness gauge, probe for scale, tape measure, and a straightedge or body hammers for high/low spots. Cutting and welding gear appropriate to thin automotive sheet: cutoff tools, a welder suited to 18–22 gauge body steel, clamps, butt-weld or overlap fixtures, and fire control. Factory metal thickness and approved weld methods should be taken from Chevrolet body repair guidance, not guessed. Fitment aids: fender washers or shims as needed at bolt-on panels, a door, hood, and deck-lid striker/latch check, and a way to measure gaps around the openings. Corrosion control: weld-through primer where the repair method calls for it, seam sealer, and undercoating or cavity wax after the metal work is closed. Product choice should follow the coating maker and any OEM repair notes. Finish path: epoxy or etch primer compatible with bare steel, a blocking plan, and a decision on whether paint will be done in-house or by a licensed shop.
If the car still has original or unknown undercoating, sound deadener, or trapped fuel and brake lines, treat those as hazards until they are identified and protected. Structural rust in the frame, torque-box area, or around convertible reinforcements is a professional-service boundary: stop and have a shop with frame and structural repair capability inspect it before you continue.
Inspect the body in a set order
Start with a dry, well-lit inspection from the outside in. Look for bubbling paint, filler waves, mismatched panel gaps, and previous weld stitches. Then go underneath and into the trunk, cabin, and cowl. On 1968–1972 A-body Chevelles, including 1970, rust commonly shows in rear quarter panels (wheel arches, lower quarters, and around the marker or trim holes), rocker panels, cabin and trunk floors, the lower rear of the front fenders, the cowl and windshield channel, battery-tray area, and around the rear window. Convertibles add extra concern at the rear quarters and around the top well. Wagons have different rear quarters and tailgate openings than coupes.
Bolt-on panels first: hood, fenders, doors, and deck lid. Check hinge wear, latch alignment, and whether a panel can be replaced without welding. Welded structure next: quarters, rockers, floor pans, trunk floor, cowl, and tail panel. Probe from both sides where you can; surface rust on a floor can hide perforation at the seat mounts or frame tunnels. Openings and glass: windshield and backlight channels must be solid before new glass or a windshield gasket is planned. Prior repairs: thick filler, overlapping patch on patch, and plug welds in odd places usually mean the next cut will be larger than the blister you can see. Frame and mounts: a straight-looking body on a rusty or bent frame will not hold gaps. Body-mount condition affects every panel you hang.
A magnet that falls off, a gauge that shows heavy filler, or a screwdriver that goes through scale means the metal is not a candidate for spot glaze. Replace or section that area. A fault in fit (door that will not shut, hood that sits high on one side) is evidence to check hinges, shims, and the opening, not proof that the skin itself is the only failed part.
Choose repair, patch, or full panel
Small, isolated rust with sound surrounding metal can be cut out and patched with same-thickness steel, finished flush, and protected. Long rust along a quarter, rocker, or floor usually favors a reproduction panel or a larger factory-style section rather than a string of small patches. 1970-specific outer parts (grille, front bumper treatment, tail panel, and some hoods) should be matched to that year; 1971–1972 Chevelle front and rear sheet metal is not a drop-in substitute for a correct 1970 appearance.
Aftermarket quarters, floors, and patch panels are widely sold for this generation, but fitment varies by maker. Plan on test-fitting, trimming, and extra metal finishing. Original GM panels, when available, still need rust inspection. Do not treat a reproduction part as dimensionally identical to a factory stamping until it is clamped on the car and the gaps, character lines, and door or wheel-arch shut lines are checked.
Steps to complete the metal work
Work from structure toward skin, and from the worst rust toward the last cosmetic panel. Keep the body supported so cutting one panel does not let the shell sag. Chevrolet body-repair literature for this A-body should be used for sectioning joints, weld type, and any specified measurements; the sequence below is a field order of operations, not a substitute for those specs.
Document and strip. Remove trim, lights, glass if the channels are in the repair, interior enough to reach floors, and undercoating in the weld zone. Label fasteners. Photograph gaps and body lines before anything is cut. Support the shell. Brace door openings and the windshield opening if you will cut rockers, pillars, or quarters. Confirm the frame is supported independently of the body if mounts will be disturbed. Cut out failed metal. Remove rust back to clean, solid steel with a defined joint. Overlap a previous patch only if that patch is sound; otherwise cut it out too. Test-fit the new panel or patch. Clamp it, check wheel-arch shape, door gap, quarter peak, and trunk opening before any weld. Trim in small steps. Tack, then weld. Use a pattern that limits heat warp on thin steel. Keep a fire watch. Disconnect or isolate electronics and the battery. Do not weld near the fuel system. Metal-finish the joints. Grind welds flush without thinning the surrounding panel, hammer and dolly highs and lows, and confirm character lines still read correctly in raking light. Treat the back side. Seal seams, prime or wax cavities you can no longer see, and restore any sound deadener only after the metal is protected. Hang bolt-on panels. Set fenders, doors, hood, and deck lid to even gaps and flush height. Adjust hinges and latches last, after the welded openings are stable. Prime and block. Apply a primer system rated for bare steel and any remaining filler, then block until the panels are straight. Do not bury an alignment problem in filler. Corrosion and paint. Finish with the paint system you planned, including inner fenders, trunk, and floor undersides if they were opened. Reassemble weatherstrips and trim only on dry, cured paint.
Stop and send the car to a professional if you find frame rust-through, bent core support or frame horns, a distorted windshield opening, or a convertible with weak rear structure. Those repairs affect safety and glass fit, and they need equipment and procedures beyond a typical skin patch.
How to know the job is done
The metal work is complete when every cut-out has been replaced with solid steel, welds are continuous where the joint requires it, the back sides are sealed, and bolt-on panels shut on even gaps without slamming. Doors, hood, and deck lid should latch on both sides, sit flush to the adjacent panel, and keep a consistent reveal. The windshield and rear-glass channels should be free of scale and pinholes before glass goes back in. There should be no soft floor under the seats, no daylight through a quarter, and no movement at body mounts.
A completion check that still shows a twisting door gap, a hood that sits on one fender, or rust bleeding through new primer means the structure or the last joint is not finished. Paint will not correct that. Factory gap targets and any torque values for hinges, bumpers, and body mounts should be taken from Chevrolet service information for the 1970 Chevelle; they are not included here because they were not available to verify.
What this guide cannot specify
No manufacturer body-repair manual, panel-gap chart, weld schedule, or fastener torque table was supplied for this article. Do not use guessed millimeters, wire settings, or tightening values. Reproduction panel quality is maker-specific and is not graded here. Paint chemistry, filler brands, and local inspection or title rules for structural repair also sit outside this scope. Use Chevrolet 1970 Chevelle / GM A-body service and body literature, and a qualified collision or restoration shop, for those details.