How to Disconnect and Reconnect a Car Battery Safely
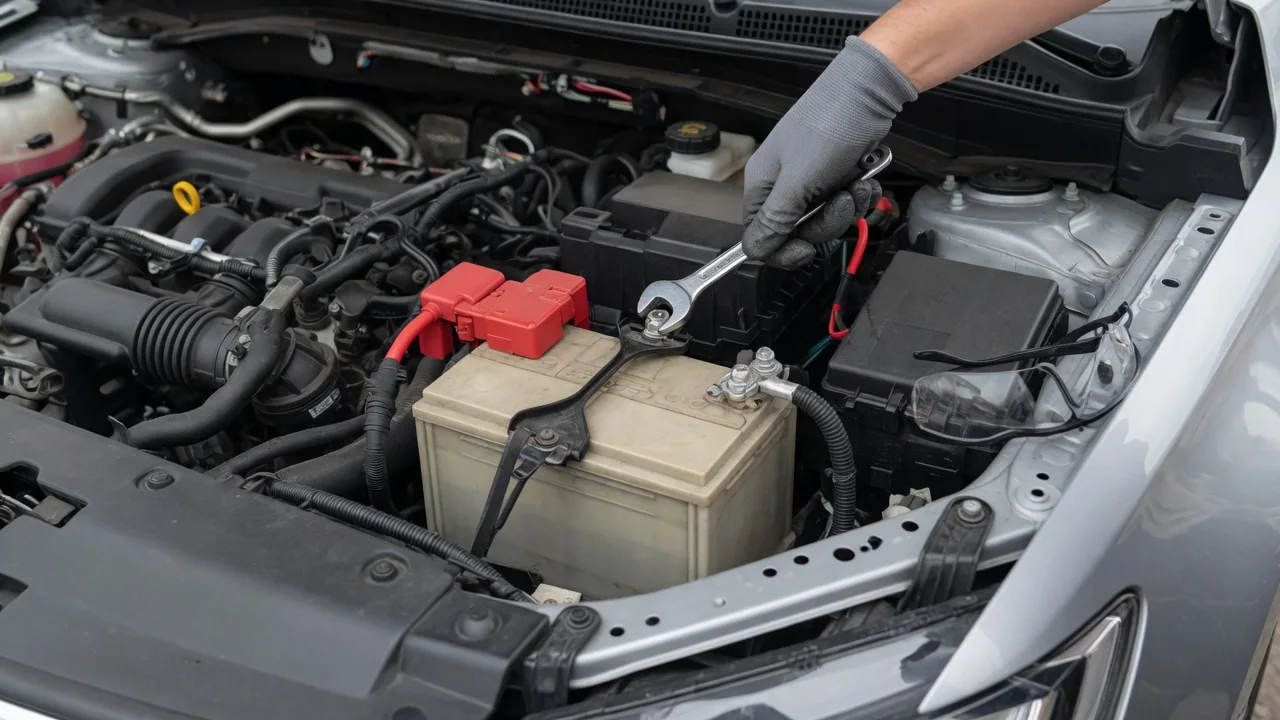
Disconnecting a 12V car battery is one of the more approachable jobs an owner can do, but the order of steps matters more than the effort involved. Done carefully, it protects you, the vehicle's electronics, and the battery itself. The guidance below covers when disconnecting is worthwhile, what to prepare, how to remove and reinstall the battery, and what to expect once power returns.
When disconnecting the car battery makes sense and when it doesn't
Owners usually disconnect the 12V battery for a practical reason: a vehicle headed into long-term storage, work on wiring or electrical components, installing an accessory such as a dash camera or aftermarket stereo, or clearing a module that seems stuck in an odd state. Removing power prevents slow drain during storage and reduces the risk of shorting a live circuit during repairs. What it does not do is fix an underlying fault. A warning light that disappears after reconnecting will often return once the vehicle is driven and its self-checks run again.
Hybrids and electric vehicles still carry a conventional 12V battery, but they also contain high-voltage components, typically identified by orange cabling, that must never be touched. Only the 12V procedure applies, and the owner's manual takes priority over any general advice. Some situations call for a professional before you start: heavy corrosion that has eaten into cables or the tray, a swollen or leaking case, a burning or rotten-egg smell, or a battery mounted under a seat or in the trunk where access and the correct disconnect point are unclear.
Tools, protective gear, and preparation before you touch a terminal
The basic kit is short: a wrench or socket that fits the terminal clamp nuts, another for the hold-down bracket, safety glasses, and chemical-resistant gloves. Many vehicles use common metric sizes, but test-fit your tools on your own clamps rather than assuming. Useful extras include a terminal cleaning brush for the posts and clamp interiors, a clean cloth for wiping the battery tray, and a memory saver, which supplies a small amount of power to keep radio presets and some module settings alive while the main battery is out.
Preparation prevents most problems. Switch the engine off, remove the key or fully power down a push-button vehicle, set the parking brake, and lower a window or unlock the doors so an unexpected lock cycle cannot shut you out. Write down any radio security code and your presets beforehand. Remove rings, watches, and bracelets, and never let a metal tool bridge both terminals or touch the positive post and bare metal at the same time. If a clamp is heavily corroded or seized, stop rather than forcing it with pliers, because a damaged post can ruin the battery.
Disconnecting the battery in the correct terminal order
Start by identifying the terminals, because everything else depends on it. The negative terminal is normally marked with a minus sign and a black cable running to the body or engine, while the positive terminal carries a plus sign and often sits under a red cover. Loosen the negative clamp first, lift it off, and tuck the cable aside so it cannot spring back onto the post. Only then remove the positive clamp. With the ground path already broken, an accidental tool contact between the positive terminal and the body no longer completes a circuit.
Clamp designs vary. Traditional nut-and-bolt clamps need only a few turns before the clamp can be twisted gently back and forth and lifted off the post. Quick-release types use a lever that opens the clamp, and some vehicles hide the terminals inside a covered box that unclips first. Loosen just enough to free the clamp, since removing the bolt entirely creates small parts to lose. Many newer vehicles also fit a battery sensor on the negative cable. Work on the clamp nut itself, and avoid pulling on the sensor body or its thin wire.
Removing the battery from the engine bay or trunk
With both cables clear, find the hold-down bracket, which may clamp across the top of the battery or grip a ledge at its base. Remove it and keep the bolts, nuts, and any hooks together so reassembly is straightforward. Batteries are compact but dense and surprisingly heavy, so lift with your legs, keep your back straight, and hold the case upright to avoid spilling electrolyte. Use a built-in handle or carry strap if one is fitted, and on trunk or under-seat installations, detach any vent tube before lifting.
Once the battery is out, inspect what it left behind. Look at the tray for corrosion, debris, or trapped moisture, check the cable ends for green or white crusty buildup, and confirm that any insulation sleeve or vent tube is intact. Store the battery upright on a dry surface, away from children, heat sources, and anything that could spark, with nothing metal resting near the terminals. A battery that is cracked, leaking, or visibly bulging should not go back in the vehicle; take it to a recycling drop-off rather than household trash.
Reconnecting the battery: reversed order and a snug fit
Reinstallation reverses the process. Set the battery squarely on a clean tray with the terminals in their original orientation, then refit the hold-down so the battery cannot shift under braking or cornering. Connect the positive clamp first and tighten it, then attach the negative clamp last. Aim for a clamp that cannot be twisted on the post by hand, but stop there, because overtightening can distort a soft lead post or crack the clamp. If the posts were dirty, a quick brush before connecting helps the clamps seat fully.
A small spark as the negative clamp touches its post is normal, since modules draw current the moment power returns. A large or sustained spark is different and suggests a short, a pinched cable, or an accessory such as a dome light or aftermarket device left switched on, so stop and investigate before finishing. Once both clamps are secure, snap any terminal covers back into place and check that the cables are routed clear of belts, fans, exhaust heat, and sharp edges before closing the hood.
What resets after reconnecting and when to get help
Expect a few things to forget their settings. The clock, radio presets, and trip data commonly reset, and seat or mirror memory may need to be stored again. One-touch power windows and sunroofs often lose their automatic function until a relearn described in the owner's manual is completed. A security-coded audio unit may demand its code, which is why locating it beforehand matters. Some vehicles also expect a battery registration or module reset after a battery change; confirm with the manual or a dealer whether yours does rather than assuming.
Some symptoms point beyond the disconnect itself. Warning lights that stay on after several drives, a no-crank condition after reconnection, or a battery that keeps going flat all indicate a separate problem, such as a charging system fault, a parasitic drain, or a weak battery. These call for professional testing of the battery, alternator, and wiring rather than another round of disconnecting. Idle quality after reconnection and choosing a replacement battery are separate subjects; if either comes up, treat it as its own diagnostic task instead of improvising a fix.