How to Detail a Car Interior: Seats, Carpets, Plastics and Cloth Upholstery
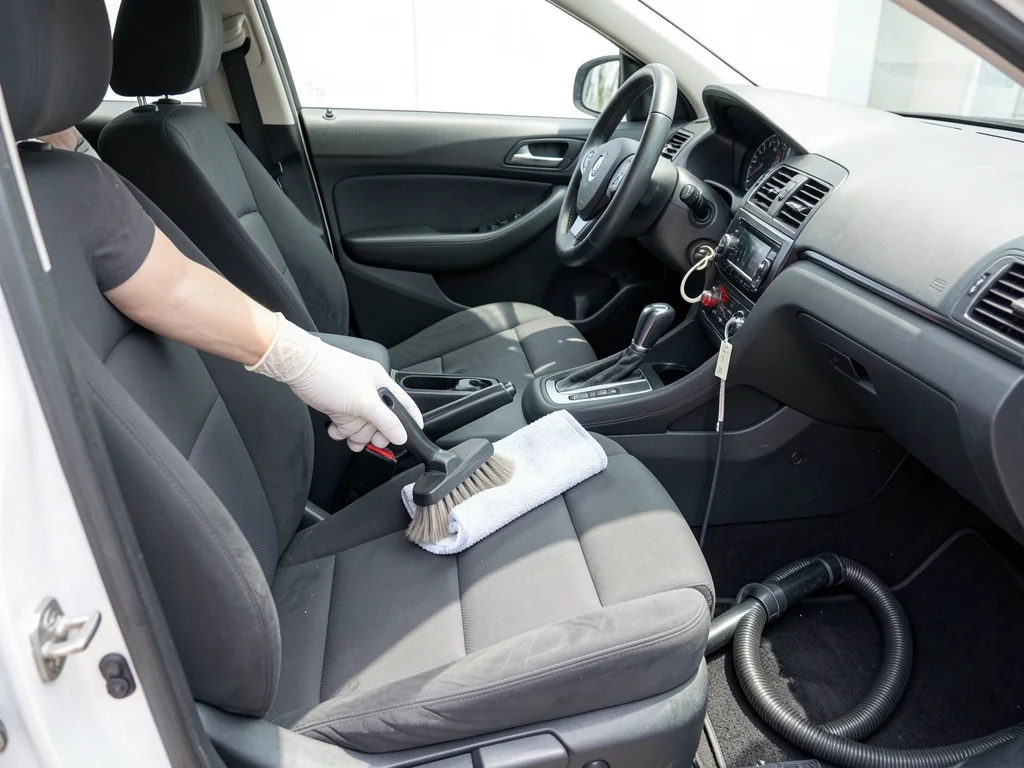
A thorough interior detail does more than make a cabin look tidy. Removing embedded grit slows wear on upholstery and carpet, clearing grime from controls improves how the car feels to use, and treating odors at their source keeps them from coming back. The process below covers seats, carpets, plastics, glass and smells in an order that avoids redoing work.
Planning the job: emptying the cabin and working in the right order
Start by taking everything out: floor mats, loose items, child seats and trunk contents. Mats hide the sand and grit that grind into carpet, and child seats often conceal crushed snacks and old spills soaked into the cushion. Once the cabin is empty, work from the top down and dry before wet. Dust the dash, vents and trim first, then vacuum, and only then use liquid cleaners, so loosened debris lands on surfaces you have not finished yet.
Before applying any product, check the owner's manual for surface care warnings. Touchscreens, leather, suede-like microfiber fabrics and matte trim can react badly to general-purpose cleaners or glossy dressings. Then make a slow inspection pass, noting stains, sticky spots, scuffs and smells, which tells you which products you need and where the time will go. A first deep clean on a neglected car can take most of a day, while a maintenance clean on a well-kept cabin may take an hour or two.
Vacuuming technique and reaching debris in seams, rails and under seats
Use the crevice tool along seat seams, the gap between seat and center console, door pockets and around seat rails, where crumbs and coins collect. Slide each front seat fully forward, vacuum behind and underneath, then move it all the way back and repeat, reclining the backrest to open the seam between cushion and seatback. Before vacuuming vents, stitching and textured plastics, loosen embedded dust with a soft detail brush or short bursts of compressed air.
Pet hair weaves into cloth and resists suction alone. A rubber brush or pumice-style pet hair stone, drawn in short strokes in one direction, rolls hair into clumps that lift away easily. Use light pressure and avoid scouring pads or wire brushes, which pull fibers and leave upholstery fuzzy. Careful vacuuming makes the biggest difference to the finished result, and it deserves patience, because any grit left behind turns into mud once wet cleaning begins.
Cleaning cloth seats: stains, water rings and avoiding over-wetting
Test any upholstery cleaner on a hidden spot, such as the underside of a seat bolster, and check for color transfer or texture change once it dries. On visible fabric, mist the cleaner lightly, agitate with a soft brush in overlapping passes, then blot firmly with a clean microfiber towel to pull soil out. The goal is to lift dirt from the surface fibers without driving liquid into the foam padding underneath.
Coffee and soda usually respond to a general fabric cleaner, grease needs a product made to break down oils, and ink may need a dedicated spot remover used sparingly. Winter salt crust dissolves with warm water and a little cleaner. Old set-in stains often lighten rather than disappear. To prevent water rings, feather the treated area outward past the stain edge and dry it evenly with airflow, because damp foam left in a closed car can turn musty or grow mildew.
Carpets and floor mats: deep cleaning without soaking the floor pan
Take rubber and carpeted mats outside. Rubber mats respond well to a scrub brush, all-purpose cleaner and a thorough rinse, while carpet mats benefit from the same agitate-and-extract approach used on the floor. Let both dry completely before reinstalling, since a damp mat traps moisture against the carpet. For fixed carpet, apply cleaner, work the fibers with a stiff brush to loosen soil at the base of the pile, then extract with a wet-dry vacuum or press dry towels in firmly.
The driver footwell and rear floor take the most abuse, collecting ground-in mud and salt. Let mud dry and brush out as much as possible before adding liquid, and treat salt with repeated light applications of warm water. Saturating carpet is the main risk, because water can soak into the padding and sit against the floor pan, feeding odor and possibly corrosion. Several light passes are safer than one heavy soak. If stains or smells persist, professional hot-water extraction is a sensible next step.
Dashboard, door panels and plastics: cleaning and protecting trim
Spray a mild interior cleaner onto a microfiber towel rather than directly onto the dash, keeping overspray off screens, gauge clusters, switches and the windshield. On textured door panels and lower trim, work cleaner into the grain with a soft detail brush, then wipe dry with a clean towel to prevent streaks. Hard plastics tolerate firmer agitation, but soft-touch coatings can turn shiny or sticky if scrubbed, and piano-black trim scratches so easily that it needs only a gentle wipe.
Leather-look vinyl generally cleans like hard plastic but should not be attacked with stiff brushes. For protection, choose a non-greasy, low-gloss dashboard protectant, since shiny dressings reflect onto the windshield and attract dust. Give extra attention to the steering wheel, shifter surround, door handles, window switches and climate buttons, which collect skin oils and hand lotion. Cleaner on a towel, followed by a dry wipe, usually removes the darkened film and restores the original texture and grip.
Glass, vents, cupholders and the small details that finish the job
Clean interior glass with an ammonia-free cleaner, which is gentler on tint film, using two towels: one to clean and a second, dry one to buff. Work the edges and the top strip of each side window, which only appears when the glass is lowered. A towel wrapped around your hand reaches the windshield's lower corners. For vents, use a soft brush or foam swab with a light touch, because louvers and their adjustment tabs can snap under pressure.
Pull out removable cupholder inserts and scrub them separately, and soften sticky residue in the fixed base with a damp towel before wiping it away. Seat belt webbing collects sweat and grime; extend it fully, clean with a mild cleaner and gentle brush, and let it dry before it retracts. Treat the headliner carefully. Spot-clean with a lightly dampened towel and blot gently, since heavy moisture or scrubbing can loosen the adhesive and make the fabric sag.
Odor control, drying and a final walkthrough checklist
Lasting odor removal starts with finding the source. Spilled milk, damp carpet, forgotten food and a clogged cabin air filter are common culprits, and fragrance only masks them. After wet cleaning, open the doors, run fans across damp fabric and park somewhere dry and ventilated, avoiding sealing the car while anything is still damp. Enzyme cleaners break down organic odors from food, pets or bodily fluids, and activated charcoal absorbers help with lingering mustiness.
Persistent smoke or mildew smells may need professional treatment, since they penetrate foam, headliner and ventilation ducts. For the final walkthrough, reinstall mats so they sit flat and clear the pedals, check glass and trim for streaks in raking light, wipe touch points once more, and confirm no slick residue remains on pedals, steering wheel or shifter. Afterward, vacuuming every few weeks, wiping touch points and handling spills promptly keeps the next full detail manageable.