How to Clean and Restore Cloudy Car Headlights, Including the Toothpaste Trick
Cloudy, yellowed headlights make a car look older than it is, but the bigger problem is how much light they hold back on a dark road. The good news is that most haze sits on the lens surface. Careful cleaning, polishing, or a restoration kit can often bring back clarity. Here is how to identify the problem, choose the right fix, and keep lenses clear afterward.
Why Headlight Lenses Turn Yellow and Cloudy
Most modern headlight lenses are molded from polycarbonate, a tough, impact-resistant plastic that would yellow quickly in sunlight on its own. To prevent that, manufacturers apply a UV clear coat at the factory. Over years of service, that coating wears away. Ultraviolet exposure breaks it down chemically, road grit sandblasts it at highway speed, harsh cleaners soften it, and the spinning brushes in some automatic car washes scuff it further. Once the coating thins or cracks, the plastic underneath begins to oxidize and develops the familiar dull, chalky, yellowed surface.
It helps to separate that external oxidation from internal fogging, where moisture or condensation collects inside the housing. Surface haze can be polished away, but trapped moisture cannot, because the cause is behind the lens. Either way, cloudy lenses matter. They reduce light output and scatter the beam pattern, which cuts night visibility and may draw attention during safety inspections in some regions. Keep your expectations realistic, though. Cleaning restores surface clarity only. Cracked, deeply pitted, or internally damaged lenses will not be fixed by any polish or product.
How to Tell Which Kind of Lens Problem You Have
Start with a simple inspection. Wash the lens, dry it thoroughly, and look at it in daylight from several angles. Haze on the outer surface usually looks even and slightly textured, and it may feel rough when you drag a fingernail gently across it. Next, wet the lens with plain water. If it looks noticeably clearer while wet and turns cloudy again as it dries, the damage is surface oxidation that polishing can address. The water briefly fills the tiny roughness that scatters the light.
Internal moisture looks different. Droplets or fog behind the lens, often shifting or disappearing as the temperature changes, usually point to a failed seal or blocked vent rather than anything cleaning can solve. Also stop and reconsider if you find cracks, deep chips, melted or bubbled plastic, or a lens that has already been sanded through its coating. Before reaching for abrasives, check your owner's manual. Some manufacturers include specific cautions about lens care or special coatings that affect which products are safe to use.
Basic Headlight Cleaning: Soap, Water, and Gentle Products
Basic cleaning should always come first, and it should be done with the headlights switched off, cool to the touch, and the engine off. Rinse the lens first to float away loose grit, since wiping a dry, dusty lens is an easy way to add fine scratches. Wash with car shampoo and a soft microfiber cloth, then dry with a clean towel. Bug residue, tar, and stubborn road film usually respond to a dedicated bug and tar remover or detailing clay, used gently with the surface kept lubricated throughout.
Avoid household glass cleaners containing ammonia, general-purpose solvents, and scouring pads. Polycarbonate is not glass, and these products can attack the plastic or strip what remains of the UV coating, which speeds up the very yellowing you want to prevent. While you are there, clean the surrounding trim and, where fitted, the headlight washer nozzles so they spray freely. If the lens still looks dull after a thorough wash, the haze is in the plastic surface itself. The next step is polishing or a full restoration.
The Toothpaste Trick: How It Works and Where It Falls Short
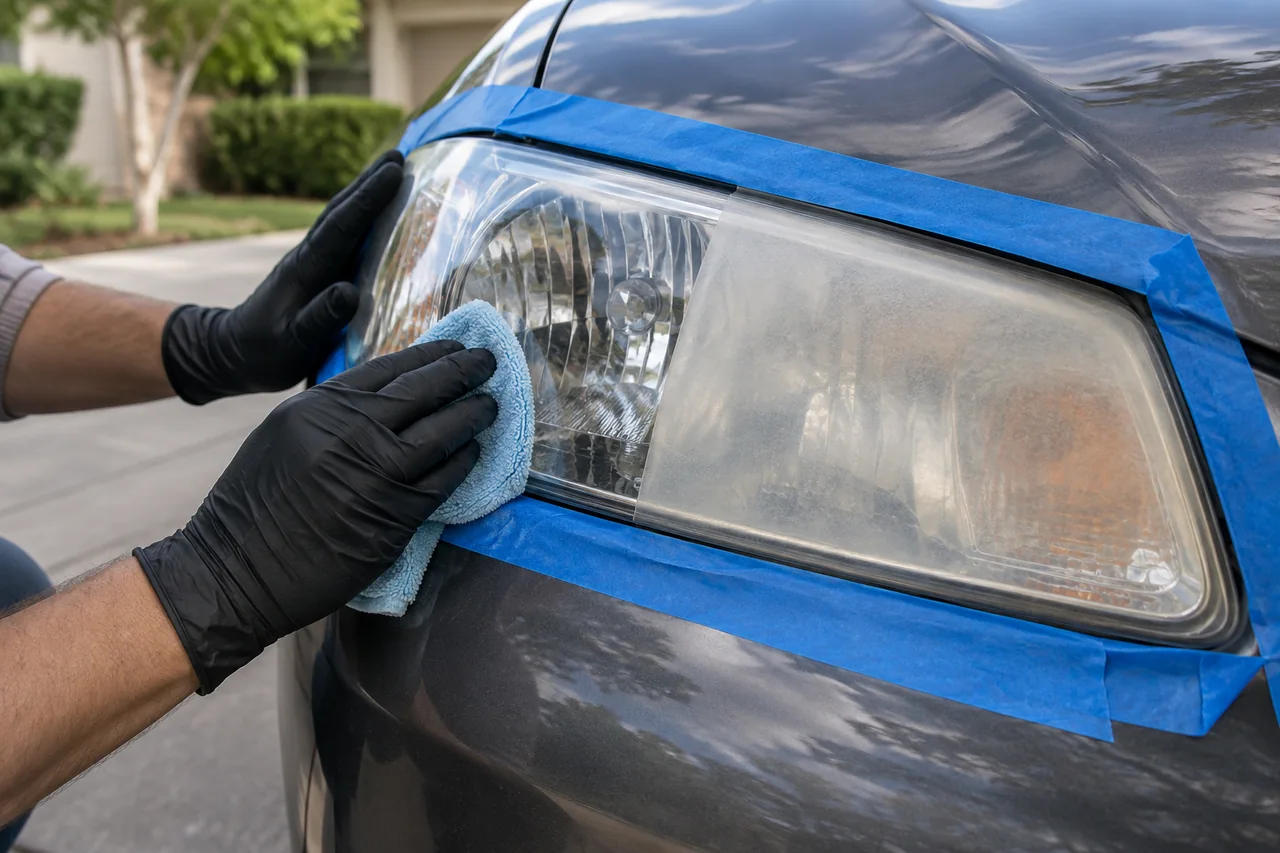
The toothpaste trick works because ordinary white paste toothpaste contains mild abrasives that act like a very fine polishing compound on oxidized plastic. Wash and dry the lens, then mask the surrounding paint and trim with masking tape. Put a small amount of paste on a damp microfiber cloth and rub in small, overlapping circles with light, even pressure, working across the whole lens. Rinse thoroughly, dry, and inspect. If the lens is improving, repeat the process, keeping the cloth damp so the paste does not dry into a gritty film.
Skip gel toothpastes, which usually lack useful abrasives, and whitening formulas that may contain coarser particles capable of scratching. Pressing hard is another common error that leaves swirl marks. Be honest about the limits. Toothpaste can clear light haze, but it will not remove heavy yellowing or pitting, and the improvement often fades quickly because no UV protection has been restored. Finish with a UV protectant or headlight sealant. If the haze is still there after a couple of passes, you need a proper restoration kit.
Using a Headlight Restoration Kit for Heavy Oxidation
A typical restoration kit includes progressively finer sanding pads or papers, a polishing compound, applicator cloths, and a UV clear coat or sealant. The basic process is similar across brands. Mask the paint carefully, then wet-sand from the coarsest grit to the finest, keeping the surface wet so debris washes away and the abrasive does not clog. Polish until the lens turns clear, clean off all residue, and apply the protective coating according to the kit's directions. Wet sanding removes the old factory coating entirely, so the final coat is essential.
If you skip that coat, the bare polycarbonate is left exposed and will often re-yellow faster than it did originally. Other common mistakes include using dry paper, letting a drill-mounted pad heat and distort the plastic, sanding onto a painted bumper, and applying the coating in dust, direct sun, or cold weather that prevents proper curing. A professional is the better choice for very deep pitting, lenses with integrated sensors or cameras, or anyone who is uncomfortable using abrasives close to paint.
Keeping Headlights Clear After Cleaning
Protection is what makes a restoration last. UV sealants, ceramic coatings, and clear protective film all slow oxidation by shielding the plastic from sunlight and abrasion. Reapply them as often as the product's own guidance says rather than guessing. Daily habits help too. Park in shade or a garage when you can, hand wash instead of using brush car washes, and rinse off bugs and road salt promptly. Watch for early signs such as faint dullness, a slight yellow tint on the most sun-exposed areas, or water no longer beading. When they appear, polish lightly and reseal.
Sometimes replacement is the smarter choice. Cracked housings, internal moisture that keeps coming back, and lenses that have been restored several times and are visibly thinning are better replaced than sanded again. After any work on the lights, especially replacing or removing a housing, have the beam pattern and aim checked. A lens that looks clear but sends light in the wrong direction can still dazzle oncoming drivers, and professional aiming may be needed to get a safe, correctly placed beam.