How to Choose the Correct Lug Nuts for Your Wheels
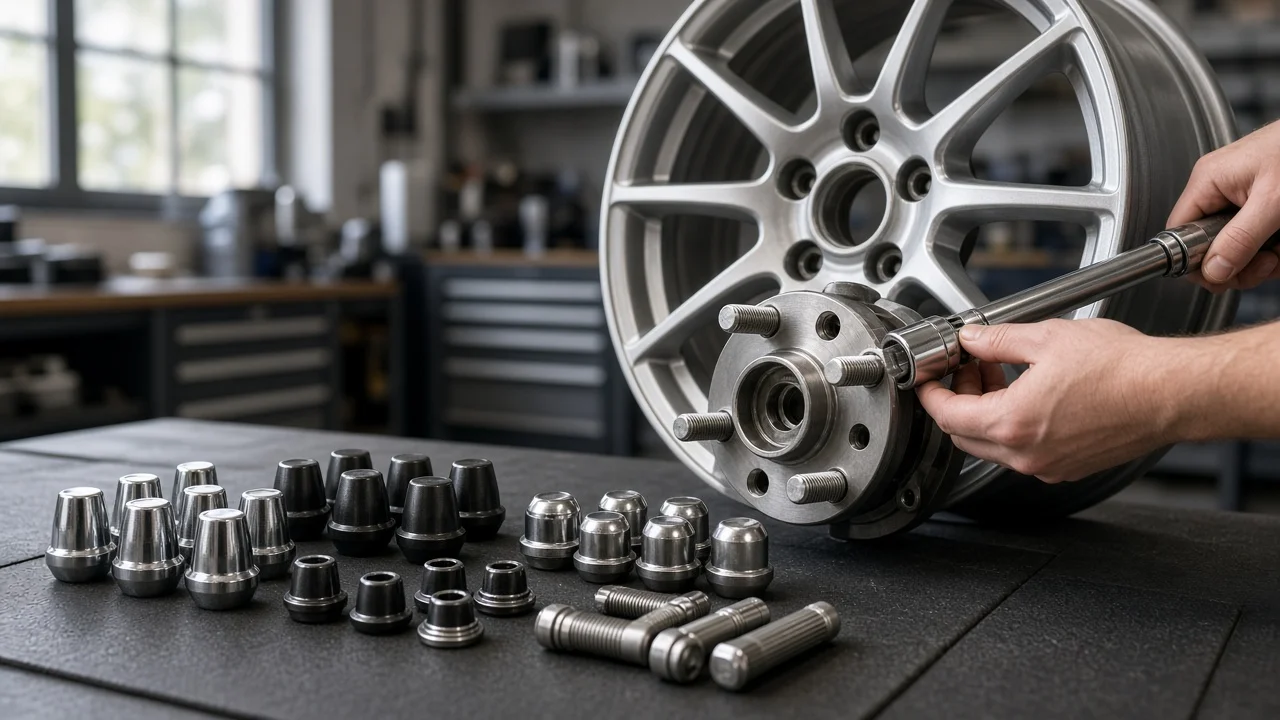
The Short Answer
The correct lug nut must match two things: the wheel stud on your vehicle and the lug hole on your wheel. The stud determines the thread size, thread pitch and thread direction. The wheel determines the seat type, the hole diameter (which limits the nut's outer size) and how much stud length the nut can engage. If either match is wrong, the wheel can loosen, damage the studs or come off while driving.
A lug nut is the threaded fastener that clamps a wheel against the hub by tightening onto a wheel stud, a threaded post fixed to the hub. The seat is the contact surface between the nut and the wheel. Thread pitch is the distance between threads, usually given in millimeters for metric studs or as threads per inch for imperial studs.
One condition changes the answer entirely: some vehicles do not use lug nuts at all. Many vehicles, particularly from several European manufacturers, use lug bolts that thread into the hub instead of nuts on studs. The same matching principles apply to bolts, but you must also match bolt length, and nuts cannot be substituted.
What Must Match
Thread diameter and pitch: written as diameter by pitch, for example M12 x 1.5, M14 x 1.5 or 1/2-20. These are common examples, not a list for any particular vehicle. A nut with the wrong pitch may start by hand and then cross-thread and strip the stud. Thread direction: most studs use right-hand threads, but some older vehicles used left-hand threads on one side. Check rather than assume on older or unusual vehicles. Seat type: the nut's seat must match the shape of the wheel's lug hole seat. Outer diameter and hex size: the nut and your socket must fit inside the wheel's lug hole, which is narrow on some aftermarket wheels. Thread engagement: the nut must engage enough of the stud. A widely used guideline is engagement at least equal to the stud diameter, but the wheel or vehicle manufacturer's requirement takes priority. Wheel material and design: original-equipment wheels and aftermarket wheels on the same vehicle often require different nuts.
Seat Types Compared
The seat is the most common source of mismatches, because nuts with the wrong seat often thread on normally and appear tight. The wheel then contacts the nut on only a small ring or point instead of the full surface, which concentrates load and lets the nut loosen over time.
Seat type | Shape | Where it is typically used | Key caution; Conical (tapered) | Cone-shaped seat, most commonly a 60-degree taper | Many aftermarket wheels and many original wheels | Confirm the taper angle; it is not universal; Ball (radius) | Rounded, spherical seat | Some original wheels from certain manufacturers | Do not interchange with conical; radius sizes also vary; Flat (mag) | Flat face, usually with a separate washer and a shank that enters the lug hole | Some original wheels, often alloy | Shank length and diameter must match the wheel; Spline drive | Usually conical seat with a slim body turned by a special key | Aftermarket wheels with small lug holes | Requires the matching key; keep it in the vehicle
Seat specifications vary between manufacturers and wheel lines, so treat the table as a guide to the categories rather than a substitute for the wheel maker's specification.
Choosing Among Lug Nut Styles
Once the thread and seat are correct, the remaining choices are about fit, durability and security. Compare them on the same criteria: whether they fit your wheel's lug holes, how they hold up to repeated removal and weather, and whether they add theft protection.
Style | Best fit | Trade-off; One-piece steel, closed end | Everyday road use where the studs are not too long | Studs that are too long can bottom out inside the nut before the wheel is clamped; One-piece steel, open end | Long studs, such as some trucks or vehicles with extended studs | Exposes stud threads to dirt and corrosion; Two-piece capped | Common original equipment on some vehicles for appearance | The decorative cap can swell or loosen, so the socket no longer fits properly; Spline drive or tuner | Aftermarket wheels with narrow lug holes | Needs a dedicated key; losing it makes wheel removal difficult; Locking lug nuts | Theft deterrence, usually one per wheel | Needs the matching key; replace the set if the key is lost; Aluminum (lightweight) | Motorsport uses where weight matters and fasteners are inspected often | Generally less durable than steel and more prone to thread wear and galling with repeated use
For most daily-driven vehicles, one-piece steel nuts with the correct thread and seat are the most practical choice. Choose open-end nuts only if your studs are long enough to need them, spline-drive nuts if your wheel's lug holes are too small for a standard socket, and locking nuts if theft is a concern and you will keep the key accessible.
Steps to Identify and Fit the Right Lug Nuts
Prerequisites: know your vehicle's make, model, model year and market, and know whether the wheels are original equipment or aftermarket. Equipment: a thread pitch gauge or a known-good nut for comparison, a caliper or ruler, a torque wrench with the correct socket, and wheel chocks plus a suitable jack and jack stands if wheels will be removed.
1) Confirm whether your vehicle uses studs and nuts or lug bolts. If it uses bolts, buy bolts instead and match length as well as thread and seat. 2) Find the thread size and pitch from the owner's manual, the vehicle manufacturer's specifications or the stud itself. Thread specifications can differ between model years and between trims, so do not rely on a different version of the same model. 3) Identify the seat type required by the wheel. For aftermarket wheels, use the wheel manufacturer's specification, because it may differ from the original nuts. 4) Check the lug hole diameter and make sure the nut body and your socket fit inside it. If not, choose a slim or spline-drive design. 5) Check stud length against nut type. Make sure the nut will provide adequate thread engagement and, with closed-end nuts, that the stud will not bottom out before the wheel is clamped. 6) Before installation, start each nut by hand for several turns. Stop if a nut binds or resists early; this indicates a wrong pitch or damaged threads, and forcing it can strip the stud. 7) Tighten the nuts in a star or crisscross pattern, first snug, then to the torque value specified for your vehicle and wheel. Use a torque wrench rather than an impact wrench for the final tightening. 8) Do not apply oil or anti-seize to the threads unless the vehicle or wheel manufacturer specifies it, because lubrication changes how much clamping force a given torque produces.
Completion check: every nut should seat fully and evenly against the wheel, the wheel should sit flush against the hub, and all nuts should reach the specified torque without slipping. Many wheel manufacturers and tire shops recommend rechecking torque after a short initial drive, particularly with new wheels or new nuts; follow the interval given in your manufacturer's instructions.
Stop and seek qualified service if a stud is stripped, bent or cross-threaded, if a nut will not seat flush, if the wheel does not sit flat on the hub, or if you cannot confirm the correct specifications. Replacing wheel studs involves the hub assembly and should be handled by a qualified technician unless you have the proper tools and instructions.
Limits of This Guide
This guide does not provide thread sizes, seat specifications or torque values for specific vehicles or wheels, because those depend on make, model year, market and wheel design. Those values must come from the vehicle manufacturer's documentation, the wheel manufacturer's specifications or a qualified technician. If your vehicle has aftermarket studs, wheel spacers or adapters, the original specifications may no longer apply, and the fitting should be checked by a professional.