How to Change Differential Fluid: Step-by-Step DIY Guide
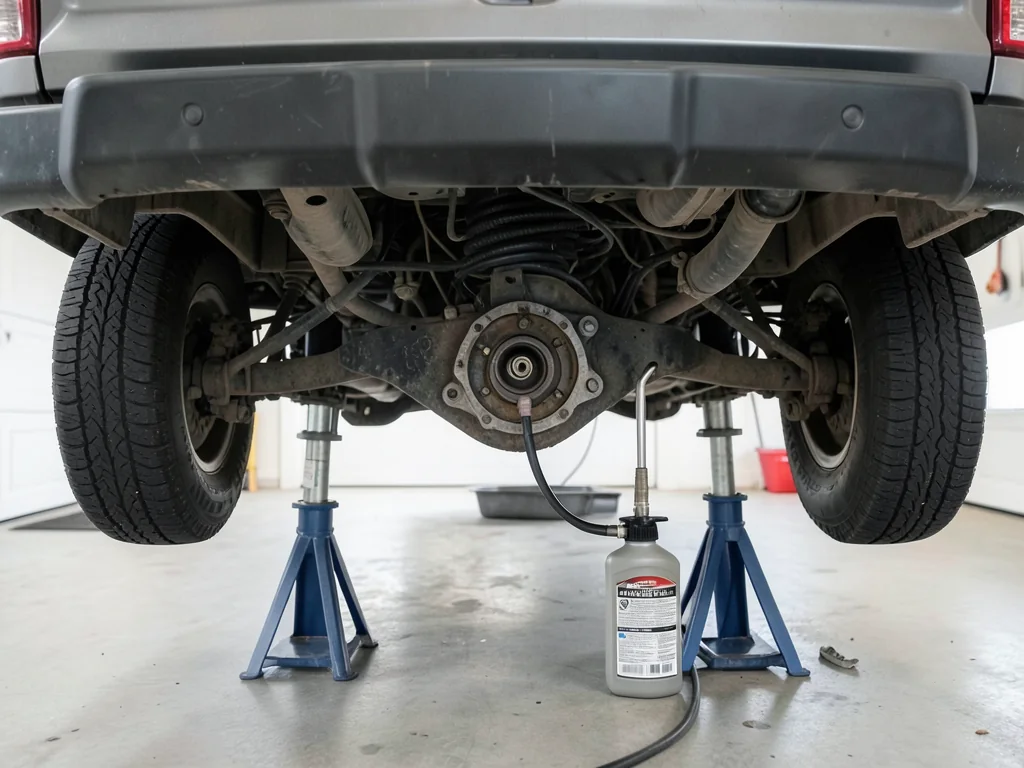
Changing differential fluid is one of the easier driveline jobs to do at home, as long as the vehicle can be lifted safely and the right tools are on hand. This guide covers draining, flushing and refilling front and rear units. It also explains how to choose pumps and extractors, how to pair the work with a transfer case service and how to handle the old oil responsibly.
What a differential fluid change involves and whether it is a DIY job
A differential splits engine torque between the left and right wheels and lets them turn at different speeds through corners. Its ring and pinion gears run in a bath of gear oil that is sheared constantly under heavy load. Over time, heat breaks down the oil's additives, condensation can get in through the vent, and normal gear and bearing wear leaves fine metal particles in the fluid. All of this weakens the oil's ability to protect the contact surfaces.
The basic sequence is simple. Lift and secure the vehicle, open the fill plug, drain or extract the old fluid, inspect it, refill to the correct level and reinstall the plugs. With a drain plug, most beginners can manage it. Designs with only a cover plate or a fill plug are harder. Seized plugs, gaskets that need sealant, limited-slip additive requirements or no safe way to lift the vehicle all justify a shop visit. Always confirm the fluid type, viscosity, capacity and limited-slip needs in the owner's manual or service data.
Tools and supplies: hand pumps, extractors, flush kits and what you actually need
The fill hole sits on the side of the housing, so you can't just pour thick gear oil in. A hand pump or fluid transfer pump is nearly essential. For units without a drain plug, a vacuum extractor pulls fluid out through the fill hole, but it usually leaves some old oil and settled debris at the bottom. Products sold as flush kits are typically just a pump, tubing and fittings. Differentials aren't machine-flushed like transmissions. Here, a flush means a thorough drain followed by a rinse and refill.
Besides the pump, you'll need a floor jack with rated jack stands or sturdy ramps, wheel chocks, and a drain pan that holds the full fluid capacity with room to spare. Get new crush washers or a cover gasket if the design calls for them, plus gloves and plenty of shop rags. Many differential plugs use square drives, large hex bits or unusual socket sizes. Identify the plug type before you start so you don't discover the problem halfway through the job.
Draining and flushing the rear differential
Park on level ground and chock the wheels that stay down. Lift at the manufacturer's jacking points and lower the vehicle onto jack stands before reaching underneath. Never work under a vehicle held up only by a jack. Next, loosen the fill plug before touching the drain plug. If the fill plug turns out to be seized or stripped, you can stop with the differential still full instead of being stuck with an empty unit you can't refill.
Let the old fluid drain or extract it, then inspect it. Dark color is normal, but a burnt smell suggests overheating, and a milky look points to water contamination. Fine gray paste on a magnetic drain plug is ordinary wear, while larger chips call for closer diagnosis. For a home flush, add a small amount of fresh fluid, turn the wheels by hand if the setup allows it, and drain again. On cover-plate designs, remove all the old gasket or sealant and clean the sealing surface thoroughly before reassembly.
Refilling the differential and checking the fluid level correctly
Reinstall the drain plug with a new crush washer where required, and tighten it to the specified torque instead of guessing. Then pump new gear oil into the fill hole until it just reaches the bottom edge of the opening. That check only works when the vehicle is level. If it has to sit at an angle, fill by the published capacity instead, because a tilted housing can look full when it is actually low or overfilled.
Limited-slip differentials may need a specific fluid or a friction modifier additive. Leaving it out can cause chatter or shudder in tight, slow turns. Don't overfill, because extra oil can be pushed past seals and out the vent, and never mix incompatible fluid types. Once the level is right, reinstall the fill plug and wipe the housing clean so any new seepage is easy to spot. Then lower the vehicle and check again for drips after a short drive.
Front differential fluid change: how it differs on 4WD and AWD vehicles
On most four-wheel-drive and all-wheel-drive vehicles, the front differential sits low near the engine, often tucked between suspension arms, steering parts and a skid plate. Access is tighter than at the rear. On some designs the front unit is built into the transmission or transfer case and shares its fluid. Check the service data to confirm that your front differential really is a separate serviceable unit before you buy fluid or loosen anything.
The drain-and-fill steps are the same as at the rear: loosen the fill plug first, then drain, inspect and refill. The correct fluid may differ from the rear unit's, so check instead of assuming. Expect obstacles such as a skid plate that has to come off, little room for a drain pan and plugs that face awkward directions. A pump with a long hose makes refilling much easier. Front units are often smaller, so confirm the capacity and level-check method in the service data to avoid overfilling.
Doing front, rear and transfer case fluid together in one session
Servicing both differentials and the transfer case in one session makes sense because the vehicle is already lifted, the wheels are chocked and the tools largely overlap. Each unit may need a different product, though. The transfer case usually has its own fill and drain plugs and its own fluid specification, which often isn't gear oil. Never assume it matches the differentials. Treat each unit as its own job, with its own fill-plug check and its own inspection of the old fluid.
Plan the order before you start, and label each fluid container so the correct product goes into each unit. Keep a simple written checklist of every unit, the fluid used and the amount added so nothing is left half drained or unfilled. Electronically controlled or clutch-type transfer cases sometimes need special fill procedures. A combined job on one of those is often better left to a shop that has the right service information and equipment.
How long it takes, cleanup and disposing of the old gear oil
Once the vehicle is lifted, a simple rear differential with a drain plug can usually be done in well under an hour. Cover-plate designs, front units and combined jobs take considerably longer, especially the first time. The biggest delays are stuck plugs, scraping off old gasket material, waiting for thick cold fluid to drain and hunting for the right plug tool. A short drive beforehand warms the oil so it flows faster, but let it cool enough to handle safely.
Used gear oil is hazardous waste. Pour it into a sealed container and take it to an auto parts store, municipal recycling site or service facility that accepts used oil. Never dump it on the ground or down a drain. Wipe the housing clean, and check again for leaks after a drive. Write down the date, mileage and fluids used so you have accurate information for the next service and can spot any leak that appears later.