How to Change Dashboard Lights: Bulb Replacement and LED Upgrades
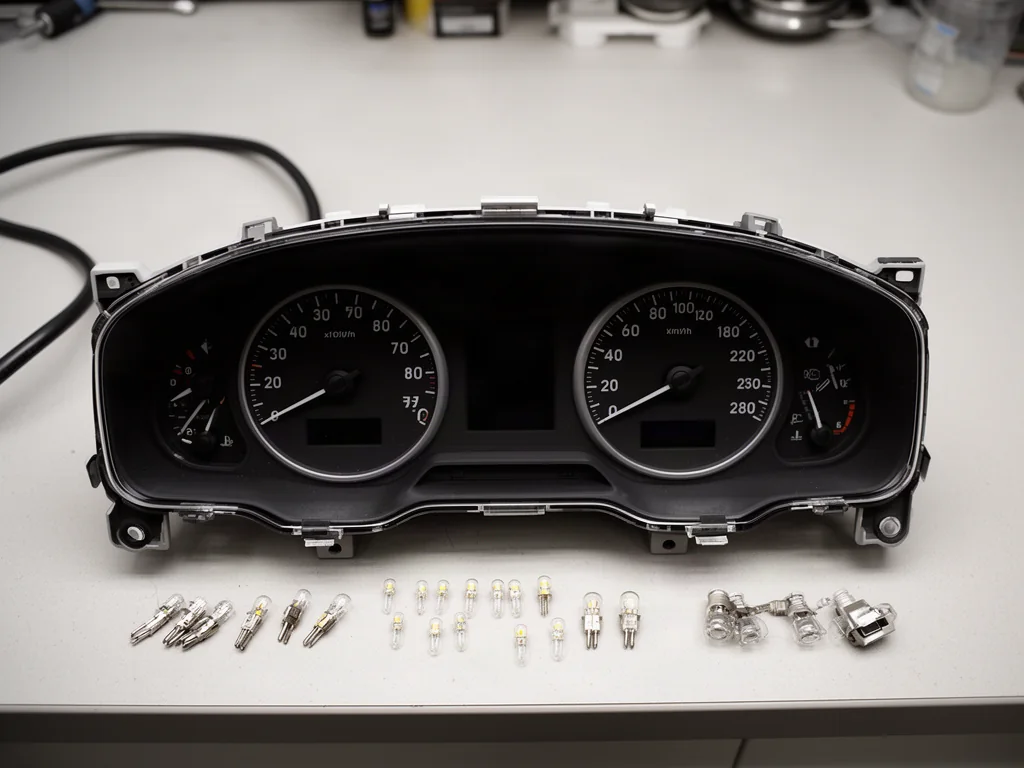
Aging instrument cluster illumination can leave speedometer and tachometer markings dim or uneven, making night driving less safe and less enjoyable. Many owners wonder whether car dashboard LED lights can replace tired incandescent bulbs, and how the job is actually done. Some gauge clusters have simple twist-out bulb sockets, while others use integrated LEDs or display panels that cannot be swapped at home. Knowing the difference matters before buying parts, because not every dash can accept an LED upgrade or a color change without unintended side effects.
Identify Which Dashboard Lights You Want to Change
Before ordering anything, define what lights you are trying to improve. Instrument cluster backlighting is the illumination behind the speedometer, tachometer, fuel gauge, and temperature gauge. It makes numbers, tick marks, and needles visible at night. That is different from warning indicators such as the check engine light, oil pressure light, or airbag symbol. Those warning LEDs are often colored red, amber, or blue, and their brightness and color must remain exactly as designed so the driver recognizes a fault instantly.
The owner's manual will identify the dashboard dimmer control and explain which part of the dash it affects. Many drivers mistake dim backlighting for a failed bulb when the dimmer is simply turned down or the automatic headlights have not switched on. Decorative LED strips or ambient footwell lighting are a separate project: they usually require new wiring and a control module, not a bulb swap. Keep the scope limited to the original gauge lighting unless a full custom install is planned, because mixing the two can lead to electrical conflicts and confusing nighttime displays.
Check Whether the Cluster Has Replaceable Bulbs
Whether you can replace dashboard lights depends on the cluster design. Older vehicles and some economy cars use small incandescent bulbs that twist into sockets in the back of the cluster. Those are straightforward: remove the bulb, match the base and wattage, and install a new one or a compatible LED with the same socket type. However, many modern cars use surface-mounted LEDs soldered directly to a circuit board. Those are not designed for field replacement, and even a skilled owner should not attempt to desolder them.
The exact vehicle, model year, trim level, and even production date can change the cluster. A parts catalog or service manual will list whether a 'bulb and holder' is available for your VIN. If the catalog shows no replaceable illumination bulbs, the cluster likely uses integrated LED backlighting or a full LCD display. In that case a dim spot is not a bulb failure; it is a circuit board or display fault. Removing the cluster for a professional evaluation is the only safe path, since prying at sealed electronics can destroy the instrument panel.
Observe the Lighting Problem Before Buying Parts
A systematic observation saves money. With the car parked and the engine running, turn the headlights on and move the dimmer from minimum to maximum. If the entire cluster is dark, check the fuse for the instrument panel illumination and the taillight circuit, because many vehicles share that fuse. If one gauge or one corner is dark, a single bulb or its socket connection is suspect. If the backlighting flickers or changes brightness with bumps, the problem may be a loose connector or a failing dimmer switch rather than a bulb.
These patterns are clues, not proof. A dark section can result from a burned bulb, a cracked solder joint, or a damaged light guide inside the cluster. Repeated outages of the same bulb often point to excessive voltage or a poor ground, and installing another bulb will not fix that. If there is any smell of burnt plastic, if the cluster goes dark while driving, or if the speedometer and fuel gauge become unreadable at night, stop and have a professional diagnose the circuit. Driving without essential gauge visibility creates a safety hazard far beyond a cosmetic bulb.
Understand the General Bulb Replacement Process
The general replacement process follows a logical order: confirm the bulb is serviceable, disconnect the battery or follow the vehicle's specified power isolation procedure, remove the trim and cluster using the exact instructions for your car, replace only the specified illumination bulb in its holder, and reassemble before reconnecting power. Trim removal is the most variable step. Some clusters come out after removing two screws and a bezel; others require removing the steering column cover, radio, or vent ducts. Never force a panel or use a metal pry tool against a dashboard.
Before starting, verify the correct bulb specification and holder arrangement from the service manual or parts listing. Do not guess a wattage or base type, because a higher-wattage bulb can melt the housing and a wrong LED can short the circuit. If the job requires disconnecting airbag connectors, steering wheel controls, or any yellow SRS wiring, leave it to a qualified technician. After reassembly, perform a parked check with the ignition on and headlights on: confirm even backlighting, smooth dimmer operation from low to high, correct gauge movement, and normal warning-indicator behavior during the bulb check.
Confirm LED Fitment, Polarity, and Dimming Support
Choosing an LED insert for a twist-socket cluster is not as simple as matching the base. The LED must fit inside the housing without hitting the gauge face or light diffuser. Its operating voltage must match the cluster's dimming circuit, and some CAN-bus systems will flag an LED as a burned bulb unless a compatible load resistor is installed. Polarity also matters. Incandescent bulbs work in either direction, but many LED replacements only light when inserted one way. If a new LED does not illuminate, remove it, rotate it 180 degrees in the socket, and test again with the ignition off during the swap.
Dimmer compatibility must be checked across the full range. Some LEDs do not start conducting until a certain voltage, which means they stay off at the lowest dimmer settings or flicker at mid-level. Others are too bright for comfortable night driving. Test the new lights in a dark garage: set the dimmer to minimum, then slowly raise it while watching for flicker, dead spots, or sudden jumps in brightness. If the LED requires soldering, circuit board modification, or bypassing the dimmer, the job has moved beyond a plug-in bulb replacement and should be handled by an instrument cluster specialist.
Choose a Color and Brightness That Keep Gauges Readable
Factory gauge faces often have blue or green tinted markings or translucent paint, so a white LED will look different than a white incandescent bulb. A blue LED behind a green filter can produce a muddy teal, and a red LED behind a blue filter may appear nearly black. Light guides and diffusers spread the glow across the gauge face; replacing one bulb with a narrow-beam LED can create a bright hot spot near the bulb and a dark area on the opposite side. Even a color that looks good on a workbench can make the needles disappear at night.
After installing any color change, perform a realistic parked test in full darkness. Sit in the driver's seat and check every gauge, every number, and the tip of every needle at low and high dimmer settings. Look for glare reflecting off the windshield and for areas that are too bright against the surrounding dash. Warning lamps such as the high beam indicator, turn signal arrows, and check engine light must retain their original colors and visibility; never paint over them or install colored bulbs in those sockets. If the new color reduces readability, switch back to a neutral white or warm white bulb that preserves the factory appearance.