How Do Manual Drum Brakes Adjust? Shoe Clearance, Pedal Feel and Service
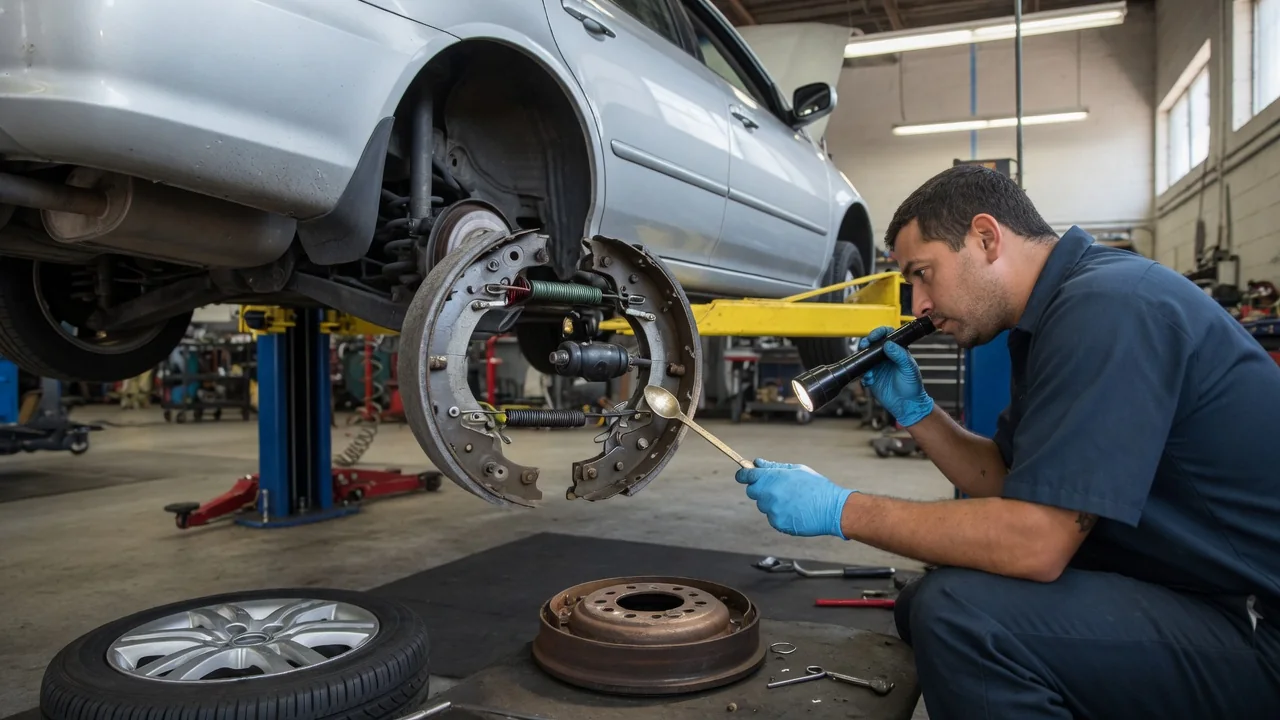
Manual drum brakes adjust through a mechanical adjuster that moves the brake shoes closer to the drum as the linings wear. Unlike self-adjusting designs, a manual system does nothing on its own. Someone has to turn a star wheel or cam at intervals to restore the correct clearance. Understanding how classic drum brake adjustment works explains why pedal travel grows between services, why a car may pull to one side, and what a careful adjustment actually changes.
Shoe clearance: what the adjuster actually moves
In a typical drum brake, two curved shoes are mounted on a stationary backing plate inside a drum that turns with the wheel. When the pedal is pressed, hydraulic pressure pushes the wheel cylinder pistons outward, forcing the shoes against the inside of the drum. When the pedal is released, return springs pull the shoes back to their resting position, leaving a small running clearance so the drum can turn freely. As the friction linings wear, that resting position stays roughly where it was, but the gap between lining and drum grows. Each stop then requires more piston travel, and therefore more pedal travel, before the shoes make contact. The adjuster exists to move the resting position of the shoes outward and close that gap again.
The most common manual design uses a threaded star wheel adjuster, sometimes called an adjusting screw, that links the ends of the two shoes opposite the wheel cylinder. Turning its toothed wheel lengthens or shortens the assembly, spreading the shoes apart or letting them close. It is usually reached through a slot in the backing plate, or on some designs through an opening in the drum, using a flat brake adjusting tool or a screwdriver to lever the teeth one notch at a time. Other classic layouts use cam adjusters instead: eccentric cams mounted on the backing plate that bear against the shoes and are turned from behind with a wrench, sometimes with one cam for each shoe. Which design a vehicle uses, where the access point is, and which direction tightens the adjustment are all vehicle-specific, and adjuster threads can differ between the left and right sides.
The goal is to set the shoes as close to the drum as possible without causing drag. A widely used method is to expand the adjuster while turning the wheel by hand until the shoes drag heavily or lock the wheel, then back the adjuster off until the wheel turns freely again. A faint, even scrape from minor drum irregularities is often considered acceptable, while a heavy or rhythmic drag is not. Some service manuals specify backing off a set number of notches or checking a measured clearance; that figure belongs to the specific vehicle and should come from its manual.
Pedal feel and what it says about adjustment
Shoe clearance shows up directly at the pedal. When the gap is excessive, the pedal travels further before anything happens, so the driver feels a low pedal that sinks a long way before the brakes bite. A pedal that comes up noticeably higher on a second quick stroke is a classic sign of excessive drum clearance, although the same symptom can have other causes. Once the shoes are properly adjusted, the pedal should engage higher in its travel and feel more immediate, because the pistons have less distance to cover.
Uneven adjustment produces different symptoms. If the shoes on one side of an axle sit closer to their drum than on the other, that side starts braking first and the car may pull toward it, especially during light stops. An imbalance between front and rear brakes can also change how the car settles under braking. Adjustment that is too tight causes its own problems: the shoes drag, generate heat, and can make a wheel noticeably warm after a drive. Heat expands the drum away from the shoes, which can lead to fade, and constant drag wears linings faster and wastes energy.
It helps to separate a low pedal from a soft one. A low but firm pedal points toward excess shoe clearance. A spongy, springy pedal usually suggests air in the hydraulic system or another hydraulic or mechanical flex, and no amount of adjustment will cure it. A pedal that slowly sinks under steady pressure points to a hydraulic leak or internal seal problem rather than clearance.
Service: adjusting manual drum brakes properly
Adjustment begins with the vehicle safely supported so the wheels can be turned by hand, and with the parking brake released so its linkage does not hold the shoes away from their rest positions. The service manual for the specific vehicle shows the access point and the tightening direction. With the access plug removed, the adjuster is turned in small steps while the wheel is rotated, following the tighten-then-back-off sequence until the wheel spins freely with the shoes close to the drum.
Removing the drum allows an inspection that adjustment alone cannot replace. Linings should have adequate thickness and be free of oil, grease or brake fluid; contamination often traces back to a leaking wheel cylinder or axle seal. Drums should be checked for scoring, cracks and out-of-round wear, and many drums carry a cast or stamped maximum diameter. Return springs and hold-down hardware should be intact and properly tensioned. The adjuster threads should be cleaned and lightly lubricated with a lubricant suited to brake use so they turn smoothly, and the raised contact pads on the backing plate where the shoes slide benefit from the same attention. A seized adjuster cannot be adjusted at all and must be freed or replaced.
Order matters. The service brakes are adjusted first and the parking brake cable afterward, because tightening the cable first can preload the shoes and give a false reading. Both wheels on an axle should be brought to a similar feel, followed by a careful low-speed road test to check for pulling and then a recheck if needed. New linings typically wear in as they conform to the drum, so many manuals call for checking the adjustment again after an initial period of use.
Practical implications and limits
Because a manual system has no automatic compensation, its condition depends on maintenance habits. How quickly clearance builds up varies with lining material, driving style, load and terrain, so there is no universal interval that fits every car. Owners of classic vehicles often treat pedal height as an early indicator and schedule adjustment when it begins to drop. It is also worth remembering that adjustment restores clearance but adds no friction material: when linings approach their wear limit, turning the adjuster only postpones replacement.
Adjustment also has firm limits. It cannot correct hydraulic faults, sticking wheel cylinders, weak springs, contaminated linings or drums that are worn beyond their limit. An oversized drum may even require more adjuster travel than the mechanism provides. Procedures, adjuster types and specifications differ between vehicles, so the general mechanism described here should always be paired with the correct manual for the car in question. Since brakes are safety-critical, anyone unsure about the condition of the components or the result of an adjustment should have the system checked by a qualified technician.