Honda Odyssey Check Engine Light: Causes and Next Steps
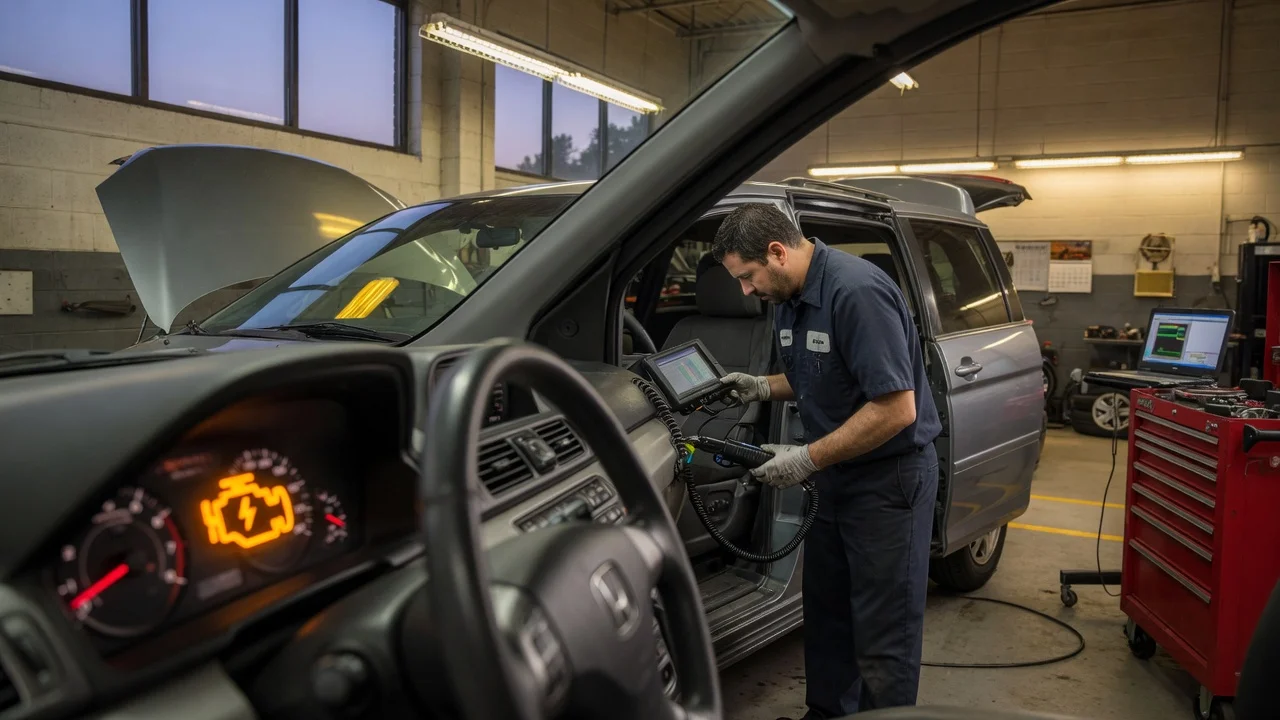
What the light means on a Honda Odyssey
A check engine light on a Honda Odyssey—also called the malfunction indicator lamp (MIL)—means the powertrain control module has detected a problem that can affect emissions or drivability and has stored at least one diagnostic trouble code (DTC). The lamp is a prompt to identify the failed monitor or circuit with a scan and follow-up tests. Scope covers gasoline Odyssey minivans in typical U.S. form from the mid-1990s onward; sensors, evaporative-emission hardware, cylinder-deactivation features, and transmission control differ by generation, engine, and market.
U.S. models from the 1996 model year onward use the standardized OBD-II connector for code reading. The 1995 U.S. Odyssey and some non-U.S. vans may use an older diagnostic protocol, so a generic OBD-II tool may not communicate. Exact test limits, monitor enable criteria, and known service campaigns are VIN- and year-specific and sit in Honda service information; those details are a gap without the stored code, freeze-frame data, and the van’s build data.
Solid light versus a flashing light
Lamp behavior | What it typically indicates | Immediate action; Steady (solid) MIL | A stored or pending emissions or powertrain fault; many vans still drive with little or no change in feel | Note other warnings, check the fuel-filler cap, and read codes soon; Flashing MIL | An active engine misfire while the engine is running; unburned fuel can overheat the catalytic converter | Reduce speed and load, avoid hard acceleration, and stop when it is safe if roughness continues; MIL plus another warning (temperature, oil pressure, charging) or a fuel smell | A broader engine, cooling, lubrication, or leak concern may be present | Treat as a stop-and-diagnose condition rather than a simple emissions reminder
A flashing lamp is the condition that most often requires stopped use. Continuing to drive under load with an active misfire can damage the catalytic converter, which is an expensive emissions component downstream of the exhaust manifold. A solid lamp with otherwise normal running still needs a scan, because some faults worsen or leave the van unready for an emissions inspection if ignored.
Plausible causes and what each check suggests
Several systems can set the same lamp. The list below is a diagnostic starting map for Odyssey vans, not a confirmation that any one part has failed. A DTC names the monitor or circuit that did not pass; it is evidence to test that system.
Fuel-filler cap and evaporative emission (EVAP) system: A loose, missing, or cracked cap after refueling is a frequent trigger and often produces no change in how the van drives. EVAP also includes the purge valve, vent valve, vapor canister, and hoses. Honda vans have a long record of EVAP leak and canister-related codes; those codes mean a leak or flow test failed, which still requires a smoke or flow test to locate the opening. Ignition misfire: Worn spark plugs, a failed ignition coil, a fuel-injector fault, or oil-fouled plugs can set cylinder-specific or random-misfire codes and may cause a rough idle, stumble, or vibration. Many V6 Odyssey engines from roughly the 2005 model year through later generations use Variable Cylinder Management (VCM), Honda’s cylinder-deactivation system. VCM-related oil consumption and plug fouling are a documented diagnostic path on a large share of those engines; that history still needs plug, coil, compression, and oil-condition checks on the van in front of you. Air-fuel and oxygen sensors: Upstream oxygen sensors help the computer trim fuel. Downstream sensors mainly watch catalyst efficiency. A lazy or failed sensor, a vacuum leak, or (on years so equipped) a contaminated mass-airflow sensor can set mixture or sensor-circuit codes. Live fuel-trim and sensor-voltage data decide whether the sensor or the air leak is the problem. Catalytic converter efficiency: The module compares upstream and downstream oxygen-sensor activity. A catalyst-efficiency code can follow a failing converter, an exhaust leak ahead of the downstream sensor, a misfire that dumped fuel into the exhaust, or a slow oxygen sensor. Converter replacement belongs after those checks. Honda VTEC oil control: Variable Valve Timing and Lift Electronic Control (VTEC) uses oil pressure and a solenoid or switch. Low oil level, dirty oil, or a faulty VTEC pressure switch or solenoid can set a valve-timing or VTEC circuit code, sometimes with a loss of power in the upper rev range. Automatic transmission and other powertrain codes: On many Hondas the same MIL can illuminate for certain transmission solenoid, ratio, or lock-up faults, sometimes together with a separate gear-position or D indicator. Those codes call for transmission-fluid condition and electrical tests, not an engine-only parts swap. Wiring, connectors, and after-refuel or after-repair events: Rodent damage, a recent battery disconnect, poor fuel, or work on the intake or exhaust can set circuit or readiness codes. Recent history is part of the diagnosis.
Observable results map to next tests in a consistent way. A cap that was loose and a single EVAP leak code, with smooth running, points first at the cap seal and a drive cycle so the EVAP monitor can run again. Rough running plus a flashing lamp or a misfire code points at ignition, fuel delivery, and engine mechanical tests before any catalyst work. A catalyst-efficiency code with a history of misfire points at repairing the misfire and checking for exhaust leaks. Transmission-related codes with delayed engagement or harsh shifts point at fluid condition and transmission electrical diagnosis. Material uncertainty remains until freeze-frame data (engine speed, load, coolant temperature, and fuel trims at the moment the code set) is read for that van.
What to check next
Confirm lamp behavior and other instruments. Write down whether the MIL is solid or flashing and whether temperature, oil, charging, or brake warnings are on. Flashing, severe bucking, overheating, or a strong fuel smell is a stop-when-safe and professional-diagnosis condition. Inspect the fuel-filler cap. Thread it until it clicks, and look at the rubber seal for cracks or flattening. This check is worthwhile after a recent fill-up and when the van otherwise drives normally. Record recent events. Note refueling, a low tank, jump-starting, a battery change, an oil service, a missed oil change, or parking where rodents are active. Those facts steer EVAP, reset, misfire, and wiring tests. Read the codes before clearing them. On 1996-and-later U.S. vans, plug a compatible OBD-II scan tool into the under-dash port, typically left of the steering column. Save every stored and pending code and the freeze-frame snapshot. Clearing the memory without a record removes the evidence the technician needs and may only hide the lamp until the monitor fails again. Treat each code as a test plan. Confirm power, ground, and connector condition on the named circuit; compare fuel trims, misfire counters, and oxygen-sensor switching to Honda specifications for that year and engine; and inspect for exhaust or vacuum leaks when catalyst or mixture codes are present. Arrange professional diagnosis when you cannot retrieve codes, when multiple modules or a transmission code are involved, when the van is in reduced-power operation, or when tests require Honda factory software, a smoke machine, or mechanical measurements such as compression or fuel pressure. Factory tightening values, fuel-pressure specifications, and monitor drive-cycle steps are year-specific and are a gap without the applicable Honda service procedure.
The durable way to turn the lamp off is to correct the fault so the related OBD-II monitor can complete and pass. After a repair, the light may stay on until that monitor runs, which can take several mixed city and highway trips. Disconnecting the battery or using a tool only to erase codes, without a confirmed repair, typically brings the lamp back and can reset emissions readiness status needed for inspection in many regions.
When to stop driving and when a shop is the next step
Stop as soon as it is safe if the MIL is flashing and the engine is rough, if coolant temperature climbs, if oil pressure is low or the oil warning is on, if there is a heavy fuel or exhaust smell in the cabin, or if the van loses power in a way that affects traffic safety. Towing is appropriate when continued running risks converter or engine damage. Seek professional diagnosis if codes point inside the engine or transmission, if a catalytic converter or EVAP canister replacement is being considered, if wiring repairs are needed under the dash or in the harness, or if an emissions inspection deadline depends on restoring readiness monitors correctly. A running, smooth van with a solid MIL can usually be driven a short distance to a parts store or shop that can scan codes, with gentle throttle and attention to any change in noise, smell, or temperature.
Generation and equipment differences
Early U.S. Odyssey vans (about 1995–1998) used a four-cylinder engine and different emissions hardware from the V6 generations that followed. From the 1999 model year, U.S. vans have used a 3.5-liter V6 in several revisions, with VCM cylinder deactivation on a large share of 2005-and-later engines. Automatic-transmission design also changes across the third (about 2005–2010), fourth (about 2011–2017), and fifth (2018–present) generations, including later multi-speed units. Those differences change which sensors exist, which misfire and EVAP codes are common, and which Honda service bulletins apply. Claims about a single failed part across all Odysseys are not supportable without the model year, engine, and stored DTC.
Hybrid Odyssey variants exist in some markets outside the typical U.S. gasoline lineup; high-voltage system faults on those vans follow a different diagnostic path than the gasoline MIL discussion here. When the year, market, and code are unknown, the supported next action remains the same: identify solid versus flashing behavior, protect the catalytic converter if the lamp is flashing, read and record the DTCs, and confirm the failed system with tests before replacing parts.