Honda CR-V Roof Rack Installation: Checking the Model Year and Mounting System
What determines how a CR-V roof rack installs
Honda CR-V roof rack installation is not a single procedure. The correct rack, fit kit, and mounting method depend on the vehicle’s model year (generation) and on the roof hardware already present: raised side rails, flush or low-profile rails, factory crossbars, or a bare roof with no rails. Confirm both of those facts before buying parts or starting work. A kit made for one generation will not clamp or load correctly on another.
Model year and generation
Roof shape, drip-rail or door-frame geometry, and factory rail design change by generation. Use the model year on the vehicle, not a catalog nickname, when matching a rack. Approximate U.S. generation ranges used for rack fitment are: first generation 1997–2001 (a 2000 CR-V belongs here), second generation 2002–2006, third generation 2007–2011, fourth generation 2012–2016, fifth generation 2017–2022, and sixth generation 2023 onward. Trim, market, and optional equipment can still change the roof within a generation, so year alone is not enough.
The three mounting systems you will actually see
Most CR-V rack jobs fall into one of three physical setups. Identify which one is on the vehicle by looking at the roof from the side and from above, with the doors closed.
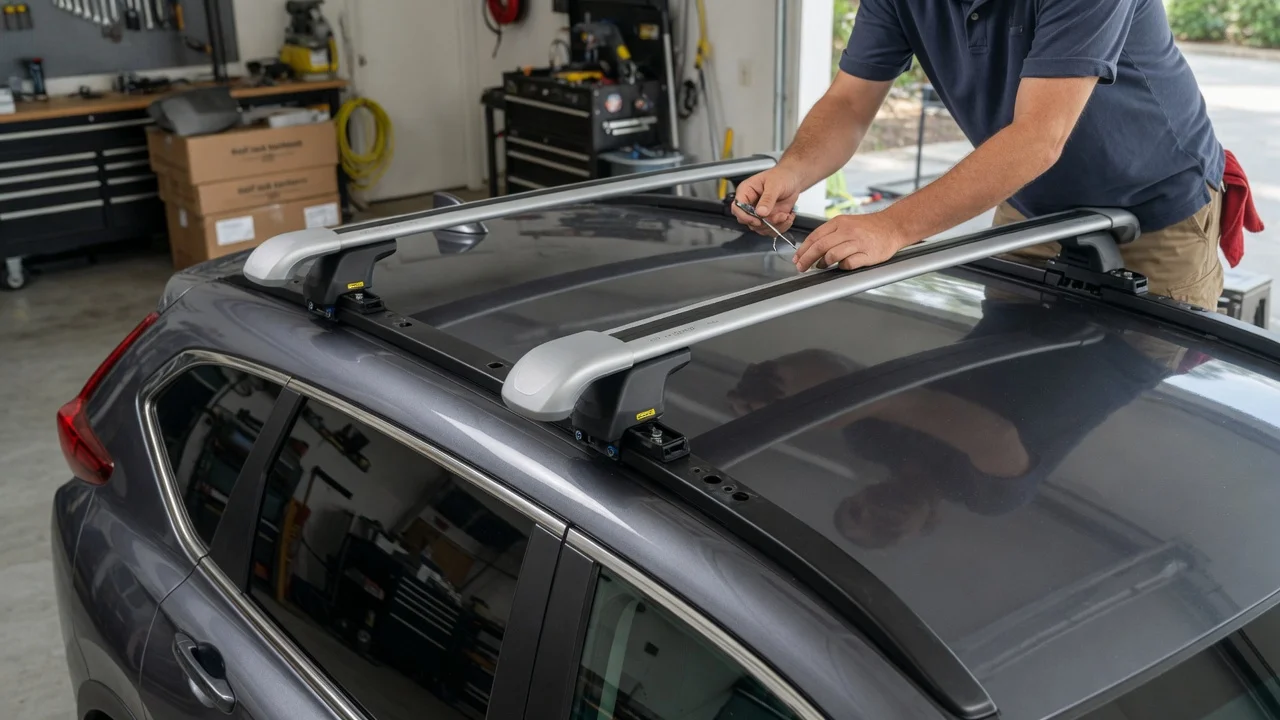
Raised side rails: factory rails stand proud of the roof along both sides. Crossbars clamp around or onto those rails, usually without drilling. This is the most common factory accessory layout on earlier CR-Vs that were optioned with rails. Flush or low-profile rails: rails sit nearly even with the roof skin. They need a clamp or pad kit made for that rail profile; a raised-rail clamp will not seat. Bare roof (no rails): the rack uses four towers (feet), pads or a vehicle-specific fit kit, and a strap or clip that engages the door frame or a similar body edge. Nothing should be drilled into the roof panel unless a documented Honda or rack-maker procedure for that exact year calls for it.
Some CR-Vs also leave the factory with crossbars already installed on the side rails. Those bars may be removable. Replacing them still requires a bar set sized to that rail type and that generation’s roof width. Mixing bars from another Honda model, or from a different CR-V generation, is a common source of poor clamp contact.
First-generation and 2000 CR-V notes
A 2000 Honda CR-V is a first-generation vehicle. Roof-rack work on that year follows the same two checks: confirm whether factory side rails are present, then choose a first-generation CR-V kit rather than a later-generation kit. Many 1997–2001 CR-Vs were built without rails; others received raised rails as an accessory or higher-trim option. If rails are present, crossbars typically clamp to those rails. If the roof is bare, a complete tower-and-bar system with a first-generation CR-V fit kit is the supported path. Do not assume a 2000 kit is interchangeable with 2002-and-later CR-Vs; the body and roof changed for the second generation.
Documented torque values, clamp-opening measurements, and OEM part numbers for 2000 CR-V rails and aftermarket kits are not included here. Use the rack manufacturer’s year-specific instructions and Honda’s service information for that VIN when those figures are required.
What to confirm on the vehicle before you start
Read the model year from the certification label on the driver’s door jamb, then match the rack listing to that year and to CR-V, not to a generic Honda listing. Photograph the roof from the side so you can tell raised rails from flush rails from a bare roof. Check for existing crossbars, unused clamp tracks, or factory mounting pads under any trim strips. Note whether a sunroof is fitted; some bar positions and load ratings change when a sunroof is present. Record the intended load (bikes, a box, lumber) so bar spacing and load rating can be checked against the rack maker’s figures for that year.
Typical installation sequence after the system is identified
Once the year and mounting type are known, installation follows the kit’s instructions for that CR-V. The usual order is: assemble each bar and its clamps or towers off the vehicle; place pads or rubber strips so they sit on the rail or on the marked roof contact points, not on painted edges that the kit does not cover; set both bars in place and equalize side-to-side overhang; tighten clamps or tower hardware in the sequence the maker specifies, then recheck after a short drive. On bare-roof kits, the door-frame clips or straps must sit in the kit’s intended channel; forcing them onto weatherstrip or onto a painted return flange that the instructions do not name can crush the seal or scratch paint.
Factory raised-rail clamps should fully capture the rail’s inner and outer lip as the kit diagram shows. Partial bite on only the top of the rail is a misfit, often from using a later-generation clamp on an earlier rail, or the reverse. Flush-rail kits use a different jaw or a T-slot accessory; they are not interchangeable with raised-rail clamps.
Load, legal, and service limits
Roof load capacity is the lower of the CR-V’s roof rating for that year and the rack’s rating. Those two numbers are published separately and are not interchangeable. Dynamic (driving) ratings are lower than static (parked) ratings. Crossbar spacing, bar shape, and whether the load is in a box or on exposed mounts all change how that rating is applied. This article does not list pound or kilogram figures because they vary by year, trim, and rack model and must be read from the owner’s manual and the rack label for the vehicle in hand.
After installation, re-torque clamp or tower hardware at the interval the rack maker specifies, typically after the first short trip and then at regular service intervals. Check that doors, the hatch, and a sunroof still close without pinching straps or weatherstrip. If the roof has been drilled, or if a previous owner used adhesive pads, treat the job as a body-integrity question and use Honda service information for that VIN rather than a generic clamp-on procedure.
What this guide does not replace
Year-by-year Honda torque specs, exact rail cross-sections, OEM crossbar part numbers, and aftermarket fit-kit SKUs are not documented in the material available for this article. Those values are generation- and kit-specific. The supported next action is to identify the CR-V’s model year and roof type, then follow the matching Honda or rack-manufacturer procedure for that combination. If the roof type is unclear (for example, covered mounting points, damaged rails, or a non-factory rack already installed), stop and have the roof inspected before clamping a new system.