Ford F-150 Rear Axle Shaft Removal
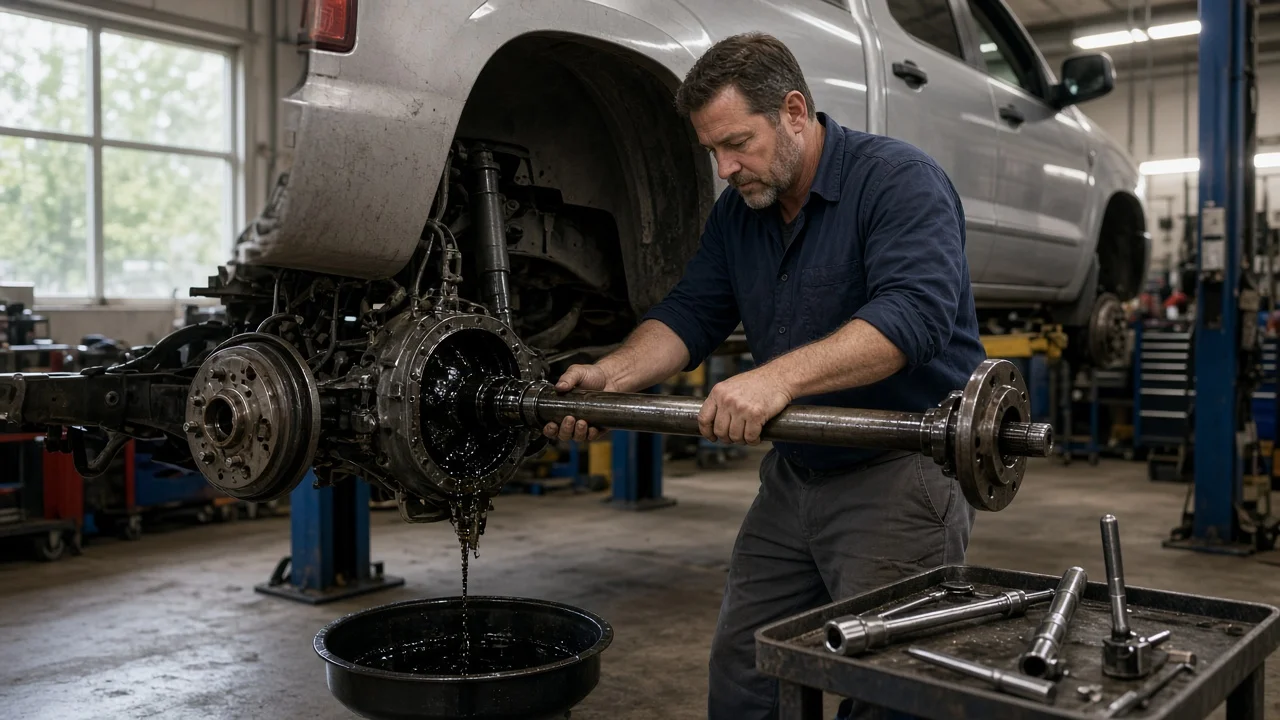
Pulling a rear axle shaft on a Ford F-150 is a common step when you replace a leaking axle seal, a worn wheel bearing, a damaged shaft or broken wheel studs. An owner with solid mechanical skills can do the job. However, it opens the differential and disturbs parts that must go back exactly right. This guide covers repair scope, preparation, removal, installation and final checks. Throughout, it defers to the service information for your specific truck.
Confirm the part and repair scope
Start by matching the truck to the job. F-150 rear axles have varied by generation and option. Ring gear sizes, spline counts and differential types differ, and a truck may have an open, limited-slip or electronic locking unit. Most conventional F-150 rear axles are semi-floating designs that hold each shaft in place with a C-clip inside the differential. That is the layout this guide assumes. Full-floating heavy-duty axles and electric drive units use different procedures and are outside this scope. The axle code on the certification label in the driver door area identifies the ratio and differential type, as does a tag on the differential cover where one is fitted. A dealer or parts counter can decode that code against the VIN. Order shafts, bearings and seals for that exact vehicle configuration rather than by model year alone.
Next, confirm that removing the shaft actually addresses the symptom. Gear oil on the inner wheel, brake parts or backing plate usually points to an axle seal. A growl or hum that changes with speed or load can come from a wheel bearing, but it can also come from the differential bearings, gears or tires. A clunk may come from driveline lash or worn joints elsewhere. A hands-on inspection with the wheel off helps separate these causes. So does checking the fluid level and condition and reviewing the service history. On a semi-floating axle, the wheel bearing rolls directly on the shaft surface. A pitted or grooved bearing journal therefore means replacing the shaft or using a repair bearing designed for that purpose. A new bearing alone will not fix it.
Prepare tools and safe access
You will need the following tools: a floor jack, rated jack stands, wheel chocks, a socket set, a breaker bar, a torque wrench, a drain pan and a gasket scraper. If you are replacing the bearing, add a seal puller, a bearing puller or slide hammer, and a correctly sized seal and bearing driver. You will also need these parts and materials: a new cover gasket or the specified sealant, the correct gear oil and any friction modifier the manufacturer specifications call for with a limited-slip differential. Have thread locker or a new pinion shaft lock bolt on hand if the service procedure requires one. Clean rags and a magnet help with retrieving C-clips.
Work on level ground. Chock the front wheels and support the axle or frame on stands, never on the jack alone. Obtain factory service information for your truck before starting. Torque values, cover sealing method, fluid type and capacity, and some removal steps differ between axle versions, so do not guess at them. The job involves removing brake components and working inside the differential. If you are not comfortable restoring brakes or seating bearings and seals squarely, a qualified shop is the safer choice. Trucks with an electronic locking differential need extra care because of their wiring and internal parts. So do trucks with a wheel speed sensor near the axle end.
Remove without avoidable damage
First, remove the wheel and release the parking brake. Then remove the brake caliper and hang it with wire so the hose does not carry its weight. Remove the caliper bracket and rotor, or the drum on trucks so equipped. Note how the parking brake hardware is arranged before disturbing it. If the wheel speed sensor or its harness is in the way, move or protect it as the service information directs.
Clean around the differential cover, loosen its bolts and drain the fluid into the pan. Look at the drained oil and the gears for metal chunks, heavy glitter or a milky appearance from water. Any of these signals wider differential problems. Rotate the carrier until you can reach the pinion shaft lock bolt, also called the cross shaft bolt. Remove the bolt and slide the pinion shaft out carefully. Once the shaft is out, do not rotate the axle or carrier. The side and pinion gears can shift out of position or fall. Limited-slip and locking units may require additional steps here, so follow the procedure for that differential.
Push the axle shaft inward toward the center of the housing to expose the C-clip on its inner end. Remove the clip; a magnet keeps it from dropping into the housing. Slide the shaft straight out, supporting its weight so the splines do not drag across the bearing or seal. Mark which side it came from. Inspect the splines, the bearing journal, the flange and the wheel studs for wear or damage.
Install and restore the system
If you are replacing the bearing and seal, pull the old seal and bearing and clean the housing bore. Then drive in the new bearing and seal squarely with a driver that contacts the correct surfaces. Install the seal oriented as designed, with its sealing lip facing the fluid side, and lubricate the lip as the part instructions specify. Slide the shaft in carefully and turn it slightly to engage the side gear splines without forcing it. Keep the shaft from scraping the new seal on its way in.
Fit the C-clip into its groove, then pull the shaft outward so the clip seats in the side gear recess. Reinstall the pinion shaft and align its bore with the lock bolt hole. Install the bolt using thread locker or a new bolt as specified, and tighten it to the published value. Clean both sealing surfaces fully. Install the cover with the specified gasket or sealant and tighten its bolts in the recommended sequence. Refill with the specified gear oil to the correct level, adding friction modifier if the differential requires it. Reinstall the rotor or drum, the caliper bracket, the caliper and the parking brake components. Reconnect or secure the wheel speed sensor. Tighten every fastener, including the lug nuts, to manufacturer specifications.
Check the completed work
Pump the brake pedal until it is firm before moving the truck, and confirm that the parking brake holds. With the wheel still raised, spin it by hand. It should turn smoothly without grinding, clicking or drag beyond normal brake contact. Check the fluid level again and look for seepage at the cover and the axle seal.
Road test the truck at low speed first. Listen for noise in straight-line driving and during tight turns, and watch for ABS or traction control warnings. Afterward, inspect the seal area and the cover again. Recheck lug nut torque if the service information advises it, and record the work in the service history.
Several signs call for further diagnosis. Fresh gear oil at the wheel can point to a damaged bore, a worn shaft journal, overfilling or a blocked axle vent. A hum that persists may originate in the differential bearings, pinion bearing or tires rather than the wheel bearing. A clunk or excessive shaft movement can mean a C-clip that has not seated or wear inside the differential. A warning light points to the wheel speed sensor or its wiring.