Ford F-150 Rear Axle Bearing Replacement
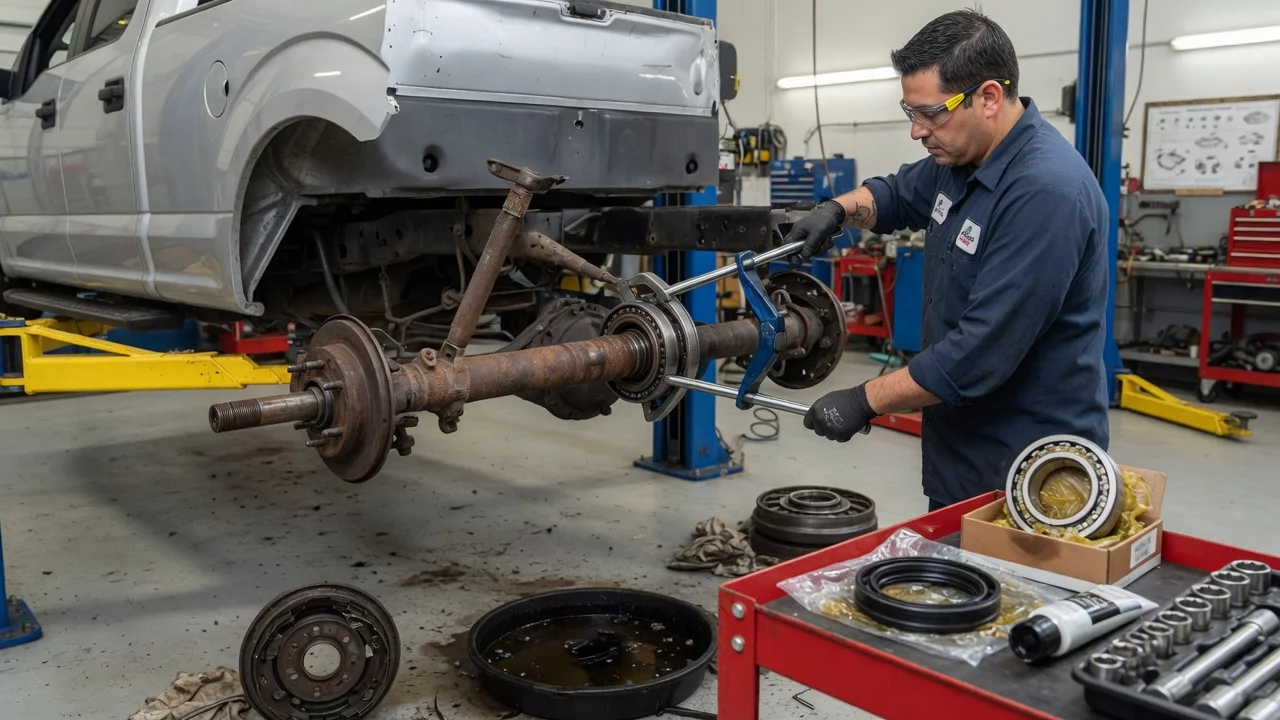
A worn rear axle bearing on a Ford F-150 usually shows up as a growl or hum from the back of the truck that rises with road speed. An experienced home mechanic can replace one, but the procedure depends on the axle design. A leaking seal or a damaged shaft can also turn a simple bearing swap into a larger repair. This guide covers confirming the diagnosis, removing the axle shaft, installing new parts and checking the finished job.
Confirm the part and repair scope
F-150 rear axles have changed across generations and option packages, so start with the exact vehicle configuration rather than a generic parts listing. The axle code on the Safety Compliance Certificate label in the driver door opening identifies the axle ratio and whether the truck has a limited-slip or locking differential. Many F-150 rear axles are semi-floating designs. In these, a C-clip inside the differential holds the axle shaft in place, the bearing is pressed into the end of the axle tube, and the rollers ride directly on the shaft. Other configurations retain the shaft with a bolted retainer plate and use a bearing pressed onto the shaft itself. The parts, tools and steps differ between these designs. Match the bearing and seal to the model year, drivetrain, axle code and build details, and work from the factory service information for that truck.
Before buying parts, make sure the bearing is really the source of the problem. Wheel bearing noise usually follows vehicle speed rather than engine speed, and it may change when weight shifts during gentle turns. Unevenly worn tires, differential pinion or carrier bearings, and driveline problems can sound very similar. With the rear raised and supported, spin each wheel by hand and feel for roughness or grinding. Look for gear oil on the backing plate, brake parts or the inside of the wheel, which points to a leaking axle seal. On C-clip axles a small amount of in-and-out movement is normal, so end play alone does not prove a failure. Review the service history and operating conditions as well. Earlier axle work, deep water crossings and heavy towing all help narrow the cause. If the differential fluid contains metal or the gears themselves are noisy, replacing the wheel bearing alone will not solve the problem.
Prepare tools and safe access
You will typically need a floor jack, rated jack stands, wheel chocks, a torque wrench, sockets and wrenches, a drain pan and a gasket scraper. You will also need a slide hammer with an axle bearing and seal puller attachment, and a bearing and seal driver sized for the housing bore. Have brake cleaner and shop towels on hand. For parts, get the new bearing and seal, a differential cover gasket or approved sealant, and the gear oil specified for the axle. Limited-slip units may also need a friction modifier. Park on level ground, chock the front wheels, and support the truck on stands under the axle housing. Never work under a vehicle held only by a jack.
Look up the manufacturer specifications before you start rather than relying on memory or forum figures. You need torque values for the lug nuts, caliper bracket, differential cover and pinion shaft lock bolt, the fluid type and capacity, and whether any fasteners are single-use or need thread locker. Trucks with an electronic locking differential or other special equipment may follow a different procedure, so confirm that in the service information. Retainer-plate axles require pressing a bearing and retaining ring off and onto the shaft with a hydraulic press, which is generally a machine shop task. If you are not comfortable working on brakes and inside a differential, have a qualified shop do this repair.
Remove without avoidable damage
On a C-clip axle, remove the wheel, then the brake caliper. Hang the caliper with wire so it does not dangle from the brake hose. Remove the caliper bracket and rotor, or the drum on drum-brake trucks, releasing any parking brake adjustment that prevents removal. If a wheel speed sensor is mounted near the axle end on your truck, remove or protect it as the service information directs. Drain the differential by removing the cover or drain plug, depending on the axle. Rotate the carrier until the pinion shaft lock bolt is accessible, remove the bolt, and slide the pinion shaft out without letting the gears shift out of place. Do not turn the wheels or driveshaft while the shaft is out.
Push the axle shaft inward, remove the C-clip from the shaft end, and slide the shaft out. Support its weight so the splines do not drag through the bearing or nick the housing. On limited-slip or locking units, leave clutch packs, springs and locker components undisturbed unless the procedure says otherwise. Pull the old seal and bearing from the tube with the slide hammer. Then inspect the shaft where the rollers ride. Pitting, flaking or grooves on that surface mean the shaft needs replacement, because a new bearing will wear quickly on a damaged journal. Some aftermarket repair bearings ride on a different section of the shaft. Use one only if it is listed for your exact axle. On retainer-plate axles, remove the plate fasteners through the axle flange access holes and pull the shaft with the slide hammer. Bearing and ring replacement on the shaft is then done with a press.
Install and restore the system
Clean the housing bore and check it for burrs or damage. Drive the new bearing in squarely to its seated position using a driver that contacts only the outer race, and follow any orientation markings or instructions supplied with the part. Install the new seal the same way, with the sealing lip facing the differential, and lubricate the lip as the instructions specify. Slide the axle shaft in carefully so the splines do not cut the seal, and engage the side gear. Fit the C-clip, then pull the shaft outward to seat the clip in its recess. Reinstall the pinion shaft and lock bolt, tightening the bolt to specification with a new bolt or thread locker if the service information requires it.
Clean the differential cover and housing mating surfaces, apply the specified gasket or sealant, and tighten the cover bolts evenly to specification. Fill the axle to the correct level with the specified gear oil, adding friction modifier if the limited-slip unit calls for it. Reassemble the brakes and wheel, torquing each fastener to its specified value. If gear oil reached the brake pads or shoes, replace them. Oil-soaked friction material cannot be reliably cleaned and can cause grabbing or poor stopping. Pump the brake pedal until it is firm before moving the truck.
Check the completed work
Road test at the speeds where the noise was most noticeable, including gentle turns in both directions. Confirm that the brake pedal feels normal and that no ABS or traction warning lights are on. After the drive, inspect the inside of the wheel, backing plate and differential cover for fresh gear oil. Then recheck the fluid level as directed in the service information. If the service information calls for rechecking lug nut torque after initial driving, do that as well.
Several results call for further diagnosis. If the noise remains, the cause may be the opposite bearing, differential bearings, gears or tires. If metal debris turned up in the old fluid, the differential needs closer inspection. A seal that leaks again soon after the repair may mean it was damaged during installation, the shaft surface is worn, or the axle vent is blocked. Record the work in the truck's service history and follow the maintenance schedule for differential fluid service. This gives you a baseline for any future inspection.