Ford F-150 4WD Actuator Replacement
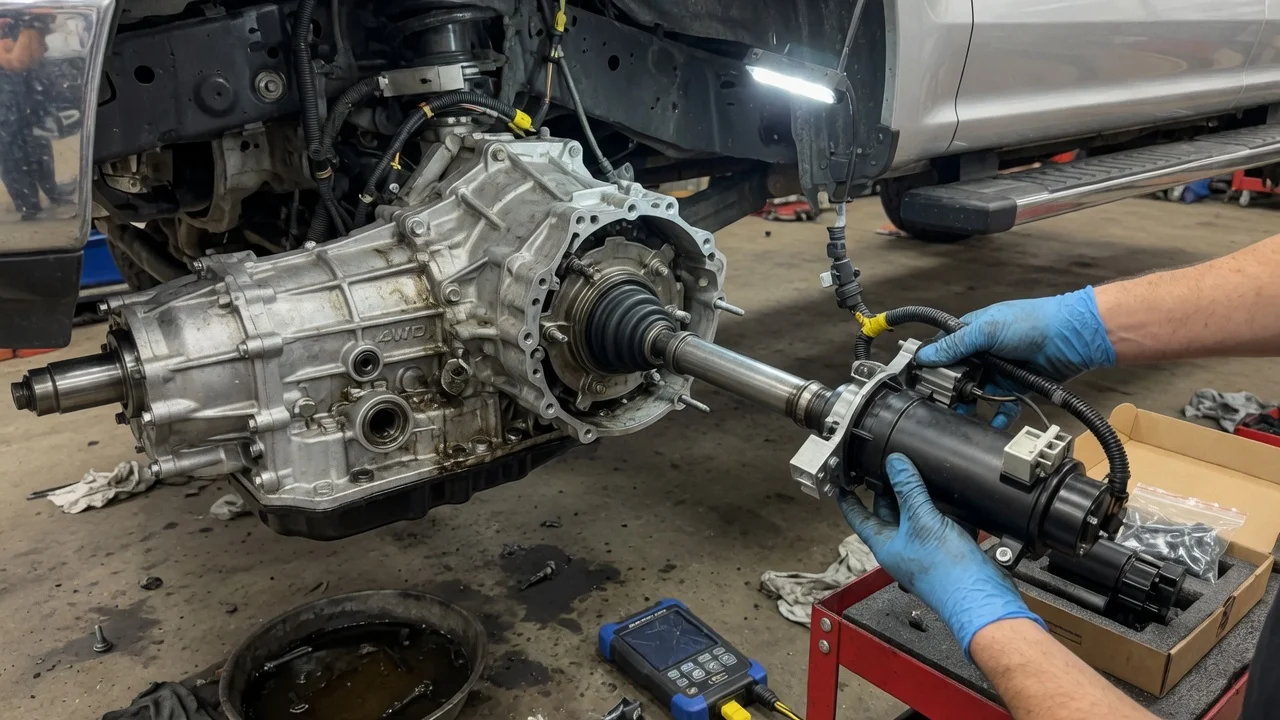
When a Ford F-150 refuses to shift into four-wheel drive, gets stuck in it, or flashes its 4x4 indicator, a failed actuator is a common suspect. Replacing one is often within reach of a capable home mechanic, but only after confirming which actuator your truck uses and that it is actually the faulty part. This guide covers diagnosis, preparation, removal, installation and the checks that prove the repair worked.
Confirm the part and repair scope
On an F-150, the term 4WD actuator can mean different parts. Most often it refers to the electric shift motor bolted to the transfer case on trucks with a dashboard 4x4 selector. Many of these motors also contain a position sensor, sometimes called an encoder, which tells the 4x4 control module which mode the transfer case is in. On trucks with integrated wheel ends, the front hubs are locked and unlocked by vacuum, controlled by a solenoid. Each of those components can be called an actuator too. Which parts your truck has depends on its model year, drivetrain and transfer case type, so match the replacement to your exact vehicle configuration, ideally using the VIN rather than the model name alone.
Next, confirm that replacement will actually fix the problem. A flashing indicator, no engagement or a truck stuck in 4WD can also come from a blown fuse, a faulty selector switch, corroded connectors, damaged wiring, a control module fault, low battery voltage or a vacuum leak in the hub system. Read stored trouble codes with a scan tool that can access the 4x4 module, inspect the fuses, and check for power and ground at the actuator connector. On vacuum systems, inspect the lines for cracks and loose fittings. Check the service history as well, because a recently replaced part or earlier wiring repair can narrow the search. Replacing a motor that tests as healthy only adds cost without solving the fault.
Prepare tools and safe access
Get the vehicle-specific service information before starting. It provides the correct removal steps, fastener torque values and any relearn or calibration procedure for your truck. Do not substitute numbers from another model or a generic chart. A typical job requires a floor jack and jack stands rated for the truck's weight, wheel chocks, a socket set with extensions, a torque wrench, a multimeter, a scan tool, penetrating oil for corroded fasteners and dielectric grease for the electrical connector. Park on firm, level ground, chock the wheels that stay on the ground, and disconnect the battery before unplugging any electrical components.
Never work under a truck supported only by a jack. Depending on the vehicle and operating conditions, a skid plate may block access, and fasteners exposed to road salt can be seized. If the diagnosis is still unclear, if the symptoms suggest internal transfer case damage, or if you are not comfortable working under a raised vehicle, have a qualified technician handle the inspection and repair. A wrongly installed shift motor can leave the transfer case in an unintended mode, which affects how the truck drives.
Remove without avoidable damage
If the old motor still responds, select 2H before shutting the truck down so the transfer case shift shaft rests in a known position. Note or photograph the motor's orientation, connector position and harness routing. With the battery disconnected and the truck safely supported, remove the skid plate if equipped. Release the connector's locking tab and pull on the connector body, not the wires. Remove the mounting bolts, then slide the motor straight off the shift shaft. Do not pry against the transfer case housing, and do not turn the exposed shaft with a tool unless the service information instructs you to.
Once the motor is off, inspect the area. Green or white corrosion inside the connector, bent terminals or chafed wiring may have caused the fault or may damage the new part. Fluid around the shaft can indicate a seal problem that needs attention during the same repair. When replacing a vacuum solenoid for the hub system instead, label each vacuum line before disconnecting it. Inspect every line for cracks, because a leaking line produces the same symptoms as a failed solenoid.
Install and restore the system
Before installing, compare the new part with the old one. The connector, mounting points and shaft socket should match exactly. The motor's internal position must align with the transfer case shift shaft. Some replacement units ship set to a particular mode, and the included instructions or service information explain how to confirm alignment. The motor should seat flush on the transfer case without being forced. If it does not, recheck the alignment rather than drawing it in with the bolts. Tighten the fasteners evenly to the specified torque.
Clean the connector, apply dielectric grease where appropriate, and push it in until the lock fully engages. Route the harness along its original path, clear of the exhaust and driveshaft, and reattach any clips. For vacuum components, reconnect each line to its labeled port. Reinstall the skid plate, lower the truck and reconnect the battery. Some trucks may need codes cleared or a module procedure performed after the part is replaced. Follow your truck's service information instead of assuming the system recalibrates itself.
Check the completed work
Turn the ignition on and watch the 4x4 indicators during startup. Use the scan tool to clear stored codes, then rescan to confirm none return. Test the system on a loose surface such as gravel or dirt, not dry pavement. Shift from 2H to 4H and confirm that the indicator stays steady and the front wheels pull the truck. If equipped, engage 4L following the owner's manual procedure, which typically requires the truck stopped or nearly stopped and the transmission in neutral. Return to 2H and confirm the truck turns freely, without binding, once back on pavement.
Some signs mean the problem needs further diagnosis. These include codes that return, an indicator that keeps flashing, clicking or grinding during shifts, binding in tight turns while in 2H, noise from the front hubs, or front wheels that do not drive in 4H. If you saw a leak at the shaft area, check the transfer case fluid level as directed by the maintenance schedule. Record the repair, the part fitted and any codes found in the truck's service history so future inspection work starts with accurate information.