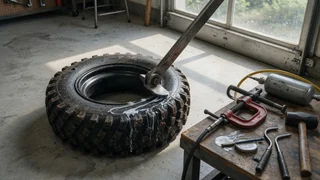
DIY ATV Tire Bead Breaker
A stuck ATV tire bead can turn a simple flat repair into a frustrating afternoon. The bead is the stiff inner edge of the tire that locks against the rim, and breaking that seal takes concentrated force. A DIY ATV tire bead breaker applies that force without a tire machine, using leverage, weight, or mechanical pressure. Because ATV tires are smaller and softer than automotive tires, they often respond to improvised tools, but the setup still needs to manage sidewall flex, rim protection, and stable tire size positioning while the bead is pushed inward.
Essential answer
A DIY ATV tire bead breaker is a homemade or shop-built tool that pushes the tire sidewall inward until the bead slips off the rim’s safety hump. The basic principle is mechanical advantage: a jack, threaded rod, long lever, or vehicle weight delivers a controlled force at a small contact point near the rim edge. Unlike prying with a screwdriver, which can tear the rubber or scratch the wheel, a proper bead breaker spreads pressure along a short section of the sidewall and works gradually around the circumference.
The useful distinction is between a simple clamp or press and the crude hammer-and-pry method. ATV rims are often narrow and lightweight, so excessive point loading can bend the flange. A well-built breaker uses a base plate, a pushing foot, and a stable frame that holds the wheel flat. That arrangement lets the operator apply repeated pressure, rotate the tire a few inches, and repeat. It does not require exact model specifications, but the tool should match the general tire size and the operator should watch inflation pressure before starting, since the bead must be fully deflated and pushed away from the rim channel.