Detailing Brushes and Buffing Pads: Types and How to Use Them
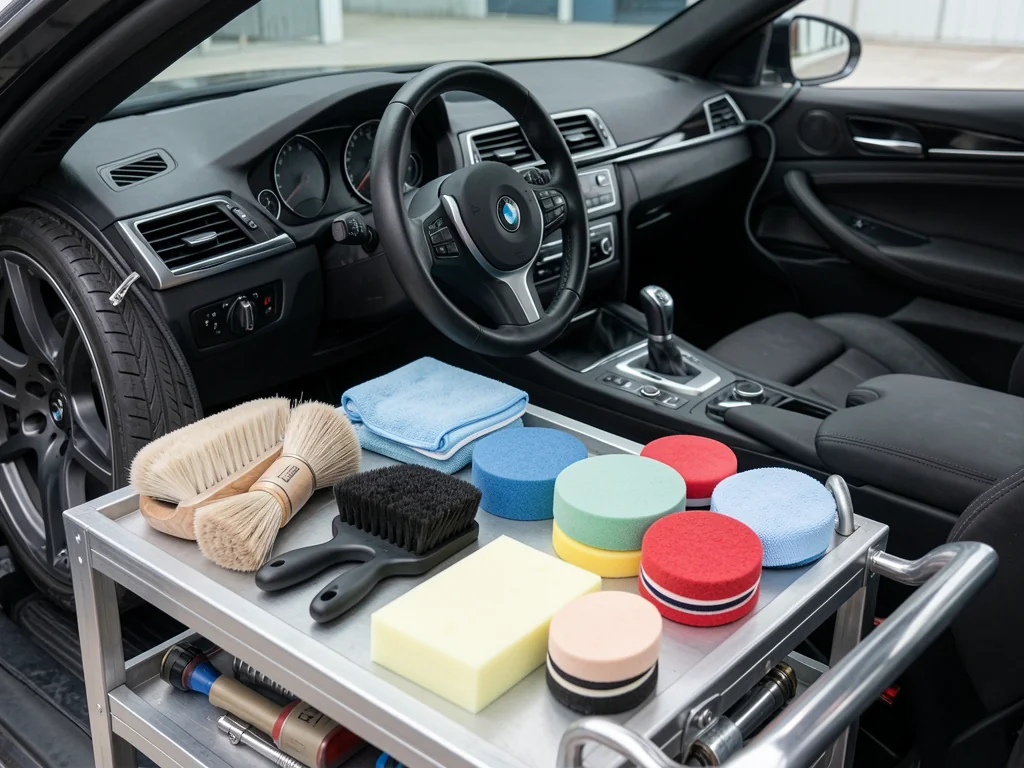
A good brush for car detailing reaches where towels and mitts cannot, from wheel barrels and lug recesses to air vents and seat seams. Buffing pads do a different job, working with polishes to refine paint. Choosing either tool well means matching bristle stiffness or pad type to the surface, the product, and the condition of the finish in front of you.
Choosing Detailing Brushes for Each Surface
Brush selection starts with how easily the surface marks. Painted wheels, piano-black trim, and soft-touch plastics tolerate far less than tire sidewalls or rubber floor mats, so bristle stiffness should scale with durability. Head size matters too: a compact head gets into tight gaps, while a wider head covers flat areas faster. Reach and handle length determine whether you can clean deep spaces without levering the handle against nearby finishes. Finally, the brush must suit the cleaner, since some chemicals are only approved for certain materials.
Soft bristles and covered or rubber-wrapped ferrules reduce the chance of a metal band or hard plastic body striking the surface, but they are not a guarantee. Grit trapped in the bristles can scratch as easily as a stiff brush, so rinse often during use. Before working on a visible area, try the brush and cleaner in a hidden spot to check for marking, discoloration, or disturbed fibers. Keeping separate brushes for wheels, exterior details, and the cabin prevents brake dust and road grime from traveling into the interior.
Cleaning Wheels, Lug Recesses, and Exterior Details
Wheels combine several distinct areas. The face is usually the most visible and often the most delicate, while barrels hide behind spokes and collect heavy brake dust. Long, slim brushes with flexible shafts can reach into barrels without the handle scraping the spokes, and small detail brushes fit lug recesses where larger tools would press their bodies into the finish. Work with wheels cool to the touch, use a cleaner approved for that wheel finish, and agitate gently rather than scrubbing hard. Rinse before the product dries to avoid spotting or staining.
Tire brushes are typically stiffer and pick up heavy rubber residue, old dressing, and embedded grit, so they should never touch finished wheel faces or painted parts. Keeping them separate, whether by color or storage location, reduces cross-contamination. Emblems, grille openings, and exterior trim collect wax residue and dirt in edges that a wash mitt skips. A clean, soft brush with light pressure lifts that debris, and a thorough rinse where the surface permits carries it away instead of leaving loosened grit behind to scratch.
Dusting Vents and Cleaning Sensitive Interior Trim
Vent louvers and dashboard seams trap dust that towels tend to push deeper. A clean, soft brush can loosen that debris while a vacuum nozzle held nearby collects it, ideally without the nozzle itself touching delicate plastics. Moisture needs careful control in this area. Switches, vent openings, and electronic controls should not be soaked; if a cleaner is used, applying it to the brush or a towel rather than spraying the panel directly generally keeps liquid where it belongs. Follow the cleaner's label and the vehicle's care guidance.
Glossy black trim and clear plastic accents show fine scratches quickly, especially from bristles holding old dust or from pressing too hard. Test the brush gently on a low-visibility section first and check under good light before moving on. Touchscreens, instrument cluster lenses, and trim with peeling or damaged coatings are a separate category. These surfaces often have specific care instructions from the vehicle or display maker, and they should be cleaned according to that guidance rather than treated as though any soft brush is automatically safe.
Brushing Upholstery, Carpets, and Seat Seams
Fabric seats, carpets, and seat seams hold sand and grit that can act like an abrasive once a brush starts moving. Vacuuming thoroughly first removes most of that loose material, so the brush lifts embedded soil instead of grinding debris into the fibers. Choose bristles suited to the material, since carpets usually tolerate firmer brushing than seat fabric. Short, gentle passes help avoid fuzzing the fibers or snagging stitching along seams, and working in small areas makes it easier to spot problems early.
Leather, coated vinyl, suede-like microfibers, and other specialty seating materials each respond differently to cleaners and agitation, so rely on material-specific product and brush guidance rather than a general upholstery approach. Moisture should stay limited, because oversaturated padding dries slowly and can leave water marks or odors. Allow cleaned areas to dry fully before the seats are used. If color appears on the brush or towel, or the surface texture starts to change, stop and reassess instead of continuing with the same method.
Matching Buffing Pad Types to Polish and Paint Condition
Buffing pads generally come in foam, microfiber, and wool, but material alone does not determine how aggressive a pad is. Each manufacturer designs its pads for cutting, polishing, or finishing roles through density, construction, and surface texture, so two foam pads can behave very differently. Color is not standardized across brands either. Rely on the manufacturer's stated purpose and the polish or compound it is intended to pair with, because pad and product work together to set the level of correction.
Paint condition guides the choice. Wash and decontaminate first, then inspect for haze, swirl marks, isolated scratches, peeling, or areas where primer or base color shows through. Keep in mind that appearance cannot reveal how much clear coat remains. Before starting, confirm that the pad diameter, backing plate, hook-and-loop attachment, and machine type are compatible according to product guidance. Then evaluate the mildest approved pad and polish combination on a small test spot, stepping up only if the result falls short.
Using Polishing Pads Safely and Keeping Tools Clean
Paint correction depends on following the instructions for the specific pad, polish, and machine together. Those instructions cover pad preparation, how much product to use, working area size, and machine operation. Excessive pressure and staying on one panel too long can build heat and remove more finish than intended, especially on edges and body lines. After the test spot, wipe off residue and inspect under good lighting. Stop if the panel becomes unusually hot, unexpected color appears on the pad, or the finish looks worse than before.
Some situations call for a qualified detailer before any correction begins, including peeling clear coat, deep scratches, uncertain repaint history, and unknown coating thickness. A professional can evaluate the paint with appropriate measurement tools. Tool care also matters. Clean brushes and pads using methods approved by their makers, dry them thoroughly before storage, and keep them away from dust. Replace brushes with frayed or matted bristles and pads with torn foam, worn fibers, or failing attachment surfaces, since damaged tools can mark the finish.