Dana 60 Rear Axle Bearing Replacement: Diagnosis, Removal and Installation
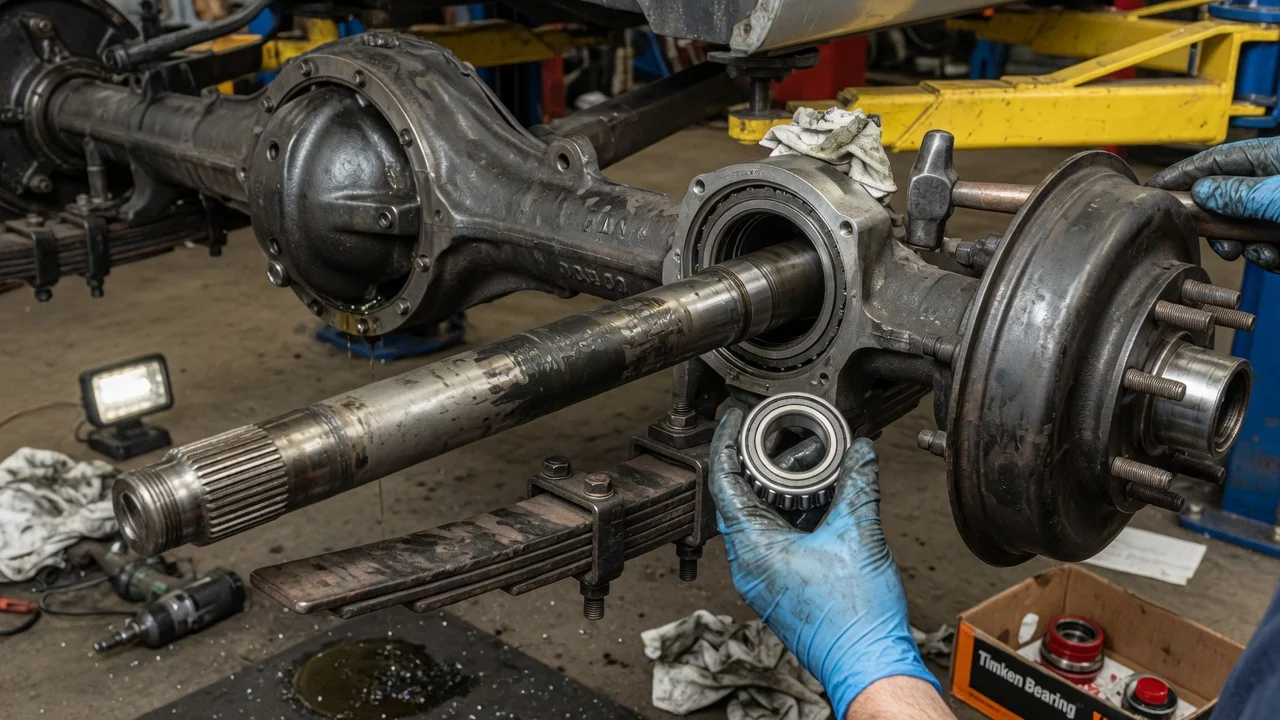
A worn rear wheel bearing on a Dana 60 axle usually shows up as a growl that rises with road speed, play at the wheel, or gear oil seeping onto the brakes. An experienced home mechanic can replace the bearing, but the procedure depends on which Dana 60 your vehicle has and on the bearing adjustment the manufacturer specifies for it. This guide covers confirming the diagnosis, preparing for the job, removing the hub, installing new parts and checking the result.
Confirm the part and repair scope
Start by confirming exactly what axle you are working on. Use the axle identification tag or the vehicle build data to confirm it is a Dana 60, then find out whether it is a full-floating or semi-floating design. On a full-floating axle, the hub extends out past the wheel and the axle shaft flange bolts to the face of the hub. The vehicle's weight rides on two tapered roller bearings on a fixed spindle. On a semi-floating axle, the wheel mounts directly to the shaft flange and the bearing is pressed onto the shaft. Bearing, race and seal part numbers vary with production year, weight rating and vehicle configuration. Match replacement parts to your specific axle, not just to the Dana 60 name.
Next, make sure the bearing is really the cause. Pinion and carrier bearings, worn tires and failing U-joints can all produce noise that sounds like a wheel bearing. With the axle safely supported, grab the tire at the top and bottom and rock it to feel for play. Then spin it by hand and feel for roughness or grinding. Look for gear oil on the backing plate, the brake parts or the inside of the wheel. If the only problem is a leaking hub seal and the bearings turn smoothly, the job may only need a seal and cleanup. Brake linings soaked in oil must be replaced, though. Check the service history too: if the bearing was adjusted recently, looseness may come from a poor adjustment rather than a failed bearing.
Prepare tools and safe access
Work on level, solid ground. Chock the front wheels, and support the axle on jack stands rated for the vehicle rather than leaving it on the jack. You will typically need: • Sockets and wrenches sized for your lug nuts, axle flange bolts and spindle nuts (spindle nuts often need a dedicated socket); • A torque wrench; • A brass drift or hammer; • Bearing race and seal drivers; • A drain pan and clean rags; • Brake cleaner; • A replacement axle flange gasket or seal; Buy new bearings, races and the hub seal as a set. Have the correct gear oil on hand, including any friction modifier required for a limited-slip differential, as listed in the manufacturer specifications.
Get the service manual procedure for your exact vehicle before you start. It gives the hub nut adjustment method, the fastener torque values, the type of lubricant and the fill level, and none of these should be guessed. Some full-floating hubs are lubricated by gear oil from the axle housing, while others use packed grease. Setting bearing adjustment, seating races and handling heavy hubs take care and experience. On semi-floating axles, the bearing has to be pressed on and off the shaft and the retaining ring cut free, which needs a hydraulic press. If you lack the equipment or confidence, have a qualified shop do the work.
Remove without avoidable damage
On a full-floating axle, follow this sequence: 1) Loosen the lug nuts while the wheel is still on the ground. 2) Raise and support the axle, then remove the wheel. 3) Place a drain pan underneath. Gear oil may run out when the shaft comes out, and if the hubs are oil-lubricated the manual may tell you to lower the gear oil level first. 4) Remove the axle flange bolts and slide the shaft out. If it sticks, tap the center of the flange to break it loose. Do not pry between the flange and the hub, because that damages the sealing surface. 5) Remove the caliper or drum as your brake design requires. Hang a caliper with wire so it does not hang by the brake hose.
Next, remove the spindle nut hardware. This may be a locking nut with a tab washer, or a single nut with a keyed retainer. Note the order and orientation of each piece as it comes off. Remove the outer bearing, then pull the hub straight off. Support its weight so the inner seal and bearing do not drag across the spindle threads. Drive out the inner seal and lift out the inner bearing. Then drive the old races out of the hub, working evenly around each race with a drift so it does not cock in the bore. If your hub carries an ABS tone ring or wheel speed sensor, protect it from impacts and debris.
Clean every part and inspect it before you reassemble anything. Check the spindle for scoring, heat discoloration or a groove worn where the seal rides. Check the hub bores for spun-race marks or cracks. Check the brake components for oil contamination. A damaged spindle or hub bore will ruin new bearings quickly and has to be fixed first.
Install and restore the system
Drive the new races into the hub with a proper driver until each one sits fully against its shoulder. A race that is not fully seated will loosen later and throw off the bearing adjustment. Lubricate the bearings the way your manual specifies: pack them with the correct grease, or pre-coat them with gear oil if the hubs use axle oil. Install the inner bearing. Then drive in the new seal square to the bore, with the seal lip facing the lubricant it holds back. Coat the seal lip with lubricant so it does not run dry on first startup.
Slide the hub onto the spindle without catching the seal on the threads, then install the outer bearing. Set the bearing adjustment exactly as your service manual describes. These procedures usually tighten the nut while rotating the hub to seat the rollers, then back it off and bring it to a final setting or a measured end play. The sequence and values differ between applications, so use the ones for your axle. Install the locking hardware in its original orientation and fully engage any tabs or keys. Never back the nut off past the adjustment just to line up a lock.
Clean the mating surfaces, then install the axle shaft with a new gasket or seal. Torque the flange bolts to specification. Reinstall the brake components. Refill the differential to the level the manufacturer specifies, and allow time for oil to reach the hubs if that is how your design is lubricated. Install the wheel and torque the lug nuts in a cross pattern to the listed value.
Check the completed work
Before you lower the vehicle, do these checks: • Spin the hub. It should turn smoothly with no roughness or binding. • Check for play again. It should match the setting you just made. • Pump the brake pedal until it is firm. • Look for leaks at the hub seal, the axle flange and the fill plug. Then make a short, low-speed test drive. Afterward, carefully compare the hub temperature on both sides, because a properly adjusted bearing should not run noticeably hotter than its partner. Inspect again for leaks, and recheck the gear oil level once it has had time to settle.
Recheck the hub and fasteners after the first period of driving, especially if the vehicle tows or works in severe conditions. Further diagnosis is needed if any of these appear: • Noise that continues after the repair; • A hub that runs hot; • Play that returns; • Oil on the brakes; Possible causes include a misadjusted nut, an incompletely seated race, a damaged spindle, or a separate fault in the differential or driveline. Record the repair in the vehicle's maintenance records so future inspections have a reference point.