Dana 44 Rear Axle Shaft Removal: Steps, Checks and Common Pitfalls
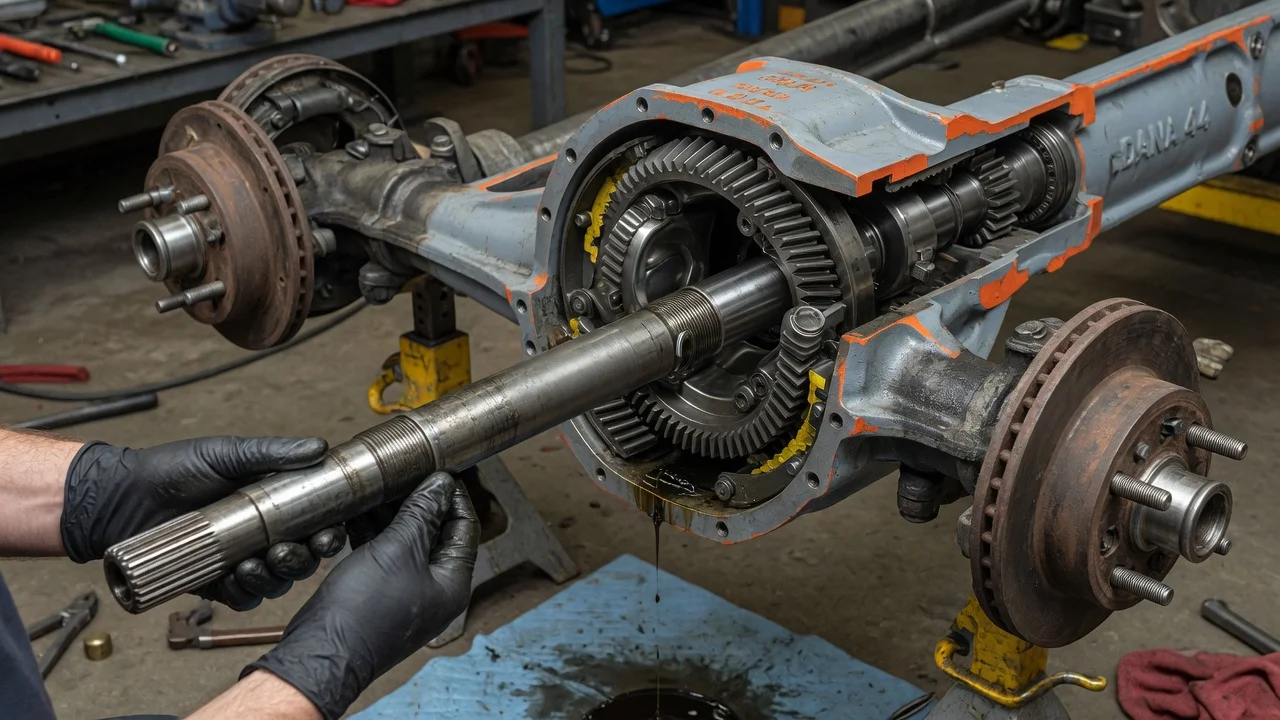
Pulling a rear axle shaft from a Dana 44 is a common job when a wheel bearing gets noisy, an axle seal starts leaking, or a shaft breaks or needs an upgrade. The method depends on how the shaft is retained in your particular axle, so steps that work on one truck can damage parts on another. This guide covers confirming the repair, preparing the vehicle, removing and reinstalling the shaft, and checking the result, using your vehicle's service information for every specification.
Confirm the part and repair scope
Dana 44 rear axles appear under many trucks, SUVs and Jeeps, and they are not all built the same. Some use C-clips at the inner end of each shaft, located inside the differential carrier. Others hold the shaft with a bearing retainer plate bolted to the axle tube flange behind the brake, with the bearing pressed onto the shaft. Spline count, shaft length, wheel bolt pattern, ABS tone ring and brake type also vary by model year and option package. Check the axle tag or housing stamping, the vehicle build data and the service history, especially if the axle has been swapped or regeared, before ordering a shaft, bearing or seal for your vehicle configuration.
Make sure removing the shaft actually addresses the fault. A growl that changes with load while cornering often points to a wheel bearing, while a whine that changes between acceleration and coasting may come from the ring and pinion instead. Gear oil on the inside of the wheel or the brake backing plate suggests a failed axle seal, but a leaking wheel cylinder or caliper can look similar, so confirm whether the fluid is gear oil or brake fluid. A broken shaft, a shaft bent during hard off-road operating conditions, or worn bearing surfaces found during inspection all justify the job; a vague noise without diagnosis does not.
Prepare tools and safe access
Before starting, get the procedure for your exact vehicle, including manufacturer specifications for lug nut torque, brake caliper or backing plate hardware, retainer fasteners, the pinion shaft lock bolt and the differential cover, plus the specified gear oil type, capacity and any friction modifier required for a limited-slip differential. Do not borrow numbers from a different Dana 44 application. Typical needs include a floor jack, rated jack stands, wheel chocks, a drain pan, hand tools, a torque wrench, a new cover gasket or the specified sealant, a seal puller and driver, and, for retainer-plate axles, a slide hammer with an axle flange adapter.
Park on level, solid ground, chock the front wheels and support the axle on jack stands rather than the jack alone. Once the vehicle is secured, release the parking brake so the drum or rotor can come off. Wear eye protection and gloves, and do not blow brake dust off with compressed air. Pressing a bearing off or onto a shaft involves high force and requires a hydraulic press, correct support fixtures and experience. If you lack that equipment, have a machine shop or axle specialist handle the press work, which is a reasonable split even for capable home mechanics.
Remove a C-clip shaft without damage
On C-clip axles, remove the wheel, then the brake drum, or the caliper and rotor on disc-brake models. Hang the caliper with wire so it does not dangle from the brake hose. Remove the differential cover to drain the gear oil. Rotate the carrier until you can reach the pinion shaft lock bolt, remove it, and slide out the pinion shaft, also called the cross shaft. Do not turn the carrier or the opposite wheel while the cross shaft is out, because the spider gears can move out of position.
Push the axle shaft inward toward the center of the housing to expose the C-clip in the groove at the shaft's inner end, then lift the clip out with a magnet or small pick. Pull the shaft straight out of the tube, keeping it level so the splines do not drag across the seal or bearing. Some factory and aftermarket locking or limited-slip differentials use a different cross shaft or clip arrangement and may need extra steps, so follow the instructions for the unit actually installed. With the shaft out, the seal can be removed from the tube end, and the bearing can be pulled with a suitable puller if it is being replaced.
Remove a retainer-plate shaft without damage
On axles without C-clips, remove the wheel and the drum, or the caliper and rotor. Rotate the axle flange so its access hole lines up with each retainer nut or bolt behind it, and remove the fasteners that hold the retainer plate to the tube flange. Note how the parking brake hardware, brake backing plate and any ABS sensor are positioned, since some of these parts may be held by the same fasteners. Disconnect or move the ABS sensor as the service information directs so it is not damaged when the shaft moves.
The bearing is pressed onto the shaft and seated in the axle tube, so the shaft usually needs a slide hammer to pull it free. Pull straight and avoid prying against the backing plate or brake lines. If the bearing or seal is being replaced, the pressed-on retaining ring is typically split before the bearing is pressed off, and a new ring is used on reassembly. Inspect the shaft for twisting, cracked or worn splines and damage at the seal surface before deciding whether it can return to service.
Install and restore the system
Clean the axle tube end and the inside of the housing, and install a new seal square to the bore with a proper driver. Inspect the bearing journal on a C-clip shaft carefully, because the bearing rollers run directly on it; pitting or a worn track means the shaft needs replacement or the repair method approved by the manufacturer, not just a new bearing. Slide the shaft in level, rotating it slowly to engage the side gear splines without forcing it or striking the new seal.
For C-clip axles, refit the clip, pull the shaft outward to seat it, then reinstall the cross shaft and a lock bolt prepared as specified, which may call for a new bolt or thread locker. For retainer-plate axles, align the ABS sensor, backing plate and parking brake parts before tightening the retainer fasteners to specification. Reassemble the brakes, clean the cover and housing mating surfaces, reseal the differential cover and fill with the specified gear oil to the stated level, adding friction modifier only if the differential requires it. Torque the lug nuts to the vehicle specification.
Check the completed work
Before driving, pump the brake pedal until it is firm and confirm the parking brake holds. With the axle still supported, spin the wheel by hand and listen for scraping, clicking or binding, and check that shaft end play is within what the service information allows. Look for seepage at the cover, fill plug and axle tube ends, and confirm that any ABS or traction control warning light clears after start-up.
Take a short, low-speed test drive in a safe area, including gentle turns in both directions, then recheck for leaks and compare both sides for unusual heat, taking care around hot brake parts. Recheck lug nut torque after the interval stated in the service information. Grinding, a pulsing brake pedal, a warning light that stays on, persistent leaks or a clunk on throttle changes call for further diagnosis before regular use. The same applies if the original noise remains, because the fault may lie elsewhere in the axle. Record the work and parts in the vehicle's service history for future inspection.