Identifying a Chevy Uplander Transmission Pressure Control Solenoid
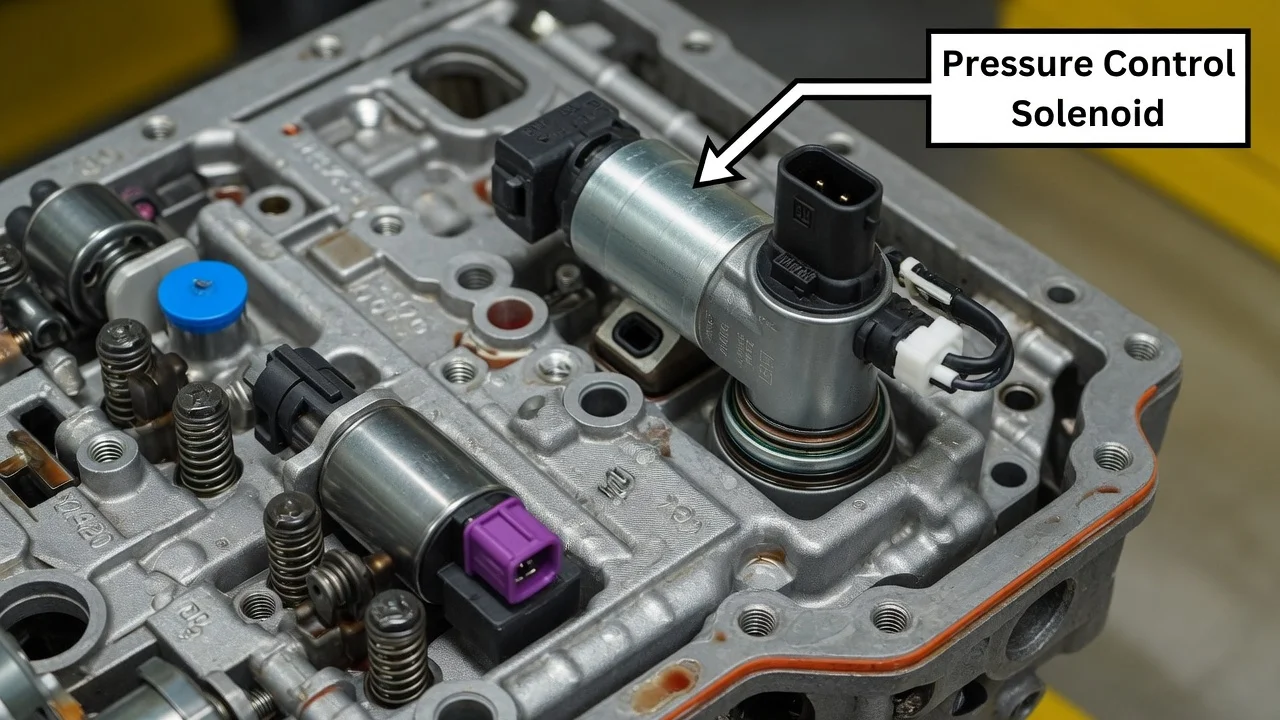
The Chevy Uplander's automatic transmission relies on an electronically controlled pressure control solenoid to set line pressure, which shapes how firmly and how quickly every shift happens. When an Uplander starts shifting harshly, slipping or setting transmission codes, owners often suspect this part. This guide explains how to identify the solenoid, how it works, what affects diagnosis on a 2007 or other model-year van, and how to decide between checking it yourself and getting professional help.
Where the pressure control solenoid is and how to identify it
Uplanders were built with GM's 4T65-E four-speed automatic transaxle. Its pressure control solenoid, sometimes called a force motor, is mounted on the valve body inside the transmission, not on the outside of the case. It sits behind the side cover on the driver's side end of the transaxle, so you cannot see or reach it with the pan removed the way you can on some rear-wheel-drive transmissions. Physically, it is a cylindrical electric solenoid with a two-wire connector that plugs into the internal wiring harness, held in place by a retaining bracket or clip on the valve body.
Confirming the part number matters more than recognizing its shape. The 4T65-E was used across many GM vehicles and model years, and solenoids, harnesses and valve body details were revised over time. Check the identification label on the transmission case and use the van's VIN when ordering a replacement, so fitment is confirmed for your specific unit rather than for the Uplander name alone.
How the solenoid controls line pressure
The powertrain control module reads throttle position, engine load, vehicle speed and fluid temperature, then sends a varying electrical current to the pressure control solenoid. The solenoid converts that current into a hydraulic signal acting on the pressure regulator valve, which sets main line pressure. Line pressure determines how hard the clutches and bands are applied. More pressure gives firmer, quicker shifts and more holding force under load; less pressure gives softer shifts during light driving.
In GM's design, line pressure generally rises as solenoid current falls. That is a deliberate safeguard: if the circuit opens or the module stops controlling the solenoid, the transmission defaults toward high pressure so the clutches are less likely to burn. This is why a circuit fault often shows up as very firm or harsh shifting, sometimes combined with the transmission holding a single gear in a failsafe mode, rather than as slipping. The control module also learns shift adaptations over time, adjusting pressure to compensate for wear, which can mask a developing problem until the adjustments run out.
What changes the diagnosis
Diagnostic codes are the first dividing line. A code for the pressure control solenoid electrical circuit points to the solenoid, its internal harness, the case pass-through connector, the external wiring or the control module, and the exact code numbers can vary by model year and calibration. Codes for shift solenoid performance, torque converter clutch problems or excessive shift adaptation describe a result, not a cause, and can come from worn valve body bores, internal leaks or clutch wear just as easily as from the solenoid itself.
Shift behavior also needs context. Harsh shifts with a circuit code suggest an electrical fault. Slipping, flare between gears or delayed engagement with no electrical code more often reflect low or degraded fluid, hydraulic leakage or worn friction material, and a new solenoid will not fix those. Service history matters too: a van with original, dark or burnt-smelling fluid, a previous overheating episode or a prior rebuild has different likely causes than one with recent, correct service.
Fluid specification can vary. Earlier GM transmissions of this era were serviced with Dexron III, while GM later moved its automatic transmissions to Dexron VI. Use the specification shown in your owner's manual or on the fill cap or dipstick for your model year, and avoid mixing in non-specified fluid, which can change friction behavior and shift feel.
What the owner can check
Start by reading and saving all stored and pending codes with a scan tool, including any history codes, before clearing anything. A basic code reader may only show generic codes, so a tool that reads transmission data is more useful. If yours can display commanded pressure control solenoid current, compare it with how the van behaves; erratic values or a commanded value that never changes point toward an electrical or control problem.
Check the fluid level and condition using the procedure for your model year, with the engine at the specified operating temperature. Note the color, smell and any debris. Inspect the external transmission connector and harness for oil intrusion, corrosion, broken locks or chafed wires, which are cheaper causes than the solenoid. Write down exactly when the symptom happens: cold or hot, which gear change, light or heavy throttle. That record is valuable to whoever does the repair.
Resistance testing of the solenoid circuit is possible at the transmission connector with a multimeter, but the correct pin and the acceptable range must come from the service information for your exact unit, measured at the specified temperature. A reading out of range points to the circuit, but a reading within range does not prove the solenoid works hydraulically, because it can still stick or leak internally.
Repair options and when to get help
If diagnosis confirms the solenoid or its internal harness, replacement requires removing the side cover. On the Uplander, access at the driver's side end of the transaxle is tight, and the job can involve supporting the powertrain and removing surrounding components, so it is more involved than the part price suggests. Some shops replace the solenoid alone; others recommend addressing known valve body wear at the same time if hydraulic symptoms are present. After any repair, the shift adaptations usually need to be reset with a capable scan tool, followed by a relearn drive.
There are limits to what symptoms and codes can prove. A harsh shift, a slip or even a solenoid code does not on its own confirm that the solenoid has failed, and replacing it without testing the circuit and checking hydraulic condition can waste money. Factory service information for your model year is needed for connector pinouts, test values and removal steps. If you lack a transmission-capable scan tool, find metal or heavy debris in the fluid, or the van has slipping or overheating symptoms, have a transmission specialist perform a full pressure and electrical diagnosis before buying parts. Continuing to drive with severe slipping can turn a repairable fault into a rebuild.