Chevy Truck Rear Axle Bearing Replacement: Identify Your Axle Before Starting
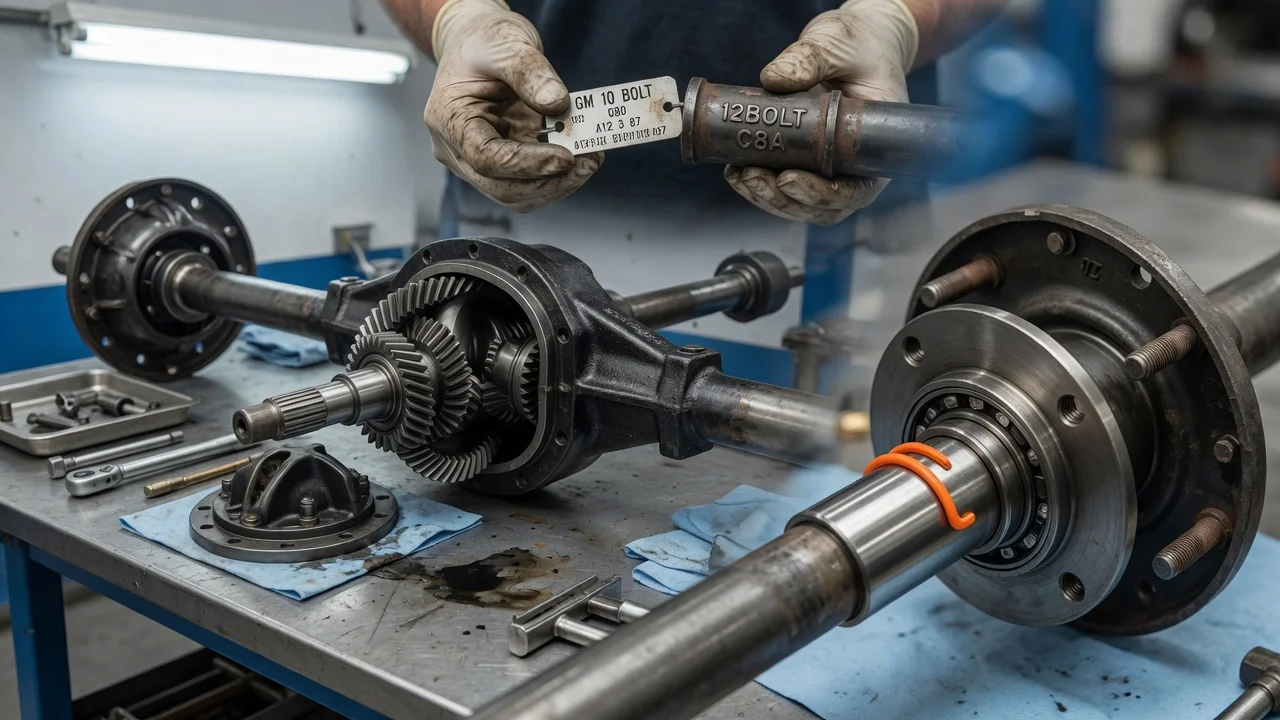
Replacing a rear axle bearing on a Chevy truck is a manageable job for an experienced home mechanic, but the procedure depends on which axle sits under the truck. A semi-floating axle with C-clip retention and a full-floating heavy-duty axle are serviced in very different ways, and parts for one will not fit the other. This guide covers identifying the axle, confirming the bearing is at fault, and completing the repair without damaging the shaft or housing.
Confirm the part and repair scope
Start with the exact vehicle configuration: model year, cab and bed, two- or four-wheel drive, and weight class. Light-duty half-ton trucks generally use semi-floating axles, while many three-quarter-ton and one-ton trucks use full-floating axles, but confirm this on your truck rather than assuming. The service parts identification label lists RPO codes for axle ratio and locking differential options. Depending on model year, the label is usually in the glove box or on a door or console area. Then look at the wheel itself. On a full-floating axle, the hub protrudes through the wheel, and a ring of bolts securing the axle shaft flange is visible at its center. On a semi-floating axle, the wheel bolts directly to the axle shaft flange. Counting differential cover bolts helps narrow down the ring gear family, but a 14-bolt cover appears on both semi-floating and full-floating versions, so it should not be the only identifier. An axle tag or stamping on the tube or cover can confirm the exact unit when ordering parts.
Next, make sure a bearing is actually the problem. A failing axle bearing typically produces a growl or hum that rises with road speed and may change in turns as load shifts from side to side. Cupped tires, pinion bearings and carrier bearings can make similar noises. Pinion-related noise often changes between acceleration and coasting, which helps separate it from a wheel bearing. With the truck safely supported, rotate each rear wheel by hand and feel for roughness. Gear oil inside the brake drum or on the rotor points to a leaking axle seal. On semi-floating axles, the seal is normally replaced along with the bearing. Metal particles in the drained oil, a history of deep water crossings or overdue fluid changes in the service history all support the diagnosis and may indicate wider wear.
Prepare tools and safe access
Work on solid, level ground with the front wheels chocked, and support the rear on jack stands rated for the truck. Never rely on the jack alone. Typical tools include a socket set, torque wrench, drain pan, gasket scraper, brake tools, a slide hammer with an internal bearing puller attachment, and a bearing and seal driver sized to the parts. Gather the bearing, seal, cover gasket or approved sealant, and the correct gear oil in sufficient quantity. Limited-slip units may also require a friction modifier, and some procedures call for a new pinion shaft lock bolt.
Get the factory service information for your specific axle before starting. Torque values for the lock bolt, cover bolts, brake hardware and wheel nuts, the fluid specification and capacity, and any full-floating hub adjustment procedure all depend on the axle and model year, so they should come from manufacturer specifications, not from memory or another truck. Full-floating hub service involves setting bearing adjustment with a spindle nut and often pressing races. If you have not done that kind of work, or if the shaft or housing turns out to be damaged, a shop is the safer choice.
Remove without avoidable damage
On a semi-floating axle, remove the wheel and the brake drum, or the caliper and rotor. Hang the caliper so the brake hose is not strained, and unclip any wheel speed sensor wiring that could be pulled. Remove the differential cover to drain the oil, then rotate the carrier to reach the pinion shaft lock bolt. Remove the bolt and slide the cross shaft out. Push the axle shaft inward, remove the C-clip from the shaft end inside the carrier, and withdraw the shaft carefully so the splines do not drag across the bearing. Avoid turning the carrier while the shafts are out, as the side gears can shift. Some locking differentials limit how far the cross shaft can be withdrawn, so follow the service manual for that design instead of forcing it. Once the shaft is out, use the slide hammer and puller to extract the seal and bearing from the tube.
Inspect the shaft closely. On these axles, the bearing rollers ride directly on the shaft, so pitting or grooving on that surface will destroy a new bearing. Replace the shaft in that case, or use a repair bearing designed to ride on a different area only if it suits your application. On a full-floating axle, remove the axle flange bolts and slide the shaft out, then remove the hub retaining nut and locking hardware and pull the hub with its bearings and seal. Expect some gear oil to escape, because these hubs are lubricated from the axle housing.
Install and restore the system
Clean the axle tube bore and check it for burrs. Drive the new bearing in squarely, with the driver bearing on the outer race only, until it seats fully against its stop. Follow any orientation marking from the bearing maker. Install the new seal with its lip facing the fluid side, driving it evenly so it is not cocked. Lightly lubricate the seal lip. Guide the axle shaft in without striking the seal, engage the splines in the side gear, and install the C-clip. Then pull the shaft outward so the clip seats in the side gear recess. Reinstall the cross shaft and lock bolt, using threadlocker if specified, and torque the bolt to the service value.
Clean both cover mating surfaces, install the cover with a new gasket or the specified sealant, and torque the bolts evenly. Refill with the correct oil to the level the manual specifies, adding friction modifier if required. Reassemble the brakes, reconnect any sensor wiring, and pump the brake pedal until it is firm. On a full-floating axle, set hub bearing adjustment exactly as the procedure describes, and reinstall the axle shaft with a new flange gasket. Incorrect adjustment can cause rapid bearing failure.
Check the completed work
Before lowering the truck, recheck the fluid level, look for seepage at the cover and the back of the brake assembly, and spin each wheel. It should turn smoothly, with no roughness and only light brake drag. Lower the truck, torque the wheel nuts to specification, and confirm the brake pedal is firm. Road test at gradually increasing speeds in a quiet area and listen for the original noise, which should be gone. Afterward, inspect again for leaks and recheck wheel nut torque after the initial driving period if the manufacturer recommends it.
Some signs call for further diagnosis. A noise that persists may come from the opposite bearing, the pinion or carrier bearings, or the tires. Oil in the drum after the repair suggests a damaged or misaligned seal, or a blocked axle vent. A clunk in turns can point to a C-clip or cross shaft problem. An ABS or traction warning light usually means a sensor or its wiring was disturbed. On a full-floating hub, unusual heat after a short drive suggests incorrect bearing adjustment. Record the work, parts and fluid used in the service history so future inspections have an accurate baseline.