Chevy Silverado 1500 5.3 Transmission Cooler Line Routing Diagram
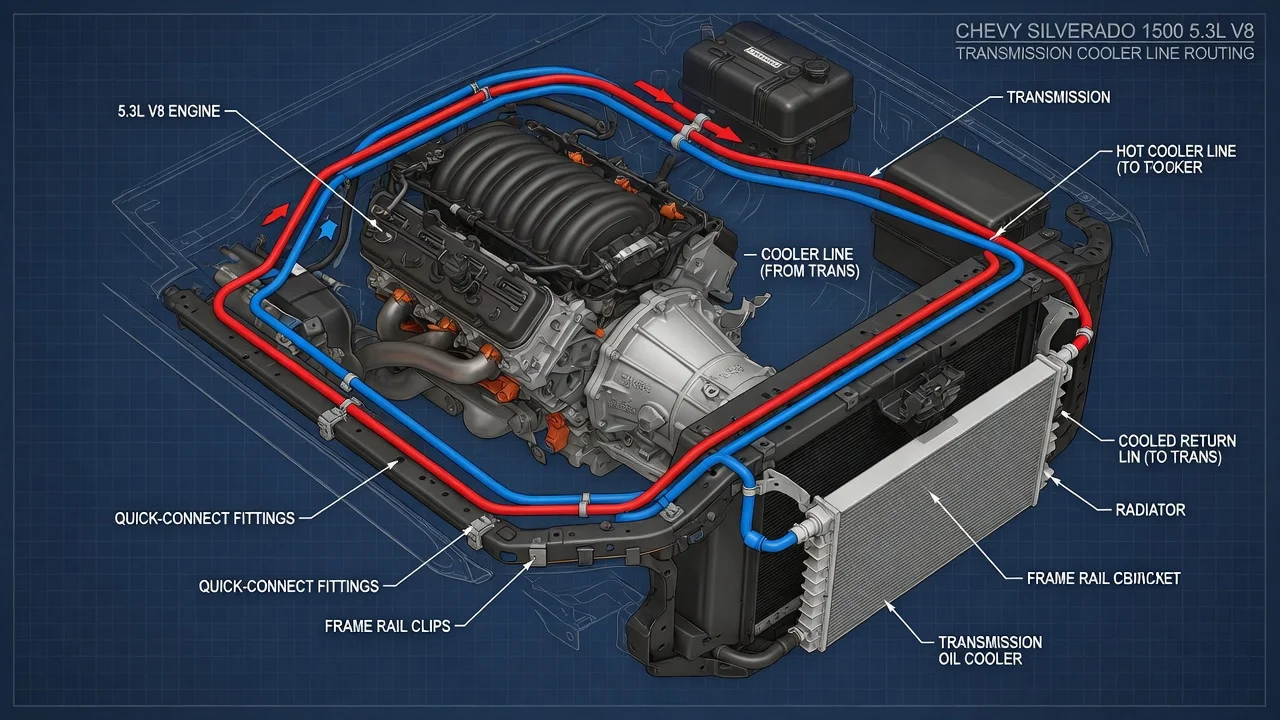
If you are tracing or replacing the transmission cooler lines on a Silverado 1500 with the 5.3L V8, the basic layout is similar across generations. Two lines leave the transmission, run forward along the engine, and connect to a cooler at the front of the truck. The exact bends, clips, fittings and any auxiliary cooler depend on model year, transmission and options. Treat a generic cooler line diagram as orientation, not as a part-specific guide.
The Short Answer on Cooler Line Routing
On most 5.3 Silverado 1500 trucks, the two cooler lines attach to fittings on the right (passenger) side of the transmission case. From there they run forward along the side of the engine block and oil pan, held by brackets and clips, then turn toward the radiator. At the front, they connect to a cooler built into one of the radiator tanks. Trucks with an auxiliary transmission cooler, often included with towing equipment, route fluid through that separate cooler, which is usually mounted ahead of the radiator, before it returns to the transmission.
One line carries hot fluid out of the transmission, and the other returns cooled fluid. Which port and which line serve each role depends on the transmission and the truck's configuration. Confirm the flow direction in service information for your specific vehicle instead of assuming it from a picture of a different year or gearbox. This matters most when an auxiliary cooler is involved or when an earlier owner changed the plumbing.
How the Transmission Cooling Circuit Works
An automatic transmission produces heat through torque converter slip, clutch engagement and fluid friction. The pump sends part of the fluid through the cooler circuit and out the supply line. In the radiator tank cooler, the fluid exchanges heat with engine coolant. That coolant sits near engine operating temperature, so the in-tank cooler can also help warm the fluid in cold weather. An auxiliary air-to-fluid cooler sheds additional heat using airflow across the front of the truck. The returning fluid typically feeds the transmission's lubrication circuit, so a restricted cooler or kinked line can affect both temperature and lubrication.
The lines themselves are usually steel tubing with flexible rubber sections crimped in to absorb engine and chassis movement. Connections at the radiator, and on many applications at the transmission, use quick-connect fittings held by retaining clips. Common leak points are the crimped hose joints, the fittings, and stretches of steel line where corrosion has eaten through, especially on trucks driven on salted roads.
What Changes the Routing on Your Truck
Generation is the first variable. The GMT800 trucks (roughly 1999 to 2007 Classic), GMT900 (2007 to 2013), K2XX (2014 to 2018) and later generations use different radiators, brackets and line shapes. Transmission type is the second. Earlier 5.3 trucks commonly used the four-speed 4L60-E family. Later trucks moved to the six-speed 6L80, and some newer trims use eight- or ten-speed automatics. A 4L60-E cooler line diagram will not match a 6L80 truck even if both have the same engine size, and replacement fitment is normally specified by year, transmission and sometimes drive type.
Options and service history change the answer too. A factory towing package may add an auxiliary cooler and longer or additional line sections. Aftermarket coolers, bypassed coolers or patched lines installed by a previous owner can make the truck look nothing like a factory diagram. Fluid specification and level-check procedure also differ. The 4L60-E uses a conventional dipstick, while the 6L80 has no traditional dipstick and is checked at a check plug at a specified temperature. Later transmissions call for different Dexron specifications, so confirm the correct fluid in the owner's manual before topping off after line work.
What the Owner Can Do
Start by identifying the exact configuration. The Service Parts Identification label, typically in the glove box on these trucks, lists RPO codes for the transmission and cooling or towing options, and the VIN confirms year and model for parts lookup. With the truck safely supported, follow both lines from the transmission to the radiator and note every clip, bracket and any auxiliary cooler along the way. Photograph the routing before removing anything. These photos are often more reliable than a generic diagram for your specific truck.
When inspecting for a leak, clean the area and look for fresh wetness at fittings, crimp joints and rusted sections. Red fluid on the frame or crossmember does not by itself prove a line has failed. It can come from the pan gasket, a seal, the cooler or a fitting, and airflow can carry drips well away from the source. Use the correct disconnect tool for quick-connect fittings to avoid damaging the radiator connections. After repairs, refill with the specified fluid, check the level using the procedure for your transmission, and recheck for leaks once the fluid reaches operating temperature.
Pay attention to related signs without jumping to conclusions. Fluid-temperature warnings, stored diagnostic codes or changes in shift behavior can point toward a cooling problem, but they have other possible causes as well. Milky or pink contamination in either the coolant or the transmission fluid can indicate a failed cooler inside the radiator. That calls for prompt professional diagnosis rather than just replacing the lines.
Limitations and the Next Step
A written description of cooler line routing cannot replace the factory diagram for your VIN. Bracket positions, line lengths and fitting styles vary enough between years, transmissions and options that a near-match can still fail to fit. Dealer service information or a repair manual covering your exact truck is the reliable reference for routing and flow direction, torque values and the fluid-level procedure.
Consider professional help if the fittings are seized or badly corroded, if the radiator cooler may be leaking internally, if the fluid smells burnt or looks contaminated, or if temperature-related codes persist after the lines are repaired. Repair options range from replacing the complete line assembly to repairing a damaged section with proper fittings and hose rated for transmission fluid. A shop can also flow-test the cooler circuit and confirm whether overheating has already affected the transmission.