Car Audio Amplifier Racks: Choosing, Mounting and Wiring a Stable Platform
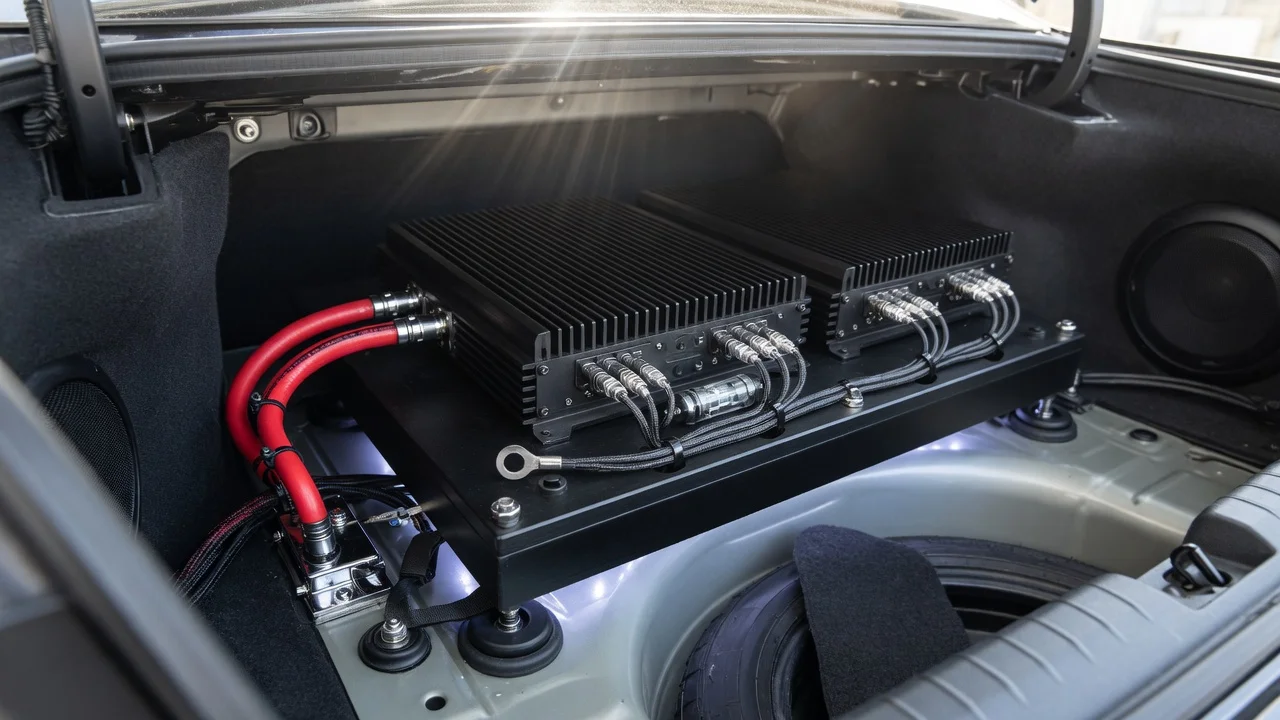
What a Car Audio Amplifier Rack Is and What It Does
A car audio amplifier rack is a rigid platform or frame used to mount one or more aftermarket amplifiers in a vehicle. The rack serves two main purposes: it keeps the amplifier stable during acceleration, braking and cornering, and it creates an air gap or organized layout that improves heat dissipation and access for tuning. In most installations the rack is a custom-fitted board or metal frame mounted to the trunk floor, under a seat, behind a rear seat back or against a cargo-area panel. The exact shape and material depend on vehicle make, model, body style and the number of amplifiers being installed.
Direct Answer: You Do Not Always Need a Purpose-Built Rack
For a single compact amplifier, a dedicated rack may not be necessary. Many installers mount small Class D amplifiers directly to a carpeted trunk panel, under-seat vent area or a factory panel using short self-tapping screws, provided the mounting surface is flat and does not conduct excessive heat. A rack becomes the practical choice when you have a large amplifier, multiple amplifiers, a signal processor, power distribution blocks or a subwoofer enclosure nearby. In those cases the rack consolidates components, reduces cable strain and makes future fuse access or tuning adjustments easier.
Material Choices for the Rack Itself
Medium-density fiberboard and Baltic birch plywood are common rack materials because they are easy to cut, sand and carpet. Birch plywood generally holds screws better than MDF, especially at the edges, and it resists splitting more consistently. Aluminum sheet or pre-made aluminum amp racks are lighter and do not absorb moisture, but they can transfer heat and may require rubber washers to isolate the amplifier chassis. The rack should be thick enough that mounting screws do not protrude through the opposite side into the vehicle body or fuel tank area.
Using a Car Audio Amplifier Mounting Board
A mounting board is a flat panel cut to fit a specific area of the vehicle, often covered in trunk-liner carpet. The board spreads the amplifier’s weight over a larger area than four small screw holes would, reducing stress on thin sheet metal or plastic trim. A well-fitted board also lets you remove the entire assembly with the amplifiers still attached, which is useful when the spare tire or tail light access is underneath. When cutting a board for a trunk or cargo area, leave clearance around the spare tire cover, trunk hinges and factory tie-down points so the board does not rattle or block access.
Mounting Orientation and Heat Management
Most car audio amplifiers use passive heatsink cooling. The heatsink fins should be positioned so that rising warm air can move away from the amplifier. Mounting an amplifier upside down or with the heatsink flat against a carpeted board can trap heat and trigger thermal protection. If the rack holds multiple amplifiers, leave at least a few centimeters of open space above and beside each unit. A vertical rack behind the rear seat is often better for heat than a flat floor board, but both can work if the surrounding air volume is adequate.
Car Audio Amplifier Screws and Fastener Selection
The correct screw depends on the rack material and the amplifier’s mounting feet. For MDF or birch plywood, coarse-thread wood screws or sheet-metal screws with a pan or truss head are common. The screw length must be shorter than the combined thickness of the amplifier foot and the board so the tip does not pass through the board. Stainless steel or coated screws resist corrosion in damp trunk or cabin environments. For aluminum racks, use machine screws with washers and locking nuts, or threaded inserts if the rack is tapped. Do not use drywall screws; their narrow shank and brittle construction can snap under vibration.
Keeping the Rack and Cables Secure
A rack should be anchored to the vehicle, not left loose on the floor. Use existing factory bolts, threaded inserts or sturdy cargo tie-down points rather than drilling through unverified panels. Route power and signal cables so they are not pinched when the rack is reinstalled. Keep main power cable runs short and separated from RCA signal cables where possible, and secure both with loom or cable ties. This reduces the chance of induced noise while keeping the installation serviceable.
Practical Buying and Installation Checklist
Confirm the rack or board fits the intended mounting area before cutting or purchasing; measure spare tire clearance, hinge travel and seat recline if applicable. Choose plywood or aluminum thick enough to hold screws without flexing. Select screws that do not protrude through the board and are rated for vibration. Leave open space above heatsink fins for airflow. Anchor the completed rack to a factory load-bearing point. Route power, ground and signal cables with separation and strain relief.
When a Generic Rack Is the Wrong Choice
Some pre-made universal amplifier racks are designed for open trunks and do not fit under seats, behind compact rear seats or in vehicles with irregular cargo floors. Before buying, verify the rack’s mounting hole pattern against the amplifier’s footprint. Large full-range amplifiers and high-current monoblock amplifiers produce more heat than compact digital units, so a sealed or tightly carpeted space may require forced-air cooling. Where the vehicle has no flat mounting surface, a custom board shaped to the panel is generally more effective than forcing a universal rack into place.