Brake Pad Clips: Inspection and Replacement
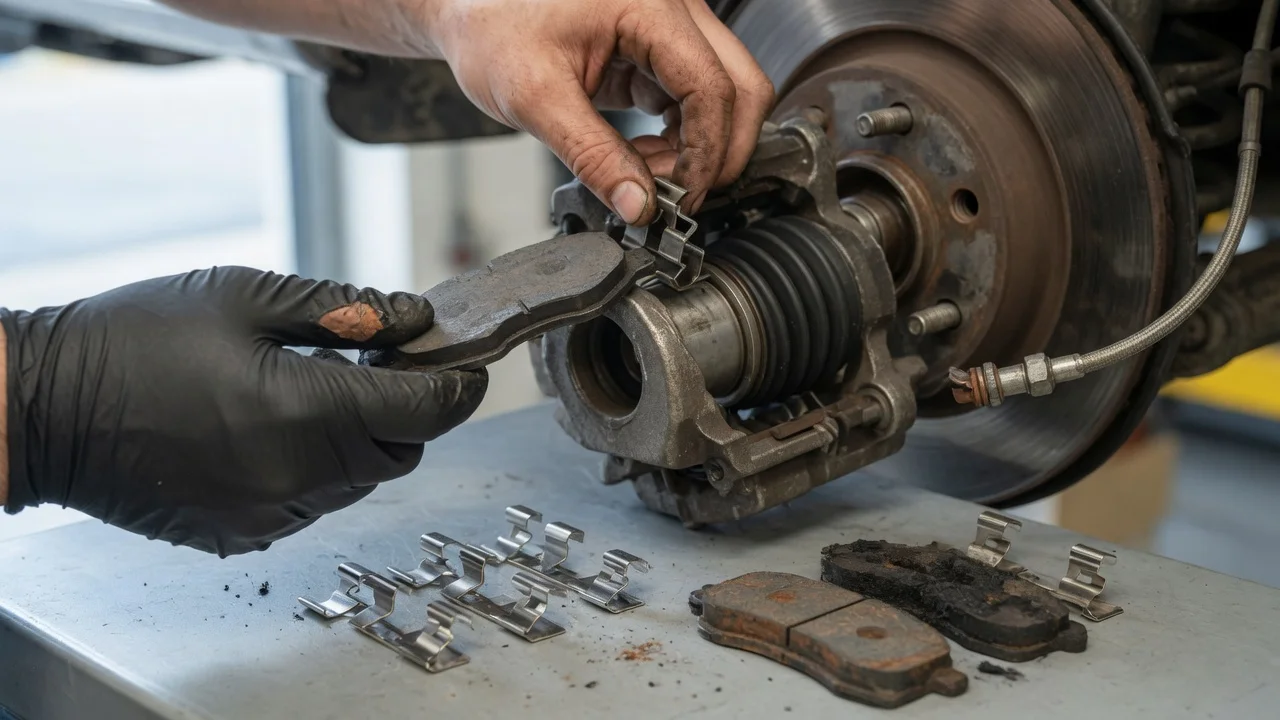
What Brake Pad Clips Are
Brake pad clips are the shaped metal retainers or springs that hold a brake pad in position within the caliper bracket or caliper body. Depending on the vehicle, the same parts may be called abutment clips, pad retainers, anti-rattle clips, or fitting hardware. Their main jobs are to keep the pad located correctly, allow the pad to move slightly as the brake is applied and released, and reduce vibration that can become brake squeal.
The essential answer is that brake pad clips are service hardware rather than a permanent fixture. They should be inspected whenever pads are checked or replaced, and they should be replaced if they are corroded, bent, cracked, or no longer gripping the pad securely. Because clip designs vary by axle, caliper type, and model year, the correct replacement must match the specific vehicle rather than being treated as a universal component.
Why the Clips Matter
A properly seated clip gives the pad a controlled sliding surface. When the caliper piston presses the pad against the rotor, the pad needs to move straight and return slightly when pedal pressure is released. If a clip is missing, weak, or corroded, the pad can sit at an angle, drag on the rotor, or move unevenly. That can show up as uneven pad wear, a persistent light scraping sound, or a clunk when braking direction changes.
Clips also influence noise. Many clips are designed to apply a small amount of spring tension to the pad. That tension helps resist the high-frequency vibration that can create squeal. Reusing clips simply because they look present can leave a new set of pads without the correct retention or damping.
Inspection Points
Inspect each clip after it is removed and after the caliper bracket is cleaned. Look at the contact areas where the pad ear or backing plate slides. Scoring, deep rust pitting, or a worn step in the metal are reasons to replace the clip. Also check the spring fingers, if fitted, to make sure they still return to their original shape and press firmly against the pad.
Bend or stretch the clip only if the service manual provides that adjustment. A clip that has lost tension, cracked at a bend, or holds the pad loosely in a dry test-fit should be treated as worn. New brake pad sets often include replacement clips, but kits vary by brand and vehicle, so the box contents should be confirmed before the caliper is reassembled.
When to Replace
Replace brake pad clips when the pad friction material is worn to the service limit, when the clips are damaged, or when the clips no longer hold the pads securely. A common practice is to replace the clips as part of a pad replacement. This does not guarantee that every new pad box includes the correct hardware, but it avoids pairing fresh pads with a degraded mounting surface.
Some vehicles use multi-piece hardware that includes the clip, a separate wear indicator, and small rubber or silicone bushings. The decision to replace should cover all parts of that hardware set that are part of the pad locating or retention system. Where the design allows it, the bracket seats should also be cleaned to bare metal before new clips are installed.
Installation and Common Mistakes
Clean the caliper bracket before fitting the clips. Brake dust and corrosion can build up under the clip and push it inward, causing the pad to bind. Use a wire brush or the appropriate cleaning tool for the bracket lands, then test-fit the new clip. It should seat fully and stay in place without heavy force.
A frequent mistake is installing a clip upside down or on the wrong side of the bracket. Left and right clips can appear similar even when they are mirrored. Compare the new parts with the old ones before removal and note the orientation. Another common error is applying thick lubricant across the sliding surface. Brake grease should be used only where specified, typically on the pad ears or the back of the backing plate, and it should not contaminate the friction material or the rotor face.
After installation, press the pad by hand to verify that it moves smoothly and returns slightly. If the pad is pinched, the most likely cause is corrosion left in the bracket seat or a clip that is not fully seated. Do not force the caliper over a pad that is not sliding freely.
Variant Differences and Fitment
Clip fitment is not universal across a model line. Vehicles can change caliper design between generations, trim levels, or production runs, and front and rear hardware is frequently different. A clip that fits one engine or brake package may not fit the same model with a larger rotor or a different caliper supplier. The safe path is to match the replacement hardware by the vehicle identification number, build date, brake option, and axle position.
Because catalog data can contain errors, the old clip should be kept until the new part has been compared and installed. Dimensional differences are often small but important. A clip that is too narrow will not seat, while one that is too wide can allow pad movement or interfere with the caliper.
Final Check
After the brakes are reassembled, pump the brake pedal to bring the pads against the rotors before moving the vehicle. Then complete the brake service according to the vehicle manufacturer's bed-in or post-service procedure if one is specified. A short, careful road check can confirm that the brakes apply smoothly, release fully, and do not produce new scraping or rattling noises.
The supplied guidance does not include model-specific torque values, hardware part numbers, or a vehicle-by-vehicle clip catalog. Those details should be confirmed from the applicable factory service information for the exact vehicle before service.