Repair a brake booster
The short answer
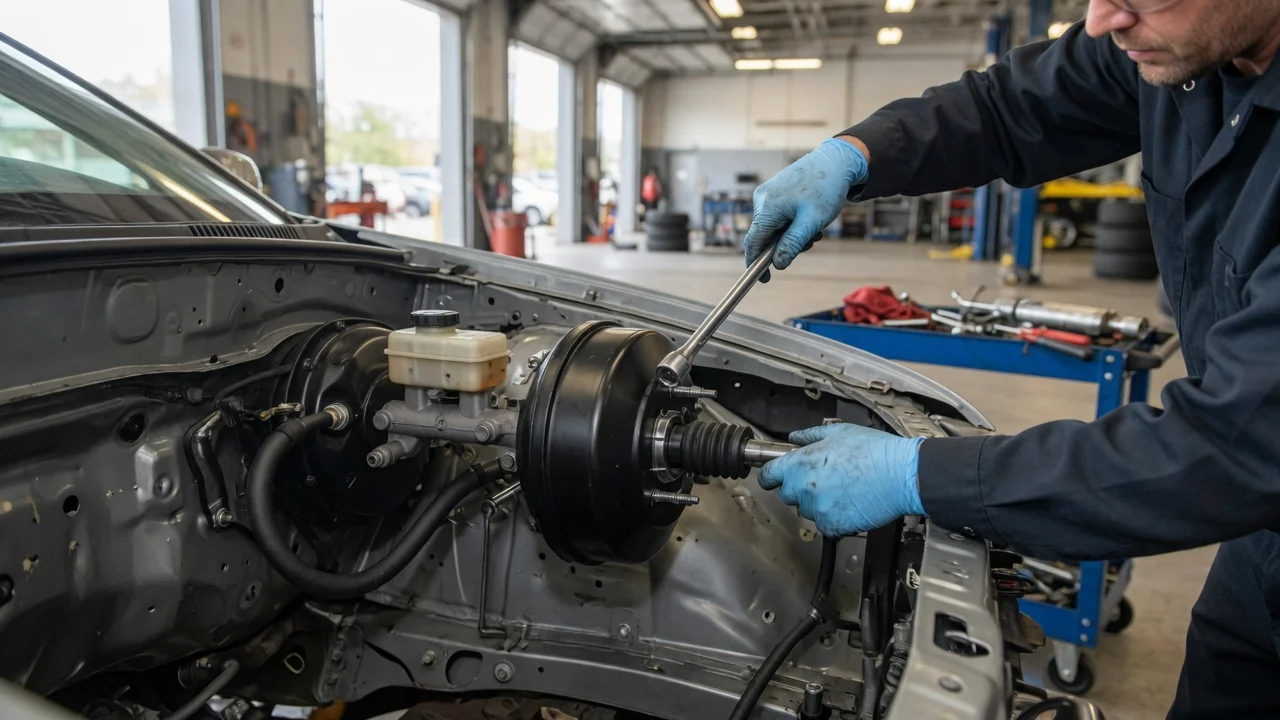
Repairing a brake booster usually means confirming that the booster, and not something connected to it, is the cause, and then replacing the faulty part. On many cars the booster is serviced as a complete unit. Some symptoms come from cheaper parts such as a vacuum hose or check valve. Rebuilding the booster itself is generally not a practical owner repair. Because the booster is part of a safety-critical system, a hard pedal, a sinking pedal or a brake warning light should be diagnosed before the vehicle is driven normally.
The answer depends on which type of booster your vehicle has. The checks and repair approach for a vacuum booster differ from those for a hydraulic or electric unit. Identify the type before following any diagnostic steps.
What a brake booster does and which type you have
A brake booster multiplies the force from your foot before it reaches the master cylinder. The master cylinder is the component that converts pedal movement into hydraulic pressure in the brake lines. Without boost assist the brakes still work mechanically, but the pedal needs much more effort and stopping distances can grow.
Vacuum booster: a round canister between the pedal and the master cylinder. It uses engine vacuum, or on many diesel and some turbocharged or direct-injection petrol engines a separate vacuum pump, acting on an internal diaphragm. A one-way check valve and a hose connect it to the vacuum source. Hydraulic booster (often called hydro-boost): uses pressure from the power steering pump. It is common on some trucks, diesels and heavy-duty vehicles. Its condition is tied to power steering fluid level and pump health. Electric or electromechanical booster: uses an electric motor instead of vacuum. It is found on many hybrids, electric vehicles and some newer combustion models, and is often integrated with stability and regenerative braking control. Diagnosis normally requires a scan tool and model-specific procedures.
Which type a given vehicle uses depends on model year, generation, powertrain and market. Check the owner's manual or the factory service information for your exact vehicle rather than assuming.
Symptoms that point toward the booster
The pedal feels hard or needs unusually high effort, especially at the start of travel. A hissing sound comes from under the dash when you press or release the pedal (vacuum type). The engine idle changes or stumbles when you apply the brakes (vacuum type, suggesting a leak). Braking effort varies, or assist fades after repeated stops. On electric boosters, a brake system or stability warning appears, with or without a stored fault code.
Some symptoms are often blamed on the booster but usually point elsewhere. A pedal that slowly sinks toward the floor under steady pressure, or a soft and spongy pedal, typically indicates a hydraulic problem such as a fluid leak, air in the lines or a failing master cylinder. A booster fault normally makes the pedal harder, not softer.
Checks for a vacuum booster
These are widely used basic checks for vacuum-assisted systems. They narrow down the cause but do not replace manufacturer test procedures. Do them with the vehicle parked securely, and do not drive to test brakes you suspect are faulty.
Reserve depletion and start test: with the engine off, press the pedal several times until it feels firm, which uses up stored vacuum. Hold light, steady pressure on the pedal and start the engine. A working booster should let the pedal move down slightly as assist arrives. No movement suggests no vacuum is reaching the booster, or the booster is not working. Vacuum hold test: run the engine briefly, switch it off, wait, then press the pedal several times. The first one or more applications should feel assisted before the pedal firms up. If the pedal is hard on the first press, vacuum is not being held, which points to the check valve, the hose or the booster diaphragm. Running leak test: with the engine idling, hold the pedal down and listen under the dash for hissing. Also watch for an idle change. Either suggests an internal leak in the booster or at its seals. Hose and check valve inspection: look for a cracked, collapsed, oil-soaked or loose vacuum hose and a damaged grommet where the valve enters the booster. A check valve should generally allow airflow in one direction only. Follow your service manual for the correct test on your vehicle.
Result | What it suggests; Pedal does not drop when the engine starts | No vacuum supply or no assist. Check the hose, check valve and vacuum source, including the vacuum pump on engines that use one. Assist is lost soon after the engine stops | Vacuum is not held. Check valve or leak in the hose or booster. Hissing while the pedal is held, or the idle changes | Probable internal leak in the booster diaphragm or valve. Hose and valve are sound but the tests still fail | The booster itself is the likely fault. Pedal sinks or feels spongy | Probably a hydraulic fault rather than the booster. Needs separate diagnosis.
One additional sign deserves attention. Brake fluid found inside the booster, or a wet area where the master cylinder meets it, can indicate a leaking master cylinder seal. In that case both parts may need attention, so have the fault diagnosed rather than replacing only the booster.
Checks for hydraulic and electric boosters
For a hydraulic booster, start by checking the power steering fluid level and condition and looking for leaks at the booster and its lines. If steering effort has also become heavy, the shared pump or fluid supply is a likely common cause. Beyond these visual checks, testing usually requires pressure gauges and model-specific procedures.
For an electric booster, a scan tool that can read brake and chassis modules is the practical starting point. Treat a stored fault code as a lead to investigate, not as proof that the booster has failed. Codes can be triggered by low battery voltage, wiring or connector faults, sensor issues or problems in a connected module. Many of these systems also need calibration or initialisation after parts are replaced, so they are generally a job for a professional with the right equipment.
Repair options once the cause is confirmed
Vacuum hose or grommet: often a straightforward replacement. Use the correct hose type, because ordinary hose can collapse under vacuum. Check valve: usually replaceable on its own. Vacuum pump, on engines that use one: replacement procedures vary considerably by engine. Booster unit: usually replaced as an assembly, new or remanufactured. The job typically involves separating the master cylinder from the booster and disconnecting the pedal pushrod inside the cabin. Some designs require a pushrod length check or adjustment. Whether the brake lines must be opened, and therefore whether the system needs bleeding, depends on the vehicle. Hydraulic or electric booster: replacement and any required calibration follow manufacturer procedures and often need specialist tools.
After any brake booster work, repeat the functional checks and confirm a normal, firm pedal while stationary before driving. Then test cautiously at low speed in a safe area.
When to stop driving and get professional help
The pedal sinks toward the floor, feels spongy, or travel has suddenly increased. A red brake warning light is on, or the fluid level is dropping. Brake assist is completely lost, making the vehicle hard to stop. The vehicle has an electric or integrated braking system showing warnings. You are not confident working on brakes, or you lack the vehicle's service procedures.
Any of these warrants stopping use of the vehicle and arranging inspection, with towing if needed. A hard pedal from booster failure still allows braking, but with much greater effort and longer stopping distances, so it should be treated as urgent rather than something to live with.
What this guide does not cover
No vehicle-specific data was available for this guide. It does not include torque values, pushrod measurements, vacuum readings, part numbers, labour times or repair costs. Those vary by model year, generation, powertrain and market, and should come from the factory service information for your vehicle or from a qualified technician.