Boostwerks Transfer Case Linkage: Fitment and Kit Selection
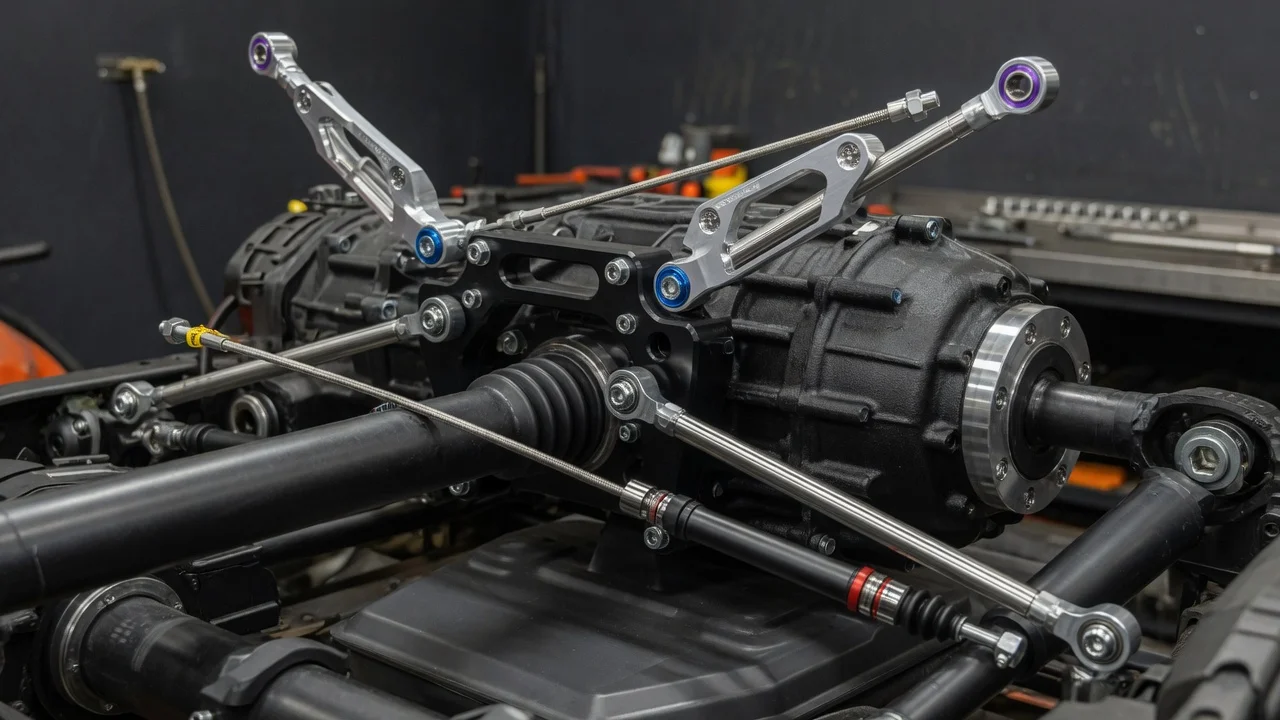
A transfer case linkage is the mechanical connection between the shift lever in the cab and the selector arm on the transfer case. When it is worn, bent or knocked out of geometry by a lift, body mount change or drivetrain swap, the shifter can feel vague, refuse to reach every range or creep out of engagement. Before buying a Boostwerks transfer case linkage, confirm the problem you are fixing, which transfer case and shifter your vehicle uses, and what the kit can and cannot do.
Define the job the product must do
Start with the symptom, not the part. Each of these points to a different cause: a loose or rattling lever, a shifter that stops short of 4-low or neutral, a range that will not stay engaged, or a linkage that rubs the exhaust or crossmember after a lift. Write down exactly what happens, in which range, and whether it changed after a specific repair or modification. Your service history matters here. A recent transmission mount, body lift, motor mount or transfer case replacement can shift the geometry enough that the original rod no longer lines up with the case detents.
Next, decide whether you need a replacement for a worn factory piece or a corrective part for a modified vehicle. A stock-height daily driver usually needs a linkage that restores the original travel and feel. A lifted or swapped vehicle may need adjustable length, different bends or relocated mounting points to clear new components. Operating conditions also shape the choice. A truck that sees mud, water crossings or road salt puts more demand on joints and finishes than one that rarely leaves pavement. Finally, rule out problems a linkage cannot solve. The fault is likely inside the transfer case in any of these cases: the lever moves freely but the case still grinds, the case jumps out of range under load, or it will not shift with the linkage disconnected. In that situation, have the case inspected before you buy any parts.
Check compatibility
Compatibility begins with the exact transfer case. Most cases carry an identification tag or cast markings. Read them rather than assuming from the model year, because factory options, earlier swaps and remanufactured units can differ from what a parts lookup expects. Confirm the full vehicle configuration as well: model, year, cab and transmission, since shifter position and tunnel shape can change with them. Then confirm the shift method. Vehicles with electronic shift-on-the-fly selectors use a motor or actuator instead of a mechanical rod. A mechanical linkage kit only applies if the vehicle has, or is being converted to, a manual lever.
With the case and shifter identified, compare the interfaces. Check how the linkage attaches at each end, whether by stud, bolt, clevis pin or bushing, and measure hole and stud diameters if the listing gives them. Note the distance between the shifter pivot and the case arm at ride height, and remember that a lift or new mounts may change it. Confirm the range pattern, such as the order of 2H, 4H, neutral and 4L, so the lever positions match the case detents. The factory service manual gives the manufacturer specifications for the stock adjustment points. Use them to judge whether the kit can be set correctly. If the product listing does not name your transfer case or shifter, ask the seller directly before ordering rather than relying on a broad fitment claim.
Features that affect the choice
Adjustability is the most practical feature for modified vehicles. A rod with threaded ends or an adjustable sleeve lets you set the length to match changed geometry. A fixed rod only works if the distance and angles match the design it was made for. Joint type is the main trade-off. Spherical rod ends remove slop and give a more direct feel, but they can pass more noise and vibration into the cab and may need boots or periodic cleaning in dirty conditions. Rubber or polyurethane bushings isolate vibration better but allow some movement and wear over time.
Treat marketing labels carefully. Words like heavy duty, billet or upgraded do not tell you whether the part fits or how it will hold up. Look for concrete evidence instead: • a fitment list naming specific vehicles and transfer cases; • stated dimensions and adjustment range; • the material and finish; • a parts list showing which hardware is included; • available installation instructions; Check whether new brackets, bushings, clips and locknuts are supplied or whether you must reuse worn originals. A kit that includes the small pieces often saves a second trip for parts and avoids pairing new rods with tired hardware.
Limitations and ownership costs
Installation is more than bolting the rod in place. Expect to support the vehicle securely and possibly remove a shifter boot or console trim. Then adjust the length so each lever position fully engages the matching range on the case. Verify every range, including neutral, first with the engine off and again during a careful road test. Where equipped, confirm the dash indicator matches the selected range. Some lifted or swapped setups need bracket modification, drilling or exhaust clearance work, which adds time and cost beyond the kit itself. Follow any torque values or adjustment procedures in the kit instructions, and use the factory service information where those instructions are silent.
Ownership costs are usually modest but not zero. Joints, boots, bushings, cotter pins and locknuts can wear or corrode, especially after mud, water and salt exposure. There is no universal replacement interval. Add a visual and hand check of the linkage to your regular maintenance schedule, and inspect it sooner after hard off-road use or if shifting feel changes. The linkage also has limits. It will not repair worn shift forks, a stretched chain, damaged detents, a failing range motor, or low or contaminated fluid. On its own, it will not convert an electronic system to manual operation.
Build a practical shortlist
Narrow your options with a short checklist rather than a ranking: 1) Confirm the kit names your transfer case and shifter type, not just the vehicle make. 2) Check that the attachment points and dimensions match what you measured, with enough adjustment range for your ride height and any lift or mount changes. 3) Compare joint type against how you drive: firm, direct feel versus quieter isolation. 4) Review the included hardware and instructions so you know what else to buy. 5) Note any required modifications and whether you have the tools and time to do them correctly.
Before ordering, gather the transfer case tag information, photos of both ends of the existing linkage and your measurements. Keep them with the vehicle's service history. That record makes it easier to confirm fit with the seller, compare alternatives fairly and diagnose any future shifting complaint. If an inspection points to an internal transfer case problem, address that first. A new Boostwerks transfer case linkage works best on a case that already shifts correctly when moved by hand at the selector arm.