BMW X1 Wastegate Actuator Replacement
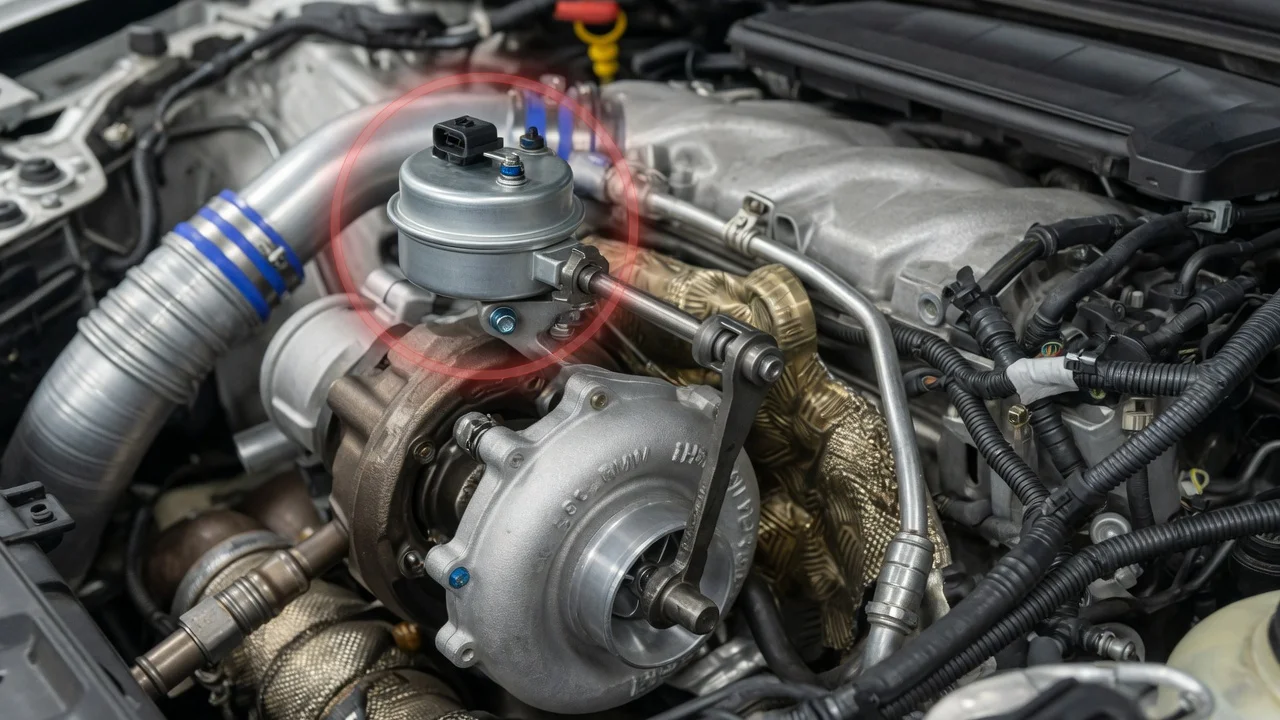
A failing wastegate actuator can leave a BMW X1 short on power, stuck in reduced-power mode or rattling from the turbocharger area. Replacing the actuator is a focused repair, but it only makes sense when diagnosis points to the actuator rather than a vacuum leak, a control fault or wear inside the turbocharger itself. This guide covers how to confirm the part, prepare for the job, remove and install the actuator, and check the result, using BMW service information for your exact vehicle configuration.
Confirm the part and repair scope
Start with the vehicle identification number rather than the model name. The X1 has been built in several generations with different turbocharged engines, and wastegate control differs between them. Some engines use a vacuum-operated actuator supplied through an electro-pneumatic pressure converter. Newer designs use an electrically driven actuator with its own position feedback. Depending on the engine, the actuator may be sold separately or only as part of the turbocharger assembly. A VIN-based parts lookup confirms which design your X1 has and whether the actuator can be replaced on its own.
Next, confirm the actuator is actually the fault. Boost-related fault codes, reduced engine power and hesitation under load can also come from cracked vacuum hoses, a weak vacuum supply, a faulty pressure converter, charge-air leaks, damaged wiring or a sensor problem. A metallic rattle from the turbo area at idle or on deceleration often points to wear in the wastegate flap and its linkage inside the turbocharger, which a new actuator will not cure. A proper inspection includes reading stored and pending codes and checking vacuum lines and connectors. On electric units, it also includes reviewing actuator position data with a capable scan tool. Your service history matters too, because previous turbo, intake or vacuum repairs may reveal disturbed hoses or a part that was already replaced.
Prepare tools and safe access
Get the BMW repair instructions for your exact engine and model year before buying tools. They give the access route, fastener types, any one-time-use parts and the tightening values. This guide deliberately does not quote those values, because they vary between engines and must come from manufacturer specifications. Expect to need a good socket and Torx set, trim tools, penetrating oil for heat-exposed fasteners and a torque wrench. You will also need a diagnostic tool that reads BMW engine codes and, for electric actuators, can run any required adaptation.
The turbocharger sits on the exhaust side of the engine, so work only on a fully cold engine. If the job requires going underneath, lift the vehicle on a hoist or secure stands at the correct jacking points, never on a jack alone. Disconnect the battery following BMW's procedure before working on electrical components. Access is often tight and may involve removing the engine underbody panel, heat shields, intake ducting or charge-air pipes. Two situations are reasonable points to hand the job to a professional: your X1 needs the turbocharger removed, or it needs the actuator calibrated with dealer-level software and you lack that equipment or experience.
Remove without avoidable damage
Follow the removal sequence in the repair instructions, because the order of access differs between engine versions. Photograph the hose routing, connector positions and linkage arrangement before taking anything apart. In general terms, the sequence is: 1) Clear the parts blocking the actuator. 2) Disconnect the vacuum line or electrical connector. 3) Release the clip or fastener joining the actuator rod or lever to the wastegate arm. 4) Remove the actuator's mounting fasteners.
Fasteners near the turbo seize easily after repeated heating and cooling. Apply penetrating oil, let it soak and use steady force rather than impact. A snapped bolt in the turbo housing or bracket can turn a modest repair into a turbocharger job. Do not lever against the wastegate arm, bend the actuator rod or force the linkage, and do not change any adjustment on the old unit. Cover open intake and charge-air pipes so dirt, clips and fasteners cannot fall toward the turbocharger. Inspect vacuum hoses and connector pins as they come off, and deal with brittle hoses or corroded terminals now.
Install and restore the system
Compare the new actuator with the old one. The mounting points, rod or lever shape, and connector type or vacuum port should all match. Fit the actuator in the same orientation, start the fasteners by hand and tighten them to the values in BMW's instructions. Reconnect the rod or lever to the wastegate arm, using a new retaining clip if one is specified, and check that the linkage moves freely without binding. A replacement vacuum unit may come with its rod preset. Do not alter that setting unless the repair instructions give an adjustment procedure, because rod length governs how the wastegate holds boost.
Route the vacuum line or wiring harness exactly as before, clear of hot exhaust parts and moving components, and make sure the connector is fully latched. Refit any heat shields, ducts and charge-air pipes with sound clamps and seals, because a loose charge pipe produces symptoms similar to a failed actuator. Reconnect the battery. An electric actuator may need a learning or adaptation routine, run with diagnostic software, so the engine control unit knows the new unit's end positions. Check the repair instructions to see whether your engine requires this. Record any stored fault codes before clearing them.
Check the completed work
Before driving, start the engine and listen for exhaust or vacuum leaks, confirm that no warning lights remain, and rescan for fault codes. With a scan tool, compare actual boost pressure against requested boost. On electric units, also confirm that the actuator position follows the commanded value. Then road test under the same operating conditions that produced the original fault, such as a full-throttle merge or sustained load on a grade. Watch for hesitation, power reduction or a returning warning light.
If boost faults return, the cause probably lies elsewhere in the boost-control system, such as the vacuum supply, the pressure converter, a charge-air leak, a sensor or wear inside the turbocharger. Rattling that persists after the swap points toward the internal wastegate flap or loose exhaust heat shields. The actuator is not a scheduled replacement item, so there is no universal maintenance schedule for it. At the next routine inspection, recheck hose condition and fastener security around the turbo. Keep the invoice and the recorded fault codes with your service history.