BMW Wastegate Actuator Replacement: Identifying the Correct Procedure
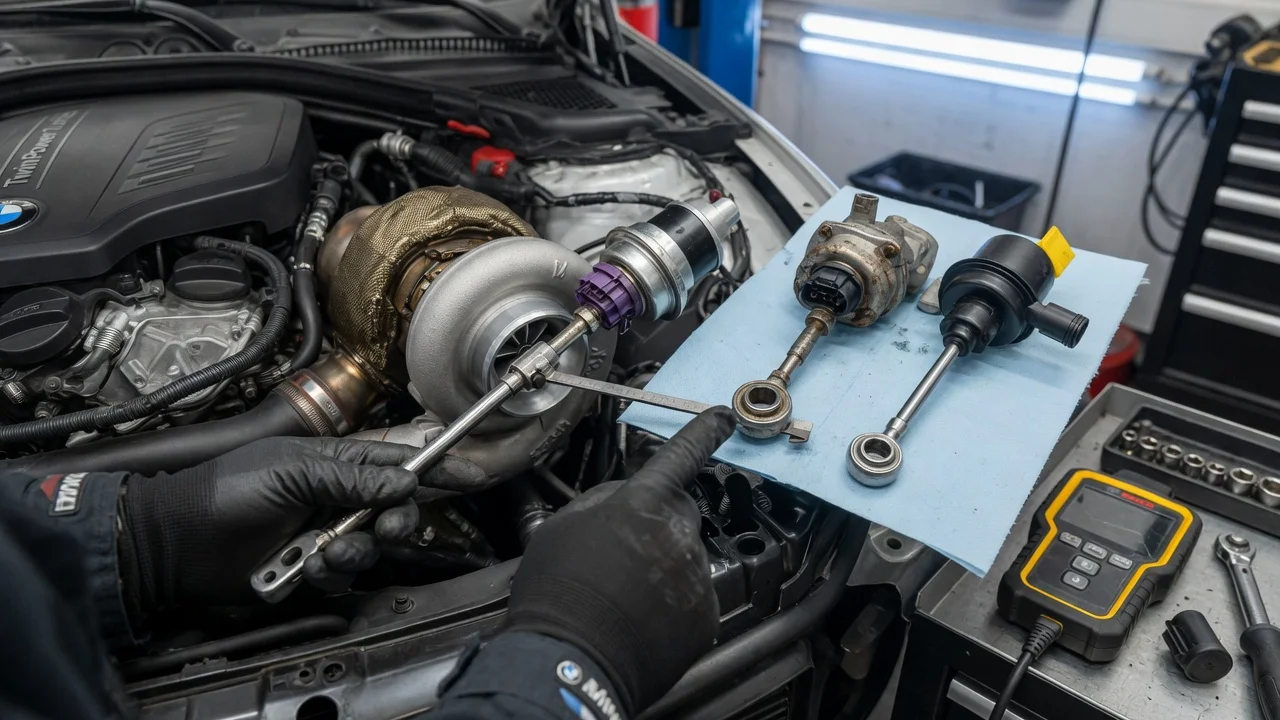
A failing wastegate actuator can leave a turbocharged BMW short on boost, stuck in reduced-power mode or logging boost control faults. Replacing it is not one universal job. The correct procedure depends on the engine, whether the actuator works by vacuum or electrically, and whether it is sold separately from the turbocharger. This guide explains how to confirm the diagnosis, plan the work and verify the result using the service information for your exact vehicle.
Confirm the part and repair scope
The wastegate lets exhaust gas bypass the turbine so boost stays within the target set by the engine control unit. The actuator is what opens and closes it. On some BMW engines it is a vacuum-operated diaphragm unit controlled by an electro-pneumatic valve. On others it is an electric motor with an integrated position sensor that reports back to the engine control unit. The two designs fail differently and are tested differently, so identify which one your engine uses before buying anything.
Many symptoms blamed on the actuator have other causes. Underboost, reduced power and boost deviation faults can come from a split charge pipe, a leaking intercooler connection, cracked vacuum lines, a faulty control valve, a vacuum supply problem or a sensor fault. A rattle from the turbo area on acceleration or deceleration is often wear in the wastegate flap or its pivot inside the turbocharger, which a new actuator will not fix. Read the stored fault codes and inspect hoses and connectors first. Then test the actuator itself: a vacuum unit should move its rod smoothly and hold vacuum when checked with a hand pump, and an electric unit can usually be exercised and monitored through BMW-capable diagnostic software.
Once the actuator is confirmed as the fault, match the replacement by VIN, engine code and production date rather than by model name alone. On some engines the actuator is only supplied as part of the turbocharger assembly, which changes the scope and cost of the repair considerably. Check the service history too, because earlier turbo or exhaust work may mean non-original parts or altered fasteners are already fitted.
Prepare tools and safe access
Get the repair instructions for your exact vehicle configuration before starting. They tell you the access route, the manufacturer specifications for fastener torque, which fasteners or gaskets must be replaced, and whether the actuator needs an adaptation or initialization afterward. Typical tools include a scan tool that supports BMW-specific functions, a hand vacuum pump for vacuum actuators, a calibrated torque wrench, quality sockets and penetrating oil for fasteners exposed to exhaust heat. Avoid improvising with tools that round off or snap corroded hardware.
Let the engine cool completely, since the turbocharger and exhaust stay hot long after shutdown. If the car must be raised, support it on rated stands on proper lift points, never on a jack alone. Disconnect the battery only as the service information describes for your model. Be realistic about access. If the procedure calls for removing the turbocharger, the exhaust manifold, a subframe or lowering the engine, this is a professional-level repair and not suitable for an inexperienced owner.
Remove without avoidable damage
The general sequence is to remove covers, heat shields and any intake or charge-air components blocking access, then disconnect the vacuum hose or electrical connector from the actuator. Label hoses if more than one is nearby. On vacuum designs, the actuator rod is usually fixed to the wastegate lever with a clip or retaining fastener. Before detaching it, mark or measure the rod position and any adjuster setting so you have a reference, but take the final setting from the service information rather than simply copying the old part. Then remove the mounting fasteners and lift the actuator out without bending its rod or bracket.
Heat cycling makes fasteners near the turbocharger prone to seizing, and a snapped stud in the turbo housing can turn a simple job into a major one. Apply penetrating oil, allow time for it to work and use steady force. Plastic connectors and vacuum lines become brittle from heat, so release locking tabs carefully. Cover any open intake or turbo openings to keep debris out. While you have access, check the wastegate lever for excessive play or binding. If the flap itself is worn or sticking, the turbocharger needs attention regardless of the actuator.
Install and restore the system
Compare the new actuator with the old one before fitting it, confirming the mounting points, rod or linkage type, and the direction of the vacuum port or electrical connector. Install it in the same orientation. On vacuum actuators, rod length and preload affect when the wastegate begins to open and therefore how much boost the engine makes. Set any adjustable rod exactly as the applicable instructions specify. Tighten fasteners to the manufacturer specifications and fit new single-use hardware where required.
Reconnect hoses and connectors so they are fully seated and routed away from hot or moving parts, then refit every heat shield. Shields protect the actuator, particularly electric units with internal electronics. If the service information calls for actuator adaptation, initialization or resetting learned values, complete it with suitable diagnostic software before the first drive. Clear the old fault codes only after this step, so any new codes clearly reflect the repaired system.
Check the completed work
Start with static checks. A vacuum actuator should hold vacuum and move through its full travel without sticking, and its hoses should show no leaks. An electric actuator should pass any available actuator test, with position readings that respond as commanded and no stored faults. Then start the engine and listen for exhaust leaks or unusual noises around the turbocharger and the components you disturbed.
Road test only where it is legal and safe, ideally with a helper watching live data. Compare requested and actual boost under varying load and operating conditions, and confirm that no reduced-power warning appears. After the engine cools, recheck connectors, hoses and fasteners, and scan again for faults.
Further diagnosis is needed if boost deviation codes return, boost overshoots its target, a rattle persists, or you see smoke or rising oil consumption. These point to turbocharger wear, charge-air leaks or control-side faults rather than the new part. Record the repair and part details in the service history. There is no universal replacement interval for this component, so inspect it as part of the normal maintenance schedule rather than replacing it preventively.