B&M Transmission Coolers: Fitment and Selection
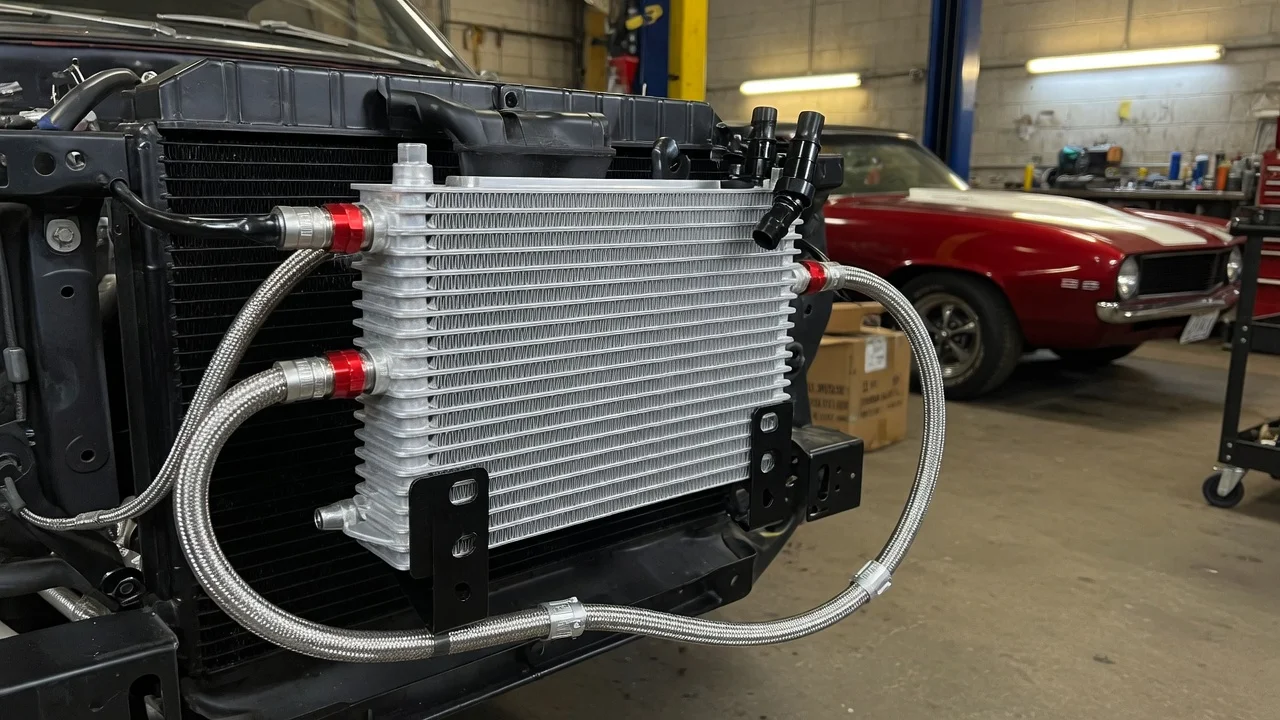
A B&M transmission cooler adds heat-shedding capacity to an automatic transmission, usually working alongside the cooler built into the radiator. Picking the right one depends less on the brand than on how you use the vehicle, which transmission it has, and how the cooler will connect and mount. This guide covers those checks so you can narrow the B and M transmission cooler range to options that suit your setup.
Define the job the product must do
Start with the workload. Towing, hauling heavy loads, long grades, stop-and-go traffic and high-stall torque converters all push automatic transmission fluid temperatures up, and sustained heat speeds up fluid breakdown. A daily driver that occasionally pulls a small utility trailer needs far less extra capacity than a truck that regularly tows near its rated limit or a performance build with a loose converter. Write down your typical load, climate and driving pattern before comparing coolers, because those factors decide how much capacity is useful and how much is wasted.
Next, list the practical constraints. How much open space is there in front of the radiator and A/C condenser, or elsewhere with good airflow? Does the vehicle already have a factory auxiliary cooler or towing package? Are you comfortable cutting into cooler lines and routing hoses, or will a shop do the work? An auxiliary cooler is a preventive upgrade, not a repair. If the transmission already slips, flares or shifts harshly, get it diagnosed before spending money on cooling.
Check compatibility
Identify the exact transmission type and how its cooling circuit is designed. Older three- and four-speed automatics often use a simple loop through the radiator tank, which makes an add-on cooler straightforward. Many modern electronically controlled transmissions use thermostatic valves, fluid warmers or fluid-to-coolant heat exchangers that manage warm-up as well as cooling. Bypassing or overloading those parts can change warm-up time and shift behavior, so check the service information for your specific transmission and configuration before deciding where an auxiliary cooler belongs.
Fitment then comes down to the physical interfaces. Measure or confirm the cooler line size, since the hose inner diameter and cooler inlet and outlet must match or be properly adapted. Many older vehicles use hose clamped over barbed tubes, while many newer ones use quick-connect fittings that require specific adapters. Check the available mounting area against the cooler's core dimensions, and decide whether you will use brackets or the tie-style mounts included with some kits; ties that pass through the radiator core need care to avoid damaging fins or tubes. A common arrangement routes fluid through the factory cooler first and then the auxiliary unit on the return side, but follow the instructions supplied with your cooler and your vehicle's service information.
The cooler does not change the fluid specification. Keep using the fluid your transmission calls for, and plan to recheck the level after installation because the added cooler and hose hold extra fluid. Some sealed transmissions require a specific temperature-based level check procedure, sometimes with a scan tool, so confirm the method for your unit.
Features that affect the choice
Core construction is the main design difference among auxiliary coolers. Tube-and-fin coolers pass fluid through a winding tube with fins attached; they are simple and inexpensive. Stacked-plate coolers route fluid through a series of flat passages between fins and are generally considered more efficient for their size, which is why B&M builds its SuperCooler line around a stacked-plate design. That efficiency matters most where mounting space is tight or the cooling demand is high.
Size and rating come next. Coolers are commonly sized by an approximate vehicle weight or application class listed by the manufacturer. Treat that figure as guidance based on the maker's assumptions, not a measured result for your vehicle and trailer. Bigger is not automatically better: in cold climates an oversized cooler with no thermostatic control can keep fluid below its intended operating temperature, which may affect shift quality. If you want to see how a cooler actually performs, a transmission temperature gauge or scan tool data gives you real numbers instead of guesses.
Be skeptical of labels such as heavy duty or maximum cooling on their own. Compare things you can verify: core dimensions, fitting size and type, the basis for the stated rating, and what hardware is included. A kit that already contains the right hose, clamps and mounting parts for your line size can save a second trip for parts.
Limitations and ownership costs
Budget for more than the cooler. Installation may require additional hose, clamps, line adapters for quick-connect fittings, and fluid to replace what is lost and fill the new circuit. If your transmission needs a scan tool to check fluid temperature or level, factor in that tool or shop time. A dedicated temperature gauge is optional but useful for towing.
Ongoing maintenance is modest but real. Inspect hoses and clamps for cracking, chafing and seepage, keep the cooler fins clear of bugs and road debris, and watch the fluid level for any slow loss. After an internal transmission failure, debris can lodge inside a cooler, particularly in fine-passage designs, so the cooler and lines generally need thorough flushing or replacement before a rebuilt or replacement unit goes in. Ask your rebuilder what they require for warranty coverage.
A cooler cannot repair a transmission. It will not clear diagnostic codes, cure slipping or restore worn clutches. A hot-fluid warning, a harsh shift or a stored code is a symptom, not proof that cooling is the problem; low fluid, a faulty sensor, converter issues or internal wear can produce similar signs. Review the service history, read any stored codes and check fluid condition, then weigh repair options with that evidence before assuming more cooling is the answer.
Build a practical shortlist
Before comparing specific models, confirm these points for your vehicle: the exact transmission and whether its cooling circuit includes thermostatic or heat-exchanger components; the cooler line size and fitting type; the open mounting area with good airflow; your realistic towing or load demand and climate; the fluid specification and level check procedure; and whether you will install the cooler yourself or pay a shop. With those answers written down, shortlist two or three coolers whose core size fits the space, whose rating suits your workload with sensible margin, and whose fittings match your lines or include the right adapters.
Finally, check that the cooler fits within your vehicle manufacturer's towing guidance, since added cooling does not raise the vehicle's rated towing capacity. Compare total installed cost, not just the cooler price, and choose the option that meets the job without unnecessary size or complexity.