Adding Aftermarket AC to a Classic Car or a Car Without AC
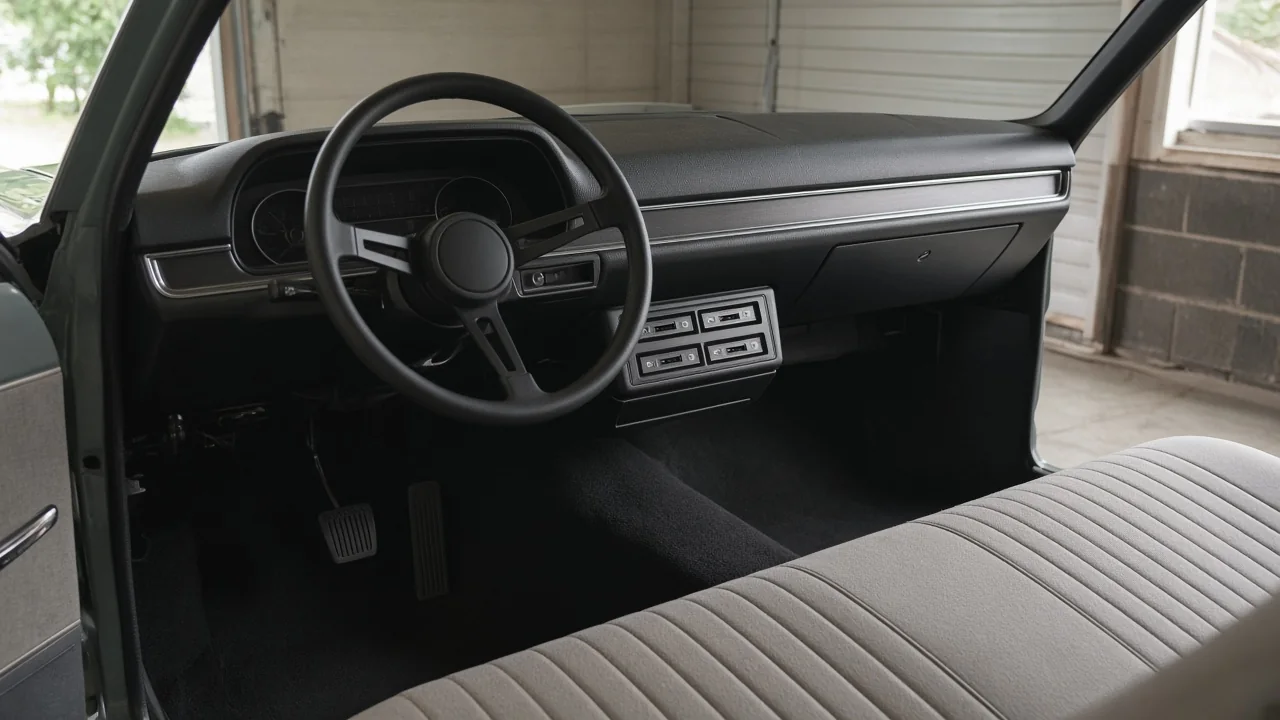
Adding air conditioning to a car that never had it, or fitting AC for a classic car, is a complete refrigeration retrofit rather than a single box under the dash. An aftermarket AC for a car can restore summer drivability, but the work reaches the engine bay, electrical system, and cabin. Before ordering an aftermarket car AC unit, weigh space, cooling capacity, preservation goals, and how much fabrication the vehicle will need.
What Adding AC to a Car Without It Involves
A conventional retrofit adds a complete refrigeration circuit, cabin airflow hardware, controls, and the connections that tie those pieces together. The compressor, typically belt-driven from the engine, pressurizes refrigerant and sends it to the condenser, where heat is rejected to outside air. Liquid refrigerant then reaches the evaporator, where it absorbs cabin heat and moisture as the blower moves interior air across the coil. Supporting parts such as refrigerant hoses, a receiver-drier or accumulator, expansion device, and blower controls complete the heat-removal loop.
Feasibility still depends on the individual vehicle's layout, mechanical condition, and remaining installation space. Engine-bay crowding, firewall access, dash structure, and condenser location all affect whether a system can be mounted without interfering with steering, exhaust, or cooling. A cabin-mounted aftermarket car AC unit, often an under-dash evaporator with a blower, only cools air that already reaches it; without a compressor, condenser, hoses, and a charged circuit, it does not establish a working refrigeration system. That unit is one piece of a larger retrofit.
What an Aftermarket AC Kit Needs to Include
An AC retrofit kit typically supplies the evaporator and blower assembly, compressor, condenser, refrigerant hoses, controls, and refrigerant-management pieces such as a drier, expansion valve or orifice tube, and service fittings. Those parts only work if the kit also includes, or the installer sources, compressor mounting brackets, belts or other drive hardware, wiring, vents, fittings, and vehicle-specific hardware. Checking the itemized contents before purchase shows what is actually in the box versus what must be fabricated or bought separately.
Under-dash evaporator placement keeps the coil and blower below the instrument panel, which can reduce passenger knee room, change vent locations, and put blower controls in a more visible cluster. An integrated evaporator hidden in the dash or heater box can look more original, but it usually needs more interior disassembly and custom ducting. Kit marketing labels do not establish fitment by themselves. The supplier must confirm requirements for the actual engine, body, accessory drive, and interior configuration, because brackets, hose lengths, and condenser size vary with those details.
Checking a Classic Car’s Readiness for AC
Before ordering AC for a classic car, assess engine configuration, accessory-drive layout, and compressor mounting space. Some engines have no unused pulley, limited belt wrap, or no clear path for compressor mounting brackets without crowding the exhaust or steering. Condenser clearance and condenser airflow matter just as much: the condenser needs a path for ram air and, often, electric fans, without blocking radiator flow. The engine cooling system should already be sound, because extra heat at the condenser raises radiator load.
Electrical capacity is another gate. The blower, condenser fans, and clutch draw current that older charging systems and aged wiring may not support, so charging output, cable condition, and fuse or relay planning need review first. Cabin sealing, cabin insulation, large glass area, and interior volume also shape cooling expectations; a poorly sealed cabin loses cooled air and gains heat through the glass. Visible vents, added controls, and required mounting changes can conflict with preservation goals, so owners should decide how much originality they will trade for comfort.
The Installation Work to Discuss With a Shop
Installation planning covers component mounting, refrigerant hose routing, wiring, vent placement, and a condensate drain that carries water out of the cabin rather than onto carpet or metal. Those topics are decisions to walk through with a shop, not a sequence of repair steps. Firewall passages, dashboard alterations, and fabricated mounts may change original panels and should be approved before work begins. An aftermarket AC for a car often needs custom brackets or hose paths; agreeing on those changes in advance prevents surprises once the dash or inner fender is already open.
Refrigerant handling is regulated work. A qualified technician should perform leak testing, evacuation, charging, and operational checks using the refrigerant specified for the installed components. The shop should also verify clearance from belts, fans, exhaust, and other hot or moving parts so hoses and the compressor stay protected in service. With the system running, cooling-system behavior needs assessment as well, because added condenser heat and any extra fans change airflow through the radiator. Those checks confirm the vehicle can reject engine heat and air-conditioning heat in real driving.
Planning the Budget and Setting Cooling Expectations
Budget for an aftermarket car AC unit is more than the kit price. Cost drivers include kit scope, fabrication, labor hours, interior disassembly and reassembly, electrical upgrades, cooling-system work, and final testing. Custom compressor mounting brackets, condenser fans, extra wiring, and dash or heater-box modifications can exceed the parts list. An itemized quote should distinguish included parts and labor from conditional work discovered once the vehicle is apart, such as deteriorated wiring, a weak radiator, or missing accessory-drive hardware. That split keeps the owner from treating an incomplete estimate as a fixed price.
Comfort after the retrofit depends on outdoor temperature, sunlight load through glass, humidity, cabin sealing, cabin insulation, and how well the blower and ducts move air. Those factors influence how the cabin feels without promising a specific vent temperature. Ask the installer to define the intended operating conditions—city traffic, highway speeds, or mixed use—and how completed system performance will be checked, such as observing vent airflow, clutch cycling, and cabin temperature change during a documented test drive. Matching the test to real use is more useful than a single idle demonstration in a cool shop.
What to Confirm Before Approval and at Handoff
Before approval, confirm documented fitment for the actual vehicle, the refrigerant the components require, replacement-part availability, warranty terms, and who is responsible for custom brackets, ducts, or wiring. Agree in writing on acceptable changes to the dashboard, firewall, engine bay, and interior so originality and function are not decided after metal is already cut. An AC retrofit kit is only as serviceable as the parts that can still be sourced later, so ask how the compressor, evaporator, and controls will be supported if something needs replacement years after the install.
At handoff, check control operation, vent airflow at each setting, unusual noises, and unwanted water inside the cabin using safe observations with the vehicle stationary or during a supervised drive. Weak cooling or unusual cycling is evidence that the system needs professional assessment; it does not by itself identify a failed compressor, condenser, or evaporator. Request the installed system's documentation, refrigerant type used, and care guidance from the shop without assuming a universal service interval. That paperwork helps a later technician diagnose or service the aftermarket AC for a car.