Acura RDX Wastegate Actuator Replacement
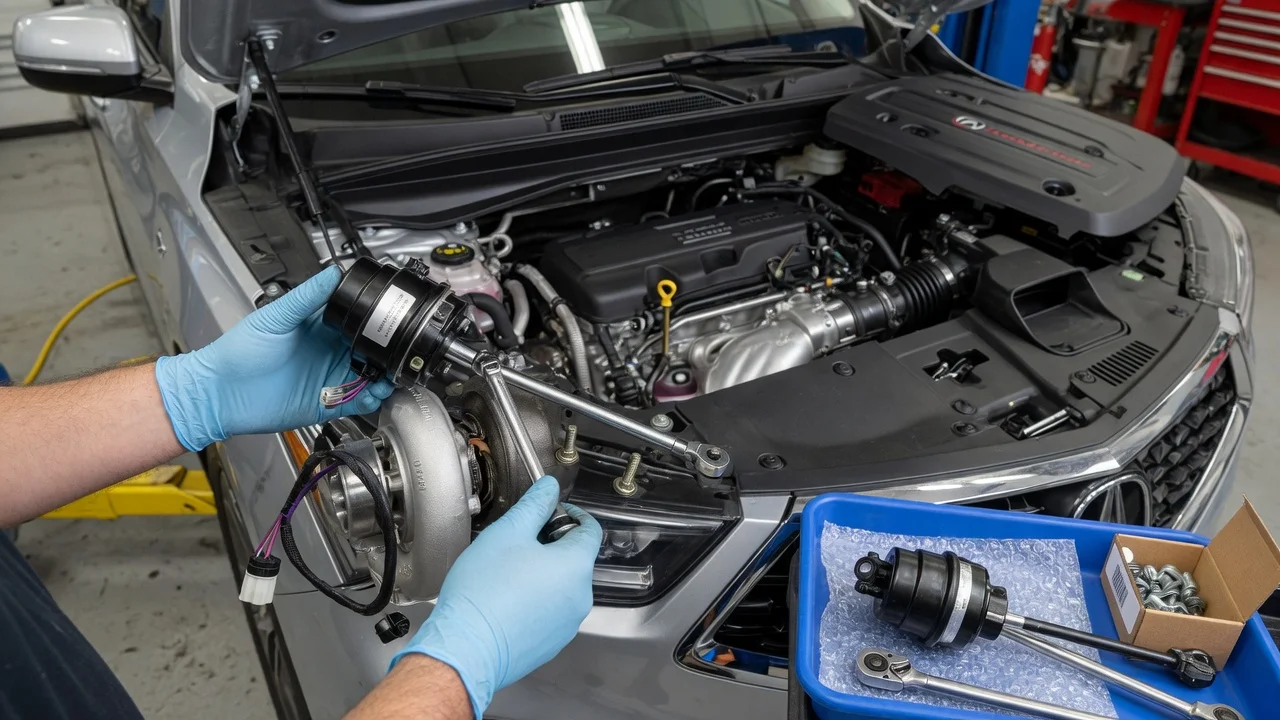
Replacing the wastegate actuator on an Acura RDX can restore proper boost control when the actuator itself has failed. It is also easy to spend money on the wrong part, because boost complaints often come from leaks, hoses, solenoids or wiring. This guide covers how to confirm the diagnosis, prepare for the job, remove and install the actuator carefully, and verify the repair. Throughout, use the factory service information for your exact vehicle configuration rather than generic numbers.
Confirm the part and repair scope
Start with the model year and engine. Only turbocharged RDX models have a wastegate. The first generation uses a 2.3-liter turbocharged four-cylinder, and the third generation uses a 2.0-liter turbocharged four-cylinder. The 2013 to 2018 RDX has a naturally aspirated V6 and no wastegate actuator at all, so a wastegate part listed for those years points to a catalog error. Actuator design and part numbers differ between generations. Match the replacement to your VIN through a parts catalog or dealer, and check whether the actuator is sold on its own or only as part of the turbocharger assembly.
Next, make sure the actuator is actually the problem. Low power, overboost or underboost codes, or a check engine light can come from several other causes: boost leaks, cracked charge-air piping, a faulty boost control solenoid, damaged pressure lines, wiring and connector faults, or a sticking wastegate flapper inside the turbine housing. A proper inspection includes these steps: read stored codes and freeze-frame data, smoke test the intake tract, check hoses and connectors, and compare commanded and actual boost with a scan tool where possible. If the wastegate valve itself is seized, or the turbocharger has shaft play or oil leakage, a new actuator alone will not fix it. Review the service history as well, because earlier turbo work, recent intake repairs or aftermarket tuning can change the diagnosis.
Prepare tools and safe access
Get the factory service information for your exact model year and engine before touching anything. It defines four things you need to know: • the access route; • fastener torque values; • any one-time-use parts, such as gaskets or self-locking nuts; • whether a calibration or relearn procedure is required after replacement; Do not substitute values from forums or from a different engine; the manufacturer specifications are what matter. Typical needs include a quality socket and wrench set, a torque wrench, penetrating oil for heat-exposed fasteners, and safe lifting equipment such as a lift or rated jack stands. You also need a scan tool that can read live data. If your actuator is electronically controlled, the scan tool must also support any relearn function the service manual specifies.
Work only on a cold engine. Turbocharger and exhaust components stay hot long after shutdown and can cause serious burns. Disconnect the battery if the service information calls for it, especially before unplugging electrical components. Access around the turbocharger is tight, and you may need to remove heat shields, intake ducting or other parts first. Rusted exhaust-side fasteners can snap, and an incorrect actuator setting can cause overboost and engine damage. This repair is best left to a qualified technician if any of these apply: you are not comfortable working around the turbocharger, you lack a torque wrench and a capable scan tool, or your vehicle requires turbo removal for this job.
Remove without avoidable damage
Follow the removal sequence in the service manual for your configuration, because component layout differs between generations. In general, start by removing the covers, heat shields and ducting that block access. Then disconnect the actuator. On a pressure-operated actuator, label and remove the control hose and note its routing. On an electronic unit, release the connector lock carefully instead of pulling on the wires. Next, detach the actuator rod or linkage from the wastegate arm, usually by removing a clip or retainer. Finally, remove the actuator mounting fasteners.
Several risks are specific to this component. Fasteners near the turbine housing seize easily after repeated heat cycles. Apply penetrating oil and use steady force, because a snapped stud can turn a simple job into turbocharger removal. Do not bend the actuator rod, pry against the wastegate arm or force the flapper; any of these can damage the wastegate valve or its bushing. Keep track of every clip, washer and bracket, and cover open turbo or intake passages so nothing falls inside. Before discarding the old actuator, compare it side by side with the new one. Mounting points, rod length, connector or hose port, and bracket shape should all match.
Install and restore the system
Mount the new actuator in the same orientation as the original, with the hose port or electrical connector facing the way the service manual shows. Align the rod with the wastegate arm so it moves without binding. Install new one-time-use parts where specified, and tighten fasteners to the torque values in the factory information. Reconnect the linkage with the correct clip or retainer and confirm it is fully seated. Route pressure hoses away from hot surfaces and moving parts. Push electrical connectors fully home until they click, with any locks engaged.
Some actuators require a specific rod length or preload setting. Electronically controlled units may also need a position learning or relearn procedure with a scan tool after installation. Never adjust rod length by guesswork, because an incorrect setting changes when the wastegate opens and can cause overboost or underboost. If the replacement comes preset and its instructions say not to adjust it, leave it alone. Reinstall the heat shields, ducting and covers, and reconnect the battery if you disconnected it. Clear stored codes only after you have recorded them.
Check the completed work
Start the engine and check every intake or charge-air connection you disturbed for leaks. Listen for unusual whistling or rattling from the turbocharger area. Use a scan tool to confirm there are no pending or stored codes. If your tool supports it, compare commanded and actual boost or actuator position, first at idle and then during a careful road test in normal operating conditions. Boost should build smoothly and stay within the expected range, without sudden surges or cutouts.
Further diagnosis is needed if any of these signs appear: a boost-related code returns, power remains low, boost spikes, the actuator does not move, smoke or oil leaks appear, or the turbocharger makes new noise. These point to an unresolved leak, a control solenoid or wiring problem, a sticking wastegate valve, or a turbocharger fault. Record the replacement date and part number in the vehicle's service history. Continue regular inspections according to the maintenance schedule for your RDX; a wastegate actuator has no universal replacement interval.