How to Replace the 700R4 TCC Solenoid
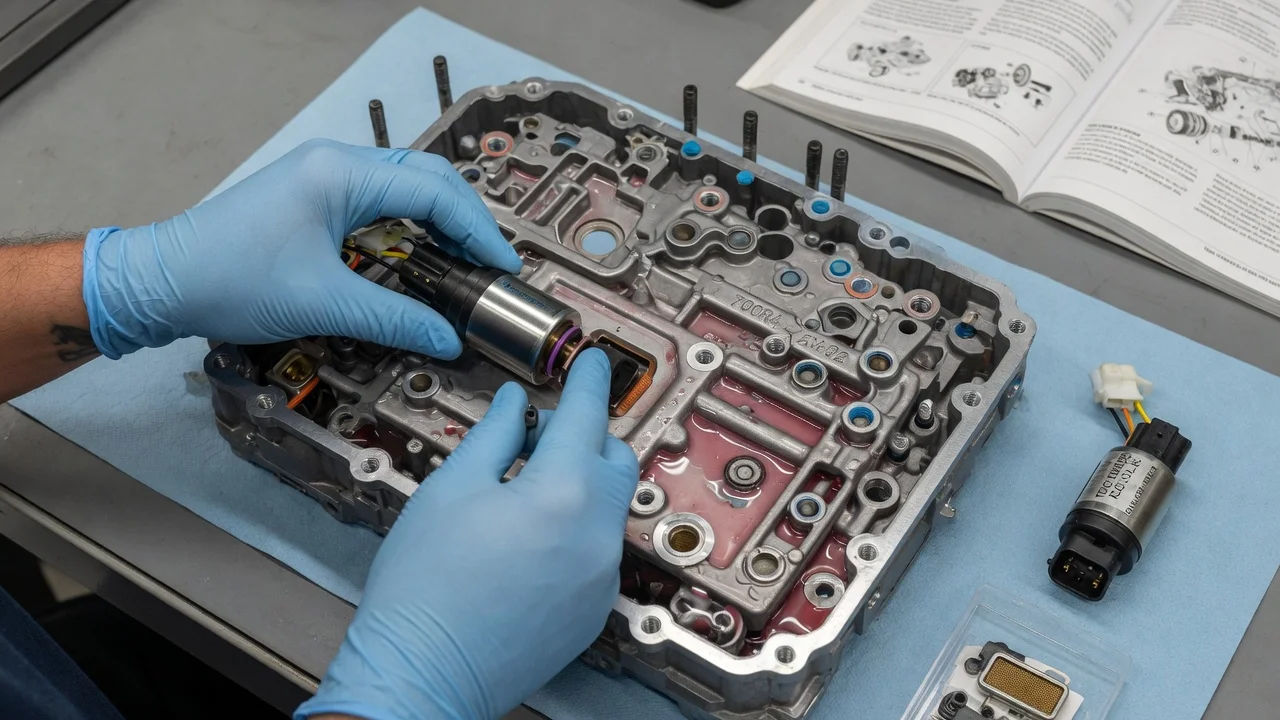
The torque converter clutch (TCC) solenoid in a GM 700R4 controls when the converter locks up at cruise. Lockup reduces slip, heat and engine speed. Replacing the solenoid is a pan-off job that many owners can handle at home, but a new part only helps if the solenoid is actually at fault. This guide covers confirming the repair, preparing the work area, removing the old solenoid, installing the new one and checking lockup afterward. Exact bolt torques and fluid capacity come from the service information for your vehicle.
Confirm the part and repair scope
Start by confirming the transmission type. The 700R4 is a hydraulically shifted four-speed with a throttle valve (TV) cable running to the carburetor or throttle body, and late units were renamed 4L60. The 4L60E looks similar but is fully electronically controlled, has no TV cable, and uses different solenoids and wiring. Check the identification tag on the case and compare the old solenoid with the replacement before buying. Connector style and mounting can differ between production years, so fitment should be matched to your unit rather than assumed. Also note how lockup is controlled on your vehicle. Factory applications usually use the engine computer, while engine swaps and older conversions may use an aftermarket lockup kit or have no lockup wiring at all.
Typical complaints are no lockup, which shows up as higher cruise RPM, hotter fluid and lower fuel economy, or lockup that will not release, which can stall the engine when coming to a stop. Neither symptom proves the solenoid has failed. The same behavior can come from a blown fuse, a faulty brake switch, a damaged harness, a leaking or corroded case connector, a missing computer command caused by sensor inputs, a worn solenoid O-ring, a stuck valve or a problem inside the converter. On computer-controlled vehicles, read any stored diagnostic codes first. Then check for battery voltage at the case connector with the key on and confirm the ground side is switched when lockup should occur. Converter shudder usually points to fluid or converter clutch condition rather than the solenoid. Service history matters too: recent fluid service, earlier repairs or a swap all change where the fault is likely to be.
Prepare tools and safe access
You will need a way to raise the vehicle safely, such as a lift or a floor jack with rated jack stands on level ground, plus wheel chocks. Gather a large drain pan, a socket set with extensions, a torque wrench, a plastic scraper and lint-free rags. Parts include the replacement solenoid with a new O-ring, a filter kit with its seal, a pan gasket and automatic transmission fluid that meets the fluid specification for your vehicle. Have the vehicle-specific service manual on hand for bolt torques, fluid capacity and the correct level-check procedure.
Let the transmission cool before starting, because fluid at operating temperature can cause burns. Disconnecting the negative battery cable before working on the wiring is a sensible precaution. Keep the work area clean, since dirt that enters the case can reach the valve body and cause sticking valves. This job is not a good first project if you have never worked under a vehicle on stands, if the diagnosis is still uncertain, or if the pan reveals signs of internal damage. In those cases, a transmission shop can diagnose the problem and compare repair options before parts are replaced.
Remove without avoidable damage
Most 700R4 pans have no drain plug. Loosen the bolts along one side and let the pan tilt so fluid drains from one corner while the other bolts hold it. Then support the pan and remove it. Look at the debris before cleaning. A fine gray film on the magnet or pan floor is common, but large metal pieces, heavy friction material or a burnt smell point to problems a solenoid will not fix. Pull the filter straight down and make sure its seal comes out of the case, because the old seal often stays behind and a doubled seal will not seat properly.
On most 700R4 units the TCC solenoid sits toward the front of the case and is held by small bolts. A short internal harness connects it to the case pass-through connector and, on many versions, to pressure switches on the valve body. Photograph the wire routing before disconnecting anything. Release the connectors gently, since old plastic becomes brittle. Remove the mounting bolts and pull the solenoid straight out, checking that the old O-ring did not stay in its bore. Do not pry against the valve body, and avoid disturbing the TV linkage. If your unit requires removing other parts for access, follow the service manual, because the valve body contains check balls that can fall out and must go back in the correct positions.
Install and restore the system
Compare the new solenoid with the old one side by side, checking the connector, mounting holes and O-ring size. Lubricate the new O-ring with clean transmission fluid, then seat the solenoid squarely by hand so the O-ring is not rolled or cut. Start the bolts by hand and tighten them to the specified torque. These are small fasteners threading into aluminum, and overtightening can strip threads or crack the solenoid body. Reconnect the harness and follow your photos to restore the original routing, keeping wires clear of the manual valve, the detent spring and the filter.
Inspect the case pass-through connector and its seal while the pan is off. A leak or corrosion there can cause the same lockup complaints as a bad solenoid. Install the new filter with a fresh seal fully seated, clean the pan and magnet, and fit the new gasket. Tighten the pan bolts gradually in a crisscross pattern to the specified torque. Refill through the dipstick tube, starting with roughly the amount that drained out. Run the engine, move through each gear range, then check the level using your vehicle's procedure. Because 700R4 shifts are set hydraulically and by the TV cable, a solenoid swap does not normally require any programming step. Reconnect the battery if you disconnected it.
Check the completed work
Before the test drive, look for leaks around the pan and connector and confirm the fluid level. Drive until the transmission reaches operating temperature. Lockup normally engages during steady, light-throttle cruising above a speed set by the computer or lockup kit. You should see a modest drop in engine RPM with no change in road speed. A light touch on the brake pedal should release lockup, and RPM should rise slightly. Note the shift behavior through all four gears as well. After the drive, recheck the fluid level hot and look again for seepage at the pan gasket.
Further diagnosis is needed if lockup still does not occur even though power and the ground command have been confirmed. That pattern points toward the hydraulic circuit or the converter rather than the new solenoid. Stalling when coming to a stop means lockup is not releasing, so check the command circuit and brake switch before assuming another part has failed. Shudder during lockup, slipping, harsh or delayed shifts, burnt fluid or returning diagnostic codes are all signs that the problem extends beyond the solenoid. A transmission specialist can pressure-test the unit and recommend the right repair.