4L60E Transmission Valve Body Replacement
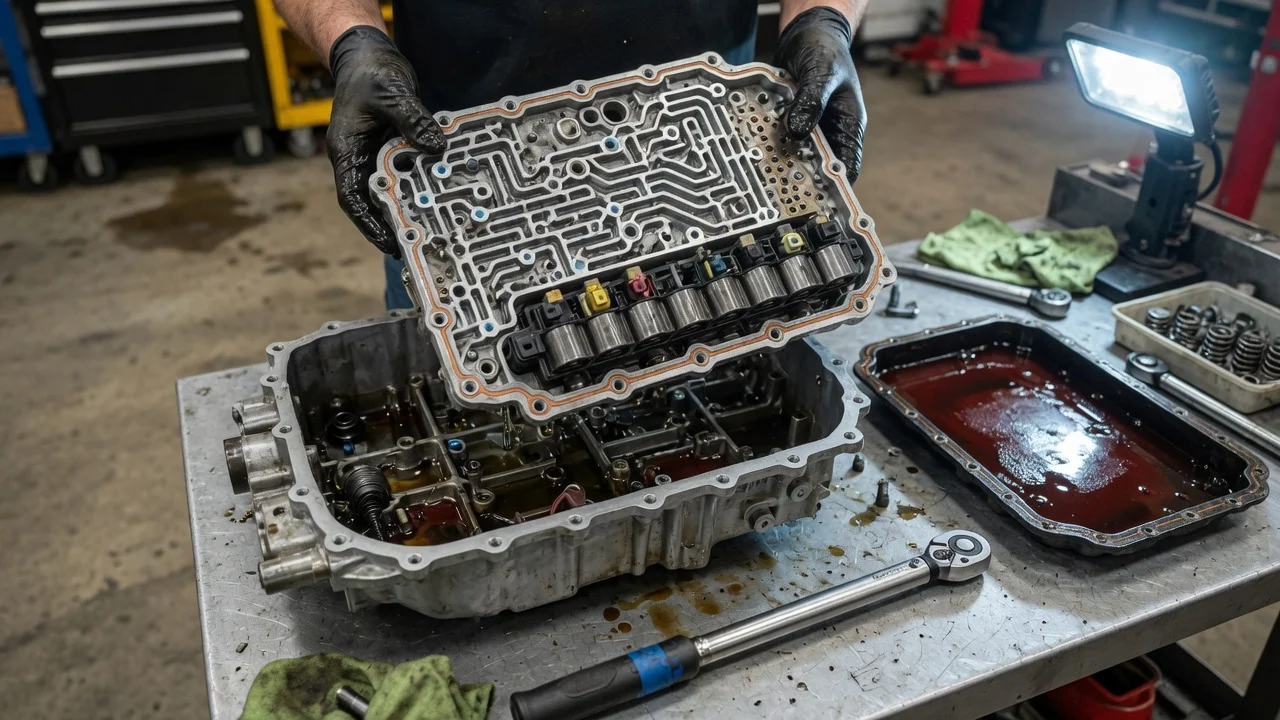
The 4L60E is GM's electronically controlled four-speed automatic. It was used in many trucks, SUVs, vans and rear-drive cars from the 1990s into the 2010s. Its valve body routes pressurized fluid to the clutches and band. It also carries the shift, pressure control and converter clutch solenoids. You can usually replace it with the transmission still in the vehicle, but the job only pays off when testing points to the valve body. This guide covers how to confirm, remove, install and verify the repair.
Confirm the part and repair scope
Start by confirming the transmission type. A 4L60E usually appears as RPO code M30 on the Service Parts Identification label. The related 4L65E (M32) and 4L70E (M70) share the same layout but differ in ways that can affect parts. Valve bodies, solenoids, pressure switch assemblies and internal harness connectors changed during production, so model year alone does not guarantee fitment. Replacement units come bare, with solenoids installed, or remanufactured with modified bores. Before installing, compare the new part with the old one, including the mounting pattern, solenoid locations and connector style.
Next, make sure the valve body is really at fault. Worn valve body bores can cause harsh or delayed engagement, erratic shift behavior, flare between gears, no upshift and converter clutch shudder. The same symptoms can also come from low or degraded fluid, wiring faults, a single failed solenoid, engine control problems or worn hard parts. A new valve body will not cure a burned 3-4 clutch pack or a damaged reaction sun shell. Check fluid level and condition, and read diagnostic codes and freeze-frame data. Compare commanded and actual behavior in scan data, and run a line pressure test if the service procedure calls for one. Review the service history too. Depending on what you find, repair options range from a connector or solenoid repair to a valve body, a rebuild or a replacement transmission.
Prepare tools and safe access
Get factory service information for your exact vehicle and model year. It provides bolt locations and lengths, the tightening sequence, torque values, check ball positions, harness routing and the fill and level-check procedure. Do not borrow numbers from another year. You will need secure support on a lift or rated jack stands on level ground, plus wheel chocks, a large drain pan and sockets. Add a torque wrench that is accurate at low values, a new filter and seal, a pan gasket, valve body gaskets if they are not supplied, and enough fluid. GM currently specifies Dexron VI for these transmissions, but confirm the fluid specification for your vehicle in its owner's manual or service information.
A scan tool that reads transmission data, clears codes and, where supported, resets adaptive values is very useful. Let the transmission cool first, because hot fluid can burn. A misplaced check ball, wrong bolt or disengaged manual valve can cause an expensive failure. If you have never worked inside an automatic transmission, a transmission shop is a reasonable choice.
Remove without avoidable damage
Disconnect the negative battery cable, raise and support the vehicle, and clear anything that blocks the pan on your model. Most 4L60E pans have no drain plug, so loosen the bolts gradually and tilt the pan to drain it. Inspect the pan and magnet. Fine gray paste is normal, while metal chunks or heavy friction material suggest damage beyond the valve body. Pull the filter straight down and confirm its seal came out of the pump bore, where it often stays behind.
Unplug the solenoid and pressure switch connectors and move the internal harness aside as the service information directs. Remove the detent spring and roller. Record where each valve body bolt came from, using photos or a punched cardboard template. Bolt lengths differ, and some bolts also secure other components such as the accumulator housing. Support the valve body as the last bolts come out, then lower it while unhooking the manual valve from the detent lever link. Keep the spacer plate and gaskets together and lower them evenly. Check balls sit in passages beneath the spacer plate and can fall out or shift, so note their positions before disturbing them. Never pry on machined surfaces.
Install and restore the system
Clean the case mating surface with solvent and lint-free material. Avoid scrapers that can gouge aluminum, and keep sealant out of hydraulic passages. Compare the replacement spacer plate and gaskets with the originals, since gaskets are often specific to one side and to the model year. Place the check balls exactly where the service information shows. When transferring solenoids or the pressure switch assembly, use new O-rings where specified and confirm each part is fully seated. Raise the valve body into place while engaging the manual valve with the detent lever link. Missing this link is a common error that causes wrong or missing gears.
Start every bolt by hand in its original hole, then tighten them in the specified sequence to the specified torque. Overtightening can distort the valve body and make valves stick, while uneven tightening can let pressure leak across the gasket. Refit the detent spring and roller, the pressure switch assembly and the connectors, routing the harness clear of moving parts. Install the new filter and seal, then the pan with a new gasket. Add the fluid quantity given in the service information, reconnect the battery and start the engine. Follow the level-check procedure, which normally requires the engine running, the selector in park, level ground and a specified fluid temperature. Clear stored codes, and reset adaptive values if your scan tool supports this for the application.
Check the completed work
Before driving, check the pan and connector area for leaks. Hold the brakes and select each range, pausing in reverse and drive. Engagement should be prompt, without a long delay or a harsh bang. Recheck the fluid level once it reaches operating temperature. On a road test at light and moderate throttle, the 1-2, 2-3 and 3-4 upshifts should be timely and firm without flare. Downshifts should be smooth, and the converter clutch should apply at steady cruise without shudder. Scan data for commanded gear, fluid temperature and converter slip can confirm what you feel.
Stop and diagnose further if the original symptom remains, new diagnostic codes appear, a gear is missing, the transmission slips, or fluid leaks or foams from the vent. Possible causes include a misplaced check ball, an unengaged manual valve, a wiring fault, or internal wear that the valve body could not fix. Continued driving can add damage. Recheck the fluid and look for leaks after a few days. Record the work, the part source and the fluid used in the vehicle's service history.