4L60E Transmission Shift Solenoid Replacement
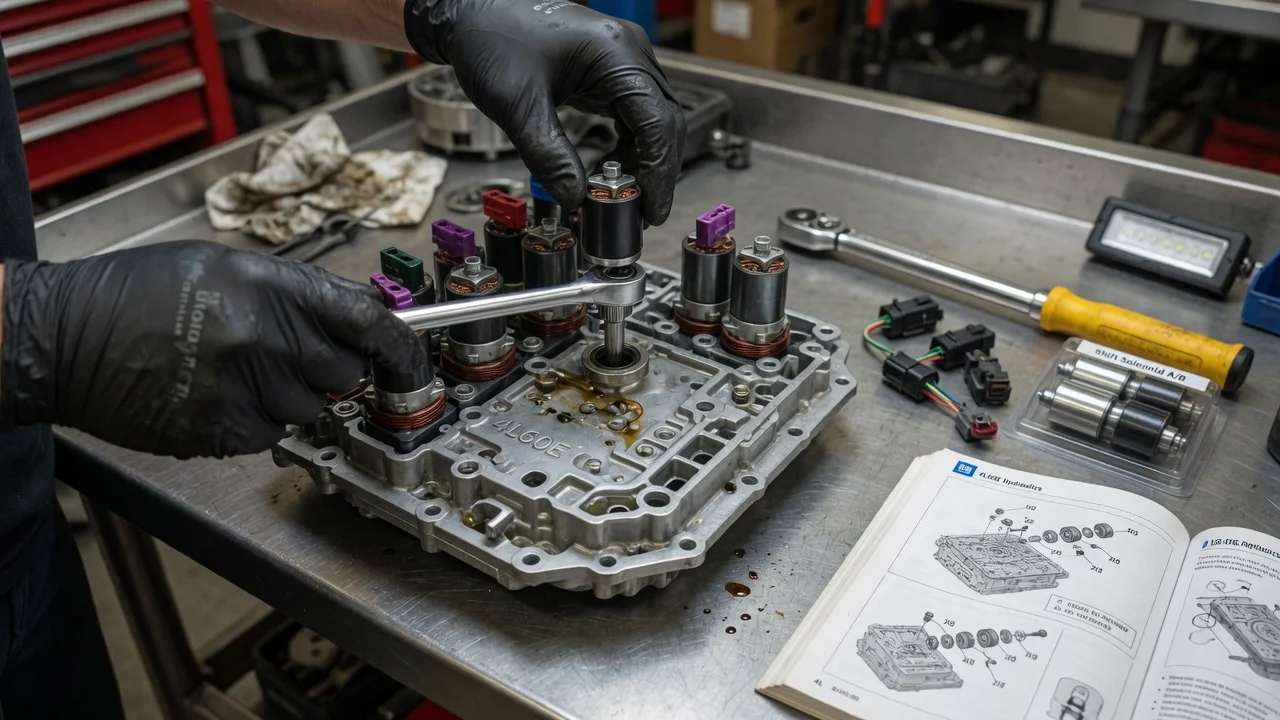
Replacing a shift solenoid on a 4L60E is one of the more approachable internal transmission repairs, because the shift solenoids sit on the valve body and are reached by dropping the pan. That easy access tempts owners to swap parts based on a symptom alone. This guide covers how to confirm the transmission type, decide whether a solenoid is really at fault, and carry out removal, installation and post-repair checks without creating new problems.
Confirm the part and repair scope
The 4L60E is a GM four-speed, electronically controlled automatic used in many rear-wheel-drive and four-wheel-drive trucks, SUVs, vans and performance cars from the early 1990s through the 2000s. Close relatives such as the 4L65E and 4L70E look similar and share many internal parts, but solenoids and connectors are not always identical. The older 700R4, also called the 4L60, is hydraulically controlled and has no shift solenoids at all. Confirm the transmission type from the RPO code M30 on the service parts identification label, usually found in the glove box or console, or from the identification tag on the case. Order parts by VIN and model year, because connector style and solenoid design changed during the production run, and correct fitment depends on matching both.
The two shift solenoids, usually called A and B, work in combination to select gears. When one fails, typical shift behavior includes starting in the wrong gear, skipping a gear or staying in a single gear. The same symptoms can also come from low or burnt fluid, a damaged internal wiring harness, a corroded case connector, a wiring fault outside the transmission, a control module problem, worn valve body bores or failed clutches. Read the stored diagnostic codes with a scan tool. Codes such as P0751, P0753, P0756 and P0758 point to a shift solenoid circuit or its performance, but an electrical code means the circuit is faulty, not necessarily the solenoid itself. Check fluid level and condition, review the service history, and measure circuit resistance at the case connector against the service manual values. An out-of-range reading implicates the solenoid or internal harness; an in-range reading sends you toward external wiring and the module.
If the transmission slips under load, flares between gears, or has dark fluid with a burnt smell and heavy debris, a solenoid alone is unlikely to cure it. In that case a valve body service or a rebuild by a transmission shop may be the more realistic repair option.
Prepare tools and safe access
Obtain service information for your exact vehicle before starting: pan bolt torque, the fluid specification and capacity, the fluid level check procedure and solenoid resistance values. You will need a scan tool, a multimeter, a socket set, a torque wrench, a large drain pan, a plastic gasket scraper and lint-free rags. Have the replacement solenoid, a new pan gasket, a new filter with its seal, and enough of the correct fluid on hand so the vehicle is not left apart while you wait for parts.
Work on level ground with the wheels chocked and the vehicle supported on rated jack stands or a lift, never on a jack alone. Let the exhaust and transmission cool, since hot fluid can burn and the pan often sits near exhaust components. On some vehicles, exhaust pipes, crossmember braces or skid plates obstruct the pan and must be moved. Disconnect the negative battery cable before unplugging electrical connectors. If you are not comfortable working under a vehicle and handling a large volume of spilled fluid, or if diagnosis points to valve body removal, this job is better left to a transmission shop.
Remove without avoidable damage
Many 4L60E pans have no drain plug, so expect fluid to come out as the pan loosens. Remove the bolts along one side first and leave a couple loose on the opposite side so the pan tilts and drains in a controlled way. Once the pan is down, inspect its contents. A light film of fine sludge on the magnet is typical of normal wear, while metal chunks or large amounts of friction material indicate internal damage that a solenoid will not fix, so stop and reassess. Pull the filter straight down and make sure its seal comes out of the pump bore, because the old seal often stays behind and will prevent the new one from seating.
Locate the shift solenoids on the valve body and identify each one using the service diagram rather than guessing from position. Release the connector lock and unplug it by the connector body, not the wires. Each solenoid is held by a retaining clip; remove the clip with a small pick or pliers, then ease the solenoid straight out with a gentle twisting motion. Avoid prying against the aluminum valve body, which scratches and gouges easily. Do not loosen valve body bolts unless the service procedure calls for it, since check balls and springs can drop out. Note how the internal harness is routed before moving it.
Install and restore the system
Compare the new solenoid with the old one for matching body shape, connector and O-ring arrangement. Lubricate the O-rings with clean transmission fluid, push the solenoid into its bore until fully seated, and install the retaining clip completely in its groove in the same orientation as removed. Connect each harness plug to the correct solenoid; on some harnesses a connector can physically reach the wrong solenoid, so verify against the diagram. Route the harness as it was originally, clear of the filter and moving parts.
Install the new filter with its seal fully seated in the pump bore. Clean the pan, magnet and both gasket surfaces, fit the new gasket, and tighten the pan bolts in a crisscross pattern to the specified torque; overtightening distorts the pan flange and causes leaks. Refill with the fluid specification listed in the owner's manual or service information, as GM has updated its Dexron requirements over the years. Add an initial amount, reconnect the battery, start the engine, move through each gear with the brake applied, and check the level at the specified temperature, topping up in small amounts.
Clear the stored codes once fluid level is correct. Many GM controllers relearn shift pressure as the vehicle is driven, and some models allow transmission adaptive values to be reset with a capable scan tool. Follow the service information for your vehicle, since not every application requires a reset.
Check the completed work
Before driving, inspect the pan for leaks and confirm the fluid level once warm. On the road test, accelerate gently and confirm the vehicle starts in first and makes each upshift and downshift at the expected points, with converter clutch engagement at steady cruise where applicable. If your scan tool shows data, compare commanded gear with actual gear and watch solenoid status. Scan again after the drive for pending or returning codes, then recheck the fluid level and look for leaks once more.
Some results call for further diagnosis. A code that returns immediately points to the internal harness, case connector, external wiring or control module. Correct gear selection with harsh, delayed or slipping shifts suggests pressure control, valve body or clutch problems. A dropping fluid level means a leak. Record the part number, fluid used and mileage in the service history so any future diagnosis starts from a known baseline.