Third-Generation Toyota 4Runner Brake Booster Check Valve: Choosing the Correct Part
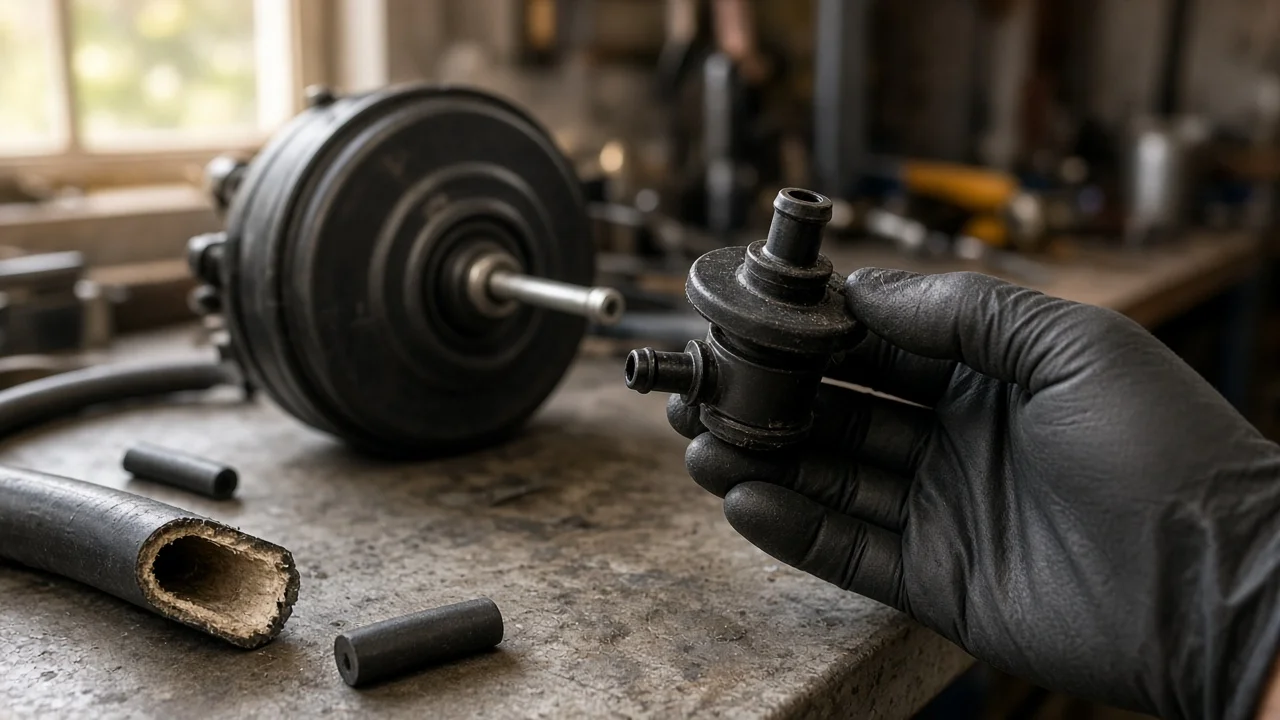
On a third-generation Toyota 4Runner, built for the 1996 through 2002 model years, the brake booster check valve is a small one-way valve in the vacuum line between the engine intake and the power brake booster. It keeps vacuum stored in the booster when the engine stalls or manifold vacuum drops, so you still get assisted stops. Choosing the right replacement means matching the valve style, hose size and flow direction to your truck rather than grabbing any universal part.
Define the job the product must do
The check valve has one task: let air flow out of the booster toward the engine and block flow in the other direction. When you lift off the throttle or switch off the engine, it traps vacuum inside the booster so the next pedal applications still get power assist. On a 1999 or 2000 4Runner that sits outdoors, tows, or spends time crawling at low engine speed, a valve that leaks back lets the booster lose its reserve, and the first press of the pedal after a stop or restart feels hard and high.
Before shopping, be clear about your situation. A daily driver needs a direct replacement that restores factory behavior. A trail truck may have rerouted hoses or aftermarket intake parts that change how the line runs. Either way, the goal is a correct-fit valve and a sound hose, not an upgrade. Note your model year, engine (the 2.7-liter four-cylinder or the 3.4-liter V6) and whether anything in the vacuum plumbing has been modified.
Confirm the check valve is actually the fault
A hard pedal can come from several places, so test before buying. With the engine off, pump the pedal several times to use up stored vacuum, then hold light pressure and start the engine; the pedal should sink slightly as assist arrives. Next, run the engine for a minute, shut it off, wait, and press the pedal a few times. You should still feel assist on the first applications. If it disappears immediately, the reserve is leaking through the check valve, the hose or the booster itself.
To isolate the valve, remove it and blow through it gently or use a hand vacuum pump. Air should pass in one direction only, toward the engine side. If it passes both ways, sticks closed, rattles with debris, or smells of fuel or brake fluid, replace it. Also inspect the hose for cracks, softness and collapsed sections, and listen for a hiss at the booster with the pedal held. Brake fluid in the vacuum line or booster points to a master cylinder problem that a new valve will not cure. Use the factory service manual for the exact procedure and pass criteria for your year.
Check compatibility before ordering
Fitment on the third-generation truck depends on more than the model name. Parts catalogs often split listings by engine and sometimes by production date, so search with your model year and engine, and use the VIN with a dealer or catalog lookup when a listing is ambiguous. A 1999 Toyota 4Runner and a 2000 Toyota 4Runner may well share the same booster check valve, but confirm that on the listing rather than assuming it.
Look at the installed part before you order. Note whether the valve sits inline in the vacuum hose with barbed ends or seats in a rubber grommet on the booster shell, and whether it is sold alone or as part of a hose assembly. Measure the hose inside diameter so the barbs seal properly, and photograph the orientation, routing and clamps. The flow arrow or marking on the new valve must point the same way as the original, toward the vacuum source on the intake.
Features that affect the choice
The meaningful differences between valves are few. An original-equipment or OE-equivalent part matched by cross-reference to your truck's original number gives the best odds of correct barb size, body length and flow behavior. Universal inline valves can work if the barb sizes match your hose, but they may be longer or shaped differently, which can kink the hose or strain it where it routes near hot engine parts. Clear direction marking matters, because a valve installed backwards blocks booster vacuum entirely.
Treat labels such as heavy-duty, performance or premium with skepticism; a check valve either seals in one direction or it does not. Useful evidence includes a listed OE cross-reference number you can verify, explicit year and engine fitment, photos showing barb diameter and the flow arrow, and material information such as a heat-resistant body. Reviews that describe an actual installation on a third-generation 4Runner are more informative than star ratings alone.
Limitations and ownership costs
A check valve is an inexpensive part, but it can only hold vacuum that the engine supplies and the booster retains. It will not fix a torn booster diaphragm, a leaking master cylinder, low engine vacuum from an intake leak, sticking caliper pistons, or worn brake pads and rotors. If the pedal feels wrong or the truck pulls, measure the remaining friction material and rotor thickness against the wear limits in the service information, and inspect the calipers and brake fluid condition as well.
Plan to replace the vacuum hose and clamps at the same time if they are original; old rubber hardens and cracks, and a new valve in a leaking hose solves nothing. Swapping the valve does not open the hydraulic system, so no bleeding is needed for this job alone. Keep the old part until the new one is proven. If assist is still poor after replacement, or the pedal ever feels unusually hard, low or spongy, stop driving the truck and have the braking system inspected by a qualified technician.
Build a practical shortlist
Narrow the options with a short checklist rather than a ranking. Confirm the listing names the third-generation 4Runner with your model year and engine, or matches an OE number verified by VIN. Confirm the valve style, inline or grommet-mounted, matches what is on your truck. Check that the barbs fit your measured hose and that flow direction is clearly marked. Prefer sellers who publish dimensions and clear photos over those relying on generic descriptions.
Then add the supporting items: a length of correctly sized vacuum hose suitable for engine-bay use, new clamps, and a hand vacuum pump if you want to test the old and new valves. After installation, repeat the engine-off reserve test and make a low-speed brake check in a safe place. If the results match the factory description, the repair is complete; if not, the fault lies elsewhere in the brake system and needs further diagnosis.