2019 Ford F-550 Rear Axle Shaft Removal
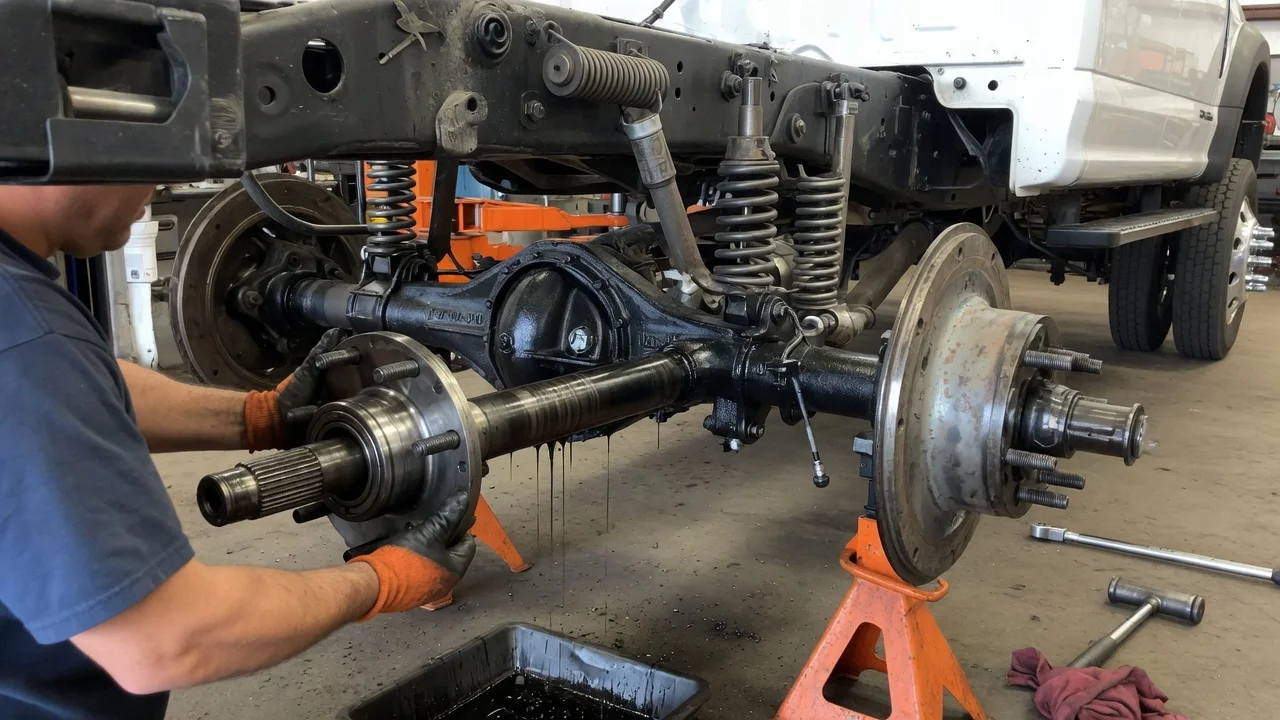
Pulling a rear axle shaft on a 2019 Ford F-550 is usually done to replace a damaged shaft, renew a leaking flange seal or reach other parts at the hub end. The F-550 uses a full-floating rear axle, so the shaft carries no vehicle weight and comes out without removing the wheels. This guide covers removal and reinstallation only, using your truck's own service information for any values.
Confirm the part and repair scope
Start with the exact vehicle configuration. The 2019 F-550 was built as a chassis cab with different wheelbases, gear ratios, axle options and upfitter bodies, so a shaft that fits one truck may not fit another. Read the axle identification tag on the housing or differential cover, and check the build data or VIN-based parts lookup before you order anything. Shaft length, spline count and flange design must match the original. Left and right shafts are often different lengths, so confirm which side you are replacing.
Make sure a new shaft actually fixes the complaint. A clunk, vibration or gear oil on the inside of the wheels can come from a worn hub bearing, a failed hub seal, a loose flange or a differential problem rather than the shaft. A twisted or broken shaft usually shows as a total loss of drive on one side or visible damage at the splines or flange. Review the service history for earlier axle, hub or differential work, and do a basic inspection before committing to parts. If the differential is damaged, replacing only the shaft will not solve the problem.
Prepare tools and safe access
Get the Ford service procedure for your exact axle before starting. It gives the fastener sizes, any required gasket or sealant, tightening values and the correct gear oil type and fill level. These numbers are axle-specific, so do not use figures from another truck or a generic chart. You will normally need sockets and wrenches for the flange fasteners, a torque wrench capable of the specified value, a drain pan, shop towels, a gasket scraper or plastic pad, brake cleaner and the replacement seal, gasket or O-ring.
Park on firm, level ground, set the parking brake and chock the front wheels. Because a full-floating shaft does not support the truck, the shaft itself can often be pulled with the wheels on the ground, but raising the side you are working on slightly helps keep gear oil in the housing. If you lift the truck, use equipment rated for a loaded F-550 and support it on stands, never on a jack alone. Upfitted bodies and loads add weight and shift balance, so account for the truck's actual operating conditions. If you lack heavy-duty lifting equipment or are unsure about differential work, leave this repair to a qualified shop.
Remove without avoidable damage
Clean the hub area first so dirt does not fall into the axle tube when the shaft comes out. Place a drain pan under the hub, since some gear oil will usually escape. Remove the fasteners that hold the shaft flange to the hub, working evenly around the circle. Depending on the axle, the flange may also be located by dowels or tapered pieces that need to be freed before the shaft will move. Do not pry between the flange and the hub with a screwdriver, as this can gouge the sealing faces and create a leak.
Once the flange is loose, pull the shaft straight out of the housing. Support its weight as it slides so the inner splines do not drag across the tube or strike the differential side gear. The shaft is long and heavy, so a second person helps. Keep the shaft level and do not let it hang from the differential end. Note the position of any gasket or O-ring, then remove it and clean both mating surfaces fully. Inspect the splines for twisting, cracks or heavy wear, check the flange for distortion and look at the gear oil for metal particles. Heavy debris or chipped material points to a differential issue that needs diagnosis before reassembly.
Install and restore the system
Compare the new shaft with the old one for length, spline count and flange pattern before installing. Fit a new gasket, O-ring or the sealant specified in the service information; reusing a gasket is a common cause of comebacks. Slide the shaft into the housing carefully, keeping it centered so the splines do not damage the tube or any internal seal. As the shaft reaches the differential, rotate it slightly until the splines engage the side gear, then push it fully home. Never force it with a hammer.
Line up the flange with the hub, install any dowels or locating pieces in their original positions, then fit the fasteners by hand. Tighten them in a crisscross pattern to the value in the manufacturer specifications, using a torque wrench rather than an impact tool. Check the gear oil level at the fill plug and top up with the specified lubricant, including any friction modifier the axle needs. If your truck has a locking or limited-slip differential, follow the service information for any extra fluid or function check.
Check the completed work
Before driving, confirm every flange fastener has been torqued, the fill plug is tight and no tools or rags are left near the hub or brakes. Lower the truck if it was raised and wipe the hub area clean so any new leak will be easy to see. Start with a slow test drive in an empty lot, listening for clicks, clunks or grinding, and making sure the truck pulls normally from a stop and in turns. If the axle has a locker, check that it engages and disengages normally.
After the test drive, inspect the flange for gear oil seepage and recheck the fluid level once the axle has cooled. Recheck fastener tightness after a short period of use if the service information calls for it. Fresh oil on the inside of the wheel, a wet flange or brake contamination means the seal or gasket needs attention right away, because oil on the brakes reduces stopping power. Continued noise, vibration or a lack of drive on one side calls for further diagnosis of the hub bearing or differential. Record the repair in the truck's service history and keep the gear oil checks on your normal maintenance schedule.