2004 Chevy Front Axle Actuator Wiring: How It Works and How to Test It
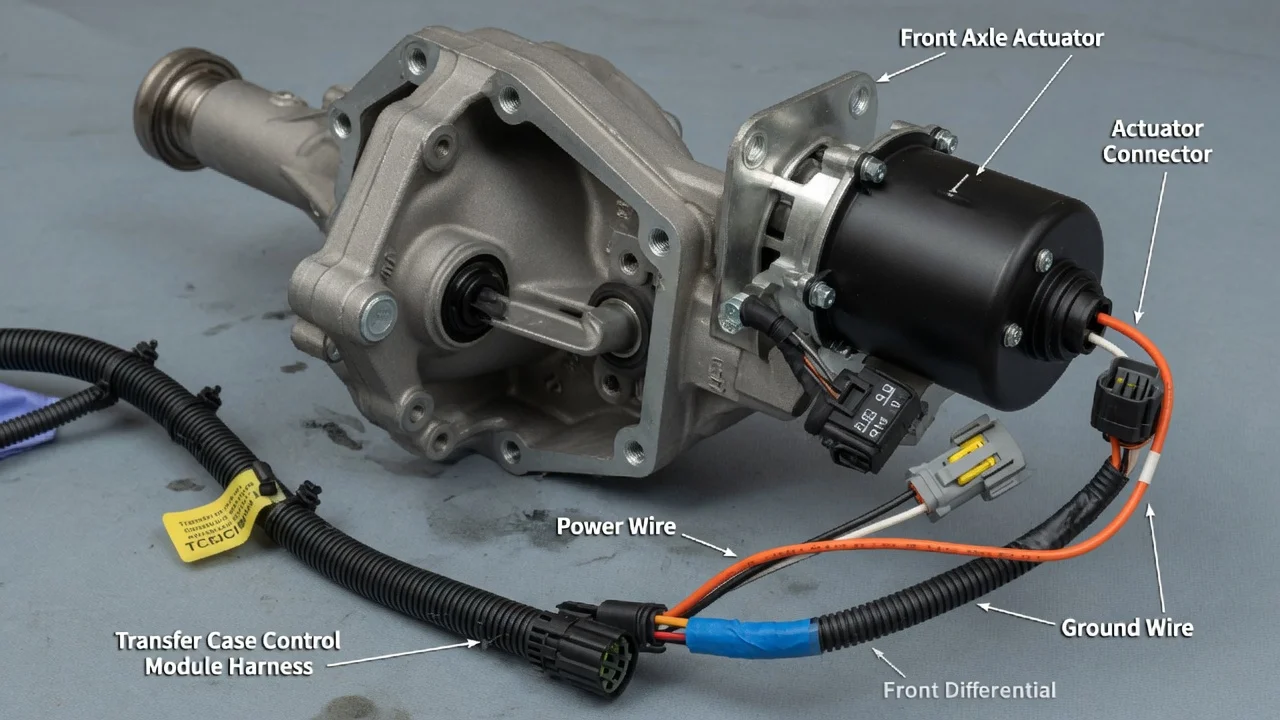
On a 2004 Chevy with four-wheel drive, the front axle actuator is the electric device that locks the front axle so the front wheels can be driven. When 4WD will not engage, the actuator wiring is one of the first things worth checking. This guide explains how the circuit is generally arranged, what differs between models, and how an owner can test it safely without guessing at wire colors or pin numbers.
The Short Answer on Actuator Wiring
On most 2004 Chevy 4WD trucks and SUVs with an electrically engaged front axle, the actuator is powered by the vehicle's 12-volt system through a fused feed. Its operation is commanded by the transfer case control module or a related 4WD control circuit. When you select a 4WD range, the control side completes the circuit and the actuator engages the axle. Exact wire colors, pin positions, fuse location and fuse rating depend on the model, drivetrain and build options. The reliable reference is the factory wiring diagram for your specific vehicle, identified by VIN and option codes. Treat any generic color chart as a hint, not proof.
The actuator runs on the ordinary low-voltage system supplied by the starter battery. It is not part of a high-voltage traction system. That distinction matters for a small number of 2004 Silverado and Sierra pickups built with GM's 42-volt mild hybrid system. On those trucks, the actuator circuit is still conventional low voltage, but the separate hybrid battery pack and its cabling should be left alone and handled only according to the factory service procedure.
How the Actuator Circuit Works
When you press the 4HI or 4LO button, the transfer case shifts and the control logic energizes the front axle actuator. Current through the actuator moves an internal mechanism that slides a shift collar, joining the axle shafts so the front driveshaft can turn the front wheels. When you return to 2HI, the command is removed and the axle disengages. On some designs, a position signal or indicator switch reports whether engagement actually happened. That is why a wiring fault can cause a flashing or unlit 4WD indicator as well as a loss of front drive.
Electrically, the actuator needs three things: correct system voltage at its connector, a solid ground or switched return path, and an intact command from the control side. Corroded connector pins, a chafed harness near the frame or exhaust, or a weak ground can cause voltage drop under load even when a test light glows brightly with no load. Because the actuator is only meant to work while commanded, a healthy circuit should not contribute meaningfully to parasitic draw with the ignition off.
What Changes the Answer
The phrase 2004 Chevy covers several different four-wheel-drive vehicles, including full-size Silverado pickups, Tahoe, Suburban and Avalanche, the midsize Colorado, and the TrailBlazer. These use different front axles, connectors and control strategies. Push-button part-time systems, automatic 4WD systems and all-wheel-drive versions also differ, and some all-wheel-drive configurations may not use a front axle actuator at all. If the actuator has already been replaced, confirm that the replacement matches the original part application and connector, because an incorrect unit can look like a wiring problem.
Operating conditions matter too. Low battery voltage or weak charging output can cause the control module to refuse or abort a shift, so an electrical complaint is not always a broken wire. Some shift requests also depend on vehicle speed or gear position as described in the owner's manual. A mechanical problem, such as a sticking shift collar or worn actuator internals, can produce the same symptoms as a wiring fault, which is why measuring power and ground at the connector is more useful than replacing parts on suspicion.
What the Owner Can Check Safely
Start with the basics. Check battery voltage at the battery terminals with the engine off and again with it running to confirm the charging system is working, and clean any corroded terminals. Locate the 4WD-related fuse using the fuse box label or owner's manual and inspect it. If a fuse is blown, replace it only with the specified fuse rating; a higher rating can let a shorted wire overheat. A fuse that blows again points to a short that needs to be found.
Next, follow the harness from the actuator on the front differential back along the axle and frame, looking for rubbed insulation, melted sections, broken clips and green corrosion at the connector. With the wiring diagram in hand, back-probe the actuator connector with the ignition on and 4WD selected to see whether supply voltage arrives. Measure voltage drop on the ground or return side against battery negative while the circuit is commanded. If both power and ground are present while commanded but the axle does not engage, the actuator or the mechanical shift parts are the likely cause. If the command never arrives, the fault is upstream, toward the selector switch or control module.
Before unplugging connectors, repairing wires or removing the actuator, turn the ignition off, remove the key and disconnect the negative battery cable. Support the vehicle on rated jack stands on level ground with the wheels chocked, never on a jack alone. Make wire repairs with properly crimped or soldered splices sealed with heat-shrink tubing, since the front axle area is exposed to water, salt and road debris. On a hybrid-equipped pickup, work only on the low-voltage actuator circuit and follow the factory isolation steps for anything beyond it.
Limitations and Next Step
This guide cannot give exact wire colors, pin numbers or fuse ratings because they vary by model and build, and guessing can lead to probing the wrong terminal or damaging a module. Obtain the factory wiring diagram and service information for your VIN before detailed testing. A scan tool that can read the 4WD or transfer case module is also valuable, since stored trouble codes often narrow the fault quickly. Seek professional help if the circuit tests good but the axle still will not engage, if the control module needs diagnosis or programming, or if the truck is a hybrid model and the repair goes beyond the ordinary 12-volt actuator circuit.