Replacing the Rear Drum Brakes on a 2000 Honda Accord
The Short Answer
Replacing the rear drum brakes on a 2000 Honda Accord means removing the rear wheels and drums, swapping the brake shoes and their hardware, then reassembling and adjusting the system. A mechanically inclined owner with basic hand tools can usually do it at home. The job covers both rear wheels at once, because shoes should always be replaced in axle sets so braking stays even from side to side.
One qualification matters before anything else: not every 2000 Accord has rear drums. The 2000 model belongs to the sixth-generation Accord (1998 to 2002), and rear brake type varies by trim and engine. Rear drums are generally associated with lower four-cylinder trims, while higher trims and V6 models are generally associated with rear discs. This article did not have trim-by-trim documentation to confirm the exact split, so check your car directly. Look through the rear wheel spokes. A drum looks like a closed metal bowl behind the wheel, while a disc setup shows a flat rotor with a caliper clamped over it. If you see a caliper, these instructions do not apply.
How the Rear Drum System Works
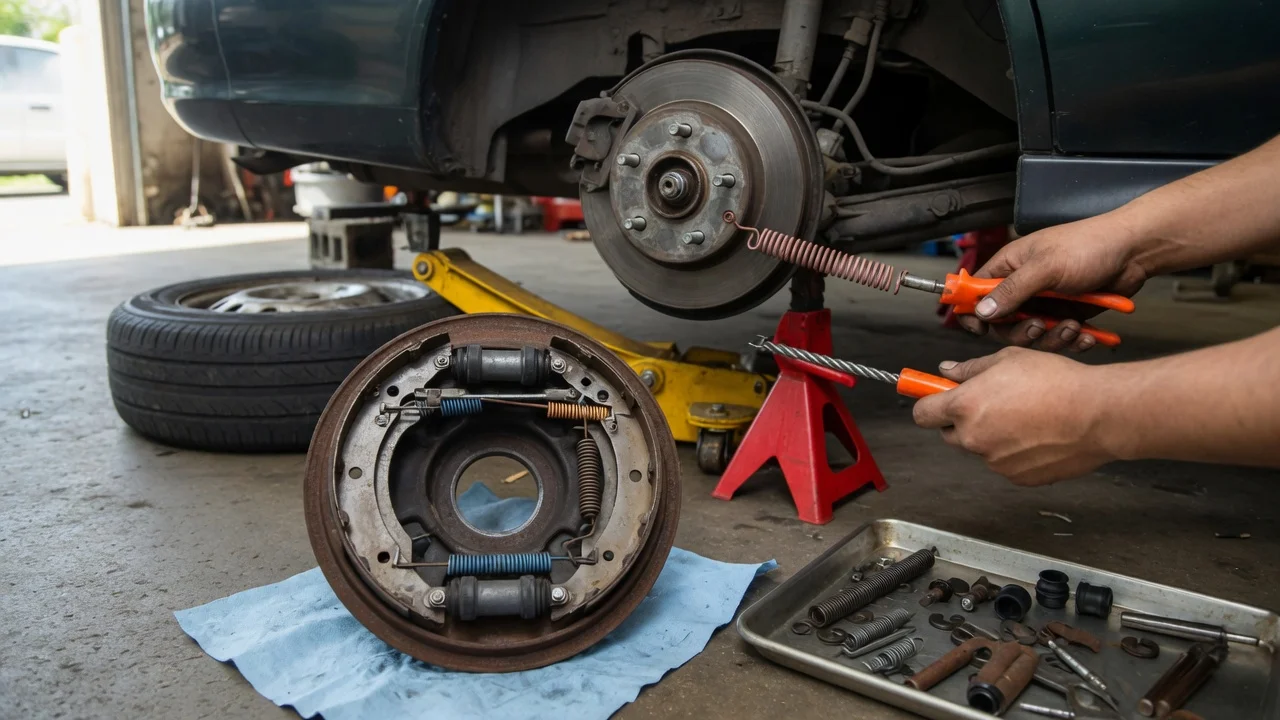
A drum brake uses two curved brake shoes mounted on a backing plate inside a rotating drum. When you press the pedal, a hydraulic wheel cylinder pushes the shoes outward against the inside of the drum, and the friction slows the wheel. Return springs pull the shoes back when you release the pedal. A self-adjuster mechanism moves the shoes outward gradually as the linings wear, which keeps pedal travel consistent. On the Accord, the rear drums also house the parking brake mechanism, which works the shoes through a cable and lever.
Signs the Rear Drums Need Attention
A parking brake lever that travels higher than it used to before it holds; A low or soft brake pedal that firms up after pumping, which can point to shoes out of adjustment; Scraping or grinding from the rear, suggesting worn linings or debris inside the drum; A pulsation felt mainly when the parking brake is applied or at low speed, which can come from an out-of-round drum; Wetness on the inside of the tire or backing plate, a possible sign of a leaking wheel cylinder that needs repair before new shoes go in
Several of these symptoms can have other causes, including problems in the front brakes or hydraulic system. Inspecting the parts is the only reliable way to confirm that the rear drums are the source.
Parts to Have on Hand
Rear brake shoe set for both sides, matched to your Accord's trim and confirmed by VIN or trim with the parts supplier; Drum brake hardware kit with return springs, hold-down springs, pins and clips; Wheel cylinders, if the old ones leak or have torn dust boots; Brake drums, if the old ones are scored, cracked or beyond their maximum allowable diameter; Brake fluid of the type specified on the reservoir cap or in the owner's manual, if any hydraulic part is opened; Brake parts cleaner and a small amount of high-temperature brake grease for the backing plate contact points
Replacing the hardware kit along with the shoes is a common recommendation. Springs lose tension with heat cycles, and weak springs can cause dragging or uneven wear. The kit is inexpensive compared with the time needed to take the brake apart again.
Tools Commonly Used
Floor jack and properly rated jack stands; Wheel chocks for the front wheels; Lug wrench or breaker bar with the correct socket; Torque wrench; Screwdrivers, including one suited to the drum retaining screws if your drums use them; Brake spring pliers and a hold-down spring tool, or careful use of standard pliers; Brake adjusting tool or a flat screwdriver for the star-wheel adjuster; Drum brake micrometer or a shop willing to measure the drums; Dust mask and gloves
General Replacement Procedure
The steps below describe the usual sequence for a Honda rear drum brake. Spring layout and fastener details can differ, so keep a factory service manual or a reputable repair guide for your exact vehicle open while you work. Do one side at a time so the untouched side can serve as a reference for how everything fits together.
1) Park on level ground, chock the front wheels and make sure the parking brake is released. The drum will not come off with the parking brake applied. 2) Loosen the rear lug nuts slightly, raise the rear of the car, support it on jack stands at the proper lift points, and remove the wheels. 3) Remove any drum retaining screws. If the drum sticks, many Honda drums have threaded holes that accept bolts which push the drum off the hub when tightened evenly. If the shoes have worn a lip into the drum, back off the self-adjuster through the access point on the backing plate so the drum can clear the shoes. 4) Take a photo of the shoe and spring arrangement before you disassemble anything. 5) Avoid breathing brake dust and do not blow it off with compressed air. Clean the parts with brake parts cleaner instead. 6) Remove the return springs, then the hold-down springs and pins, and lift the shoes off the backing plate. Disconnect the parking brake cable from its lever and transfer the lever and adjuster to the new shoes as your service information directs. 7) Gently pull back the wheel cylinder dust boots. Any fluid behind them means the cylinder should be replaced. 8) Clean the backing plate and apply a thin film of high-temperature brake grease to the raised pads where the shoes rest. Keep grease and fluid off the friction material. 9) Clean and lightly lubricate the self-adjuster threads, then install the new shoes, adjuster, hold-down hardware and return springs in the same positions shown in your photo. 10) Inspect and measure the drums. Install the drum, adjust the shoes until there is slight drag as you turn it, then back the adjuster off just enough for the drum to turn freely. 11) Repeat on the other side, reinstall the wheels, and torque the lug nuts to the factory specification. 12) Before driving, pump the brake pedal until it feels firm, then check parking brake operation. Test the brakes at low speed in a safe area first.
Drum Condition and Specifications
Every brake drum has a maximum allowable inside diameter. It is usually cast or stamped on the drum and also appears in the service manual. A drum worn past that limit, or one that would exceed it after resurfacing, must be replaced instead of machined. Deep scoring, heat cracks and a blue heat-tinted surface are also reasons to replace a drum. This article did not have verified figures for the 2000 Accord's drum diameter limit, lining thickness minimum or torque values for lug nuts and drum screws. Take those numbers from the markings on the drum and from factory service information, not from memory or general estimates.
Bleeding and Hydraulic Work
Changing only the shoes and hardware usually does not open the hydraulic system, so bleeding is not normally needed. If you replace a wheel cylinder or disconnect a brake line, air enters the system, and the brakes must be bled according to the procedure in the service manual. Some vehicles require a specific bleeding sequence, so confirm the correct order for your Accord before you start.
Do It Yourself or Use a Shop
Drum brakes are less forgiving than disc brakes because of the springs, the self-adjuster and the parking brake linkage. A mistake in assembly can cause dragging, a low pedal or a parking brake that does not hold. Doing the work at home makes sense if you are comfortable following a service manual and checking your work carefully. If a wheel cylinder leaks, the drums need machining, or you are unsure about any part of the assembly, a professional brake service is the safer choice. This article does not include labor time or cost estimates, because no supported figures were available.
What This Article Does Not Confirm
The following details were not available from verified sources here and should be checked against factory service information or your parts supplier: the exact 2000 Accord trims and engines fitted with rear drums, drum and lining wear limits, all torque specifications, and the precise spring and adjuster layout for your vehicle.